
This page is written for people who have never opened Orova. You don't need to know anything about SEO first. Every part explains a new idea before telling you what to click.
Orova SEO lives inside your workspace. The tab bar at the top has eight tabs: Projects, Write, Visual Editor, Optimize, Reports, Analysis, Competitors and Site Health. This guide follows the order you will actually work in.
One thing to remember right away: Orova writes and publishes straight to your real website. So take your time with the connection steps at the start.
01 · Introduction
What Orova SEO is
Orova SEO is where you hand off article writing for your website. You add keywords, Orova writes the articles and publishes them to your website, then measures how they perform on Google.
SEO
SEO is the work of making your website show up when people search on Google. The most common way is to write articles that answer exactly what people type.
Workspace
A workspace is the private space of one company or one brand. Every project, usage allowance and member lives inside it. Switching workspace changes all the data you see.
Quota
Quota is the number of credits Orova deducts each time it calls AI to do work for you. Your balance shows in the left corner of the screen. When quota runs out, the buttons that call AI are temporarily blocked.
Orova SEO does five kinds of work: writing new articles, fixing old articles so they rank higher, measuring results from Google, scanning competitors, and running a technical health check on your website.
Three things to have ready
- A live website with a public address.
- Admin rights on that website, so you can let Orova publish.
- A Google account with permission to view that website's data. You can still write articles without it, but Orova will have less data to work from.
The standard path for a beginner
- Create a project.
- Give Orova a place to publish (WordPress or API).
- Connect the Google services.
- Set the brand voice and writing language.
- Add keywords and turn on auto-writing.
- Open
Reportsto see how the articles perform. - Use
Optimize,Analysis,CompetitorsandSite Healthto go further.
Tip
Read in order
02 · Create a project
Step 1 — Create a project
A project is one website's file inside Orova. Every keyword, article and report belongs to a project, so this is the first thing to do.
SEO project
A project is one website that Orova looks after for you. Each project has its own name, logo, voice, language and set of connections. Two websites means two projects.
Project ID
The project ID is the identifier Orova assigns to a project. You need it when you connect a website through the API or when you contact support.
Open Projects in the tab bar at the top. If the workspace is still empty, you'll see the line No projects yet and the button + Create first project.
Create your first project
- 1
Open the Projects section. Click
Projectsin the tab bar at the top. The table shows the columnsProject ID,Created by,CreatedandLast updated. Clicking a project name opens its detail page.
Open Projects to see every project in the workspace. - 2
Click Create project. The
Create projectbutton sits in the top right corner. One click creates the project straight away — no window asks for a name — and Orova takes you to its detail page, with a banner reminding you that the next step is connecting your website and Google.
Click Create project in the toolbar. - 3
Rename the project. On the detail page, click the project name to edit it. The name must be 2 to 200 characters. Naming it after the website makes it easier to recognize. A name that is too short or too long is rejected and nothing is saved.

The project name sits at the top of its detail page.
Note
Project limit
What's on the project detail page
This is the screen you will come back to most often. Every setting for the website lives here, laid out top to bottom.
| Button / field | What it does | Notes |
|---|---|---|
| Project logo | The project's image in the list | Square image 256×256, max 4MB |
| Project name | Click the name to rename the project | Still follows the 2–200 character rule |
| Project ID | The project's identifier, with a copy button | After copying, a confirmation appears |
AI quality | Choose the model quality level used for writing | Higher levels write more thoroughly and use more quota |
AI Voice | Pick a writing voice, or create your own brand voice | See the brand voice part below |
Writing language | The default language for every article in the project | You must pick at least one language |
Connect WordPress / Connect via API | Where Orova sends the articles it writes | You can only pick one of the two |
| The Google connection block | Connect Search Console, Analytics and Drive | Orova only requests read access |
Warning
Deleting a project cannot be undone
Delete project button also deletes all of that project's articles, connections and data inside Orova. Orova asks for confirmation once, then deletes for good.03 · Publishing target
Step 2 — Give Orova a place to publish
Orova needs to know where to send the articles it writes. You pick one of two ways: connect WordPress, or connect through an API if your website doesn't run WordPress.
Publishing target
The publishing target is the address Orova sends an article to once it's written. Without one, the Write section is blocked.
WordPress Application Password
This is a separate password WordPress issues to one application, not your login password. You can revoke it at any time in the WordPress admin area. The feature exists from WordPress 5.6 onward.
Website API
An API is a URL on your website dedicated to receiving articles from outside. Use this when your website doesn't run WordPress; your technical team builds that URL.
Note
The two ways are mutually exclusive
Option 1 — Connect WordPress
Connect WordPress step by step
- 1
Click Connect WordPress. On the project detail page, in the publishing target block, click
Connect WordPress. A window opens and asks for the WordPress login page URL. If the project is already connected, the WordPress card showsConnectedwith a trash icon instead of the connect button — click the trash icon to disconnect first if you want to connect again.
The WordPress card is where you connect your site. - 2
Paste the login page URL. This is usually your website address plus the familiar login path. If your website hides the default admin path, paste the exact custom path you use.
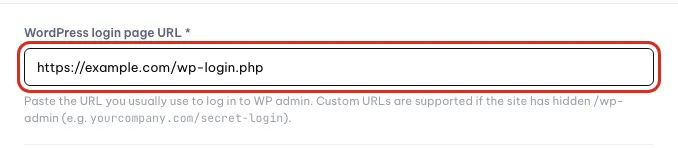
Paste your WordPress login page URL here. - 3
Follow the two steps in the same window. The two steps appear right inside the
Connect WordPresswindow — there is no separate page: step one isLog in to WordPress(it opens in a new tab), step two isOpen the authorization page. Do them in that order.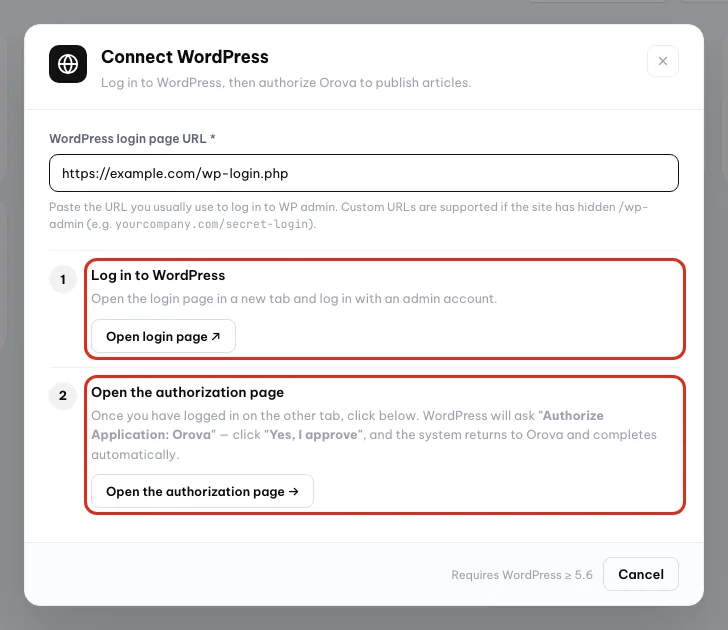
Log in first, then open the authorization page. - 4
Approve on the WordPress side. WordPress shows a page asking you to grant access to an application named Orova. Click the WordPress approval button. The browser returns to Orova on its own and the project shows as connected.
- 5
Check it. Go back to the project detail page. The WordPress card should now show
Connectedwith a trash icon next to it. If you still see theConnect WordPressbutton, the approval step didn't complete — start over.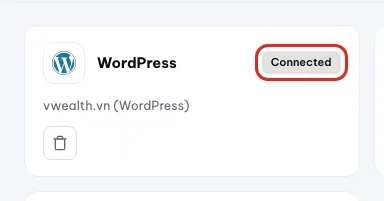
Connected means the site is ready to receive articles.
Note
Requirements
Option 2 — Connect through an API
Connect a website that doesn't use WordPress
- 1
Click Connect via API. In the same publishing target block, click
Connect via API. The form shows two fields.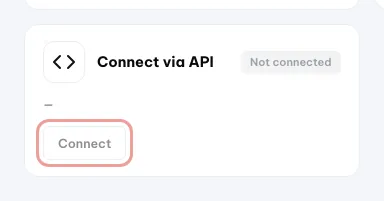
Click Connect on the Connect via API card. - 2
Fill in the API endpoint. The
Your website API endpointfield takes the address your website exposes to receive articles. Your technical team provides this address. This endpoint must answer thelistandgetactions so Orova can read your existing articles (to avoid duplicates, add internal links and optimize posts) — see the technical guide at/docs/publish-api.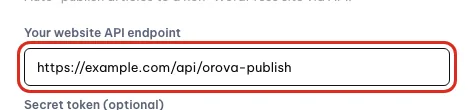
Enter the address your website uses to receive articles. - 3
Fill in the secret token if you have one. The
Secret tokenfield is the secret string your website uses to recognize Orova. Leave it blank and Orova generates a key for you to copy over to your website.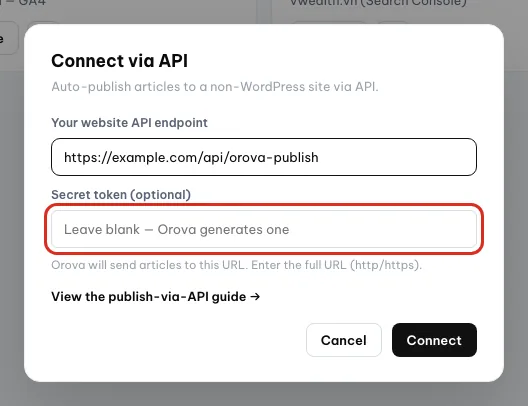
Leave the secret token blank and Orova creates one. - 4
Save the connection. Click the connect button. Orova saves it and the publishing target block switches to the connected-via-API state.
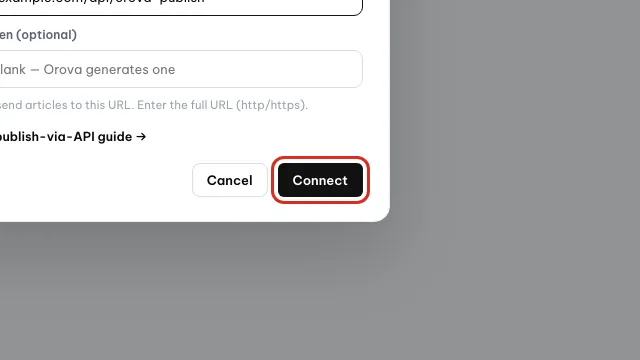
Click Connect to save the API connection.
Disconnecting or switching the connection
Once connected, the card has a disconnect button (the trash icon on the WordPress card). Only after disconnecting does the other option unlock. If you see a message like this project is connected via API so WordPress can't be connected, that's the one-target rule at work, not a bug.
Warning
Published articles stay on your website
04 · Connect Google
Step 3 — Connect Google
Three Google connections let Orova see how your articles are doing and write more on-brand. They're optional, but without them a few sections won't run.
Google Search Console
A free Google tool that tells you where your articles appear, how many people see them and how many click through. Often shortened to GSC.
Google Analytics 4
The tool that measures people arriving on your website after they click from Google. Often shortened to GA4.
Google Drive connection
Lets Orova read your brand documents on Drive, so articles describe the right products and use your company's own wording.
All three connections are read-only. Orova never edits or deletes anything in your Google account.
| Button / field | What it does | Notes |
|---|---|---|
| Google Analytics 4 | Measures visitors to your website and what they do once there | Read access only |
| Google Search Console | Pulls impressions, clicks and ranking for each article | Required for the Reports and Analysis sections |
| Google Drive | Reads brand documents to reference while writing | You choose exactly which files it may read |
Change | Pick a different GA4 property or GSC site | Useful when you manage several websites |
Manage files | View and edit the list of Drive files already read | Only on the Drive row |
Disconnect | Cancel that Google connection | You can reconnect at any time |
Grant access for one Google connection
- 1
Click the connect button on the row you want. Search Console, for example. An explanation window opens, lists the steps ahead and states clearly that Orova only requests read access.
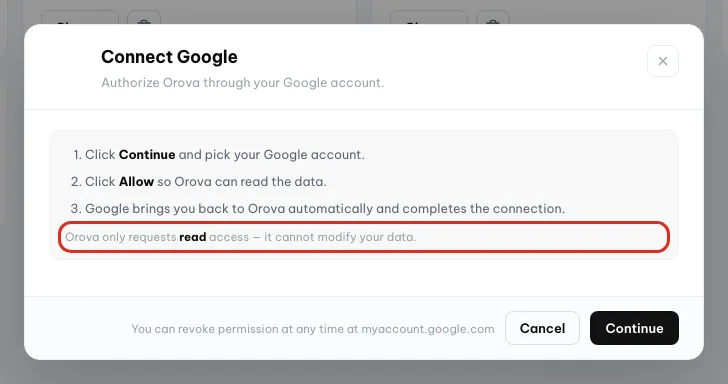
The window states Orova only requests read access. - 2
Choose a Google account. Click continue and the browser moves to Google's screen. Choose the account that has permission to view that website's data. Pick the wrong account and no website will show up to select afterwards.
Click Continue to go to Google and pick an account. - 3
Allow. Google lists the permissions Orova is asking for. Click allow. The browser returns to Orova on its own.
- 4
Pick the right website or property. If your Google account manages several websites, Orova shows a list to choose from. Pick the project's website and confirm. That row switches to
Connected.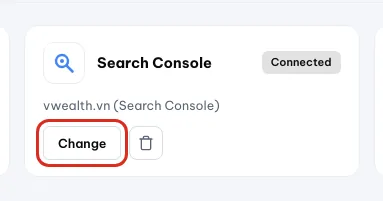
Use Change to pick a different site or property.
Add Drive documents
Let Orova read your brand documents
- 1
Open Manage files. Once Drive is connected, click
Manage fileson the Drive row. The page listing the files already read opens. - 2
Add files. Pick the Drive files you want Orova to reference: your company profile, product sheets, brand naming rules.
- 3
Re-read when a document changes. After you edit a file on Drive, ask Orova to read it again so it stays current. That re-read calls AI, so it uses quota; the number of credits appears before you confirm.
Note
When you see the additional-permission line
Tip
05 · Brand voice
Step 4 — Brand voice, language and AI quality
These three settings decide who the article sounds like, what language it's written in, and how thorough it is. Set them once and they apply to every article in the project.
AI voice
A voice is the style brief you hand the AI: who it's writing for, how to address the reader, which words to use, what to avoid. Much like briefing a new writer who just joined the company.
AI quality
AI quality is the model level Orova uses when writing. Higher levels write more thoroughly, suit pillar articles, and use more quota.
Built-in voices and your own voice
The AI Voice section comes with several ready-to-use voices. If your brand has its own way of speaking, click Create your own voice. Voices you create are tagged Yours so you can tell them apart.
Create your own voice
- 1
Click Create your own voice. The button sits right inside the
AI Voicesection on the project detail page. A window opens with three fields, all required.
Open AI Voice to find Create your own voice. - 2
Fill in Voice name. Name it so you recognize it when picking elsewhere — after the brand, for instance, or after the type of article.
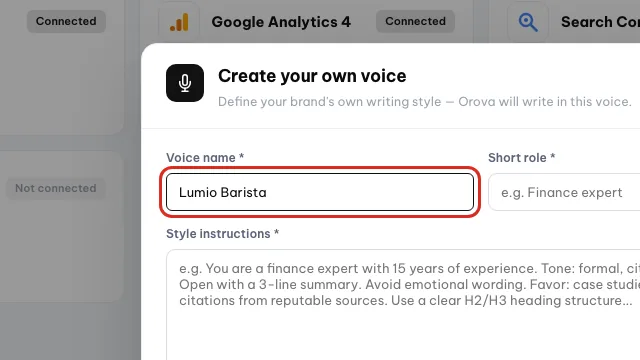
Give the voice a name you will recognize. - 3
Fill in Short role. One sentence describing who the writer is. For example: a consultant explaining things to a customer who is looking into this for the first time.
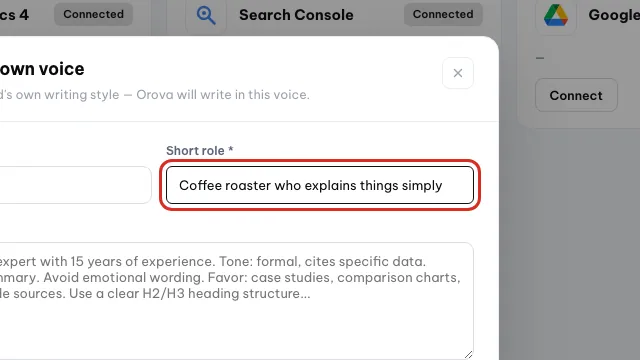
Describe the writer in one sentence. - 4
Write the Style instructions. This is the most important part — it's literally the brief for the AI. The more specific, the closer the match: the article structure you want, sentence length, words to use, words to avoid, whether personal opinions are allowed.
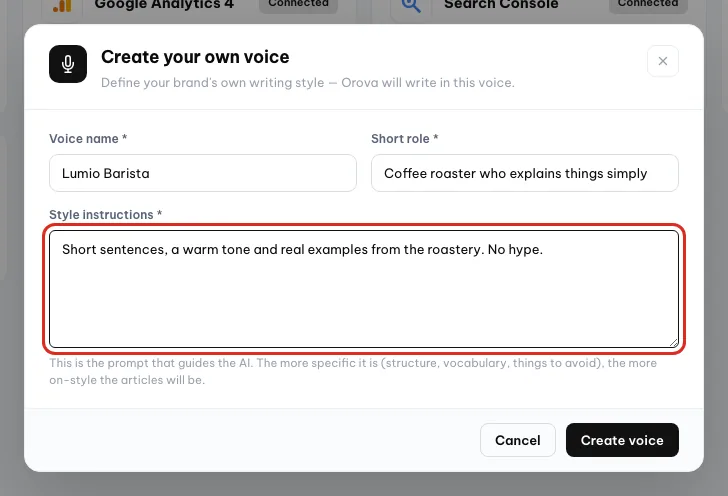
Write clear style instructions for the AI. - 5
Save and select it. Once saved, the new voice appears in the list tagged
Yours. Select it to make it the project default. Each keyword can still use a different voice when you add it.
Click Create voice to save it.
Tip
How to write style instructions
Writing language
The Writing language section sets the default language for every article in the project. You must pick at least one language; leave it empty and Orova shows an error and saves nothing. When you add a keyword, you can still choose a different language for that article.
AI quality
The AI quality section picks the model level. The balanced level suits most ordinary articles. The high level is for pillar articles you want to invest in. Changing the level only affects articles written from then on — it doesn't rewrite existing ones.
06 · Write articles
Step 5 — Add keywords and let Orova write
This is the screen you'll use daily. You put keywords in the queue, and Orova writes them one by one and publishes to your website on the schedule you set.
Keyword
A keyword is what people type into Google. In Orova, each keyword corresponds to one article that will be written.
Writing queue
The queue is the list of keywords waiting their turn. With auto-writing on, Orova takes them from the queue one at a time and writes on the schedule you set.
Background job
Long jobs run on Orova's servers, not in your browser. Writing one article takes about 2–5 minutes. Close the tab or shut down your computer and the job keeps running and the result is still saved.
| Button / field | What it does | Notes |
|---|---|---|
Keywords · Queued · Written | Three numbers summing up the situation | They change with the filters you've picked |
The Search keywords... field | Find something quickly in the list | Type part of a keyword and it shows up |
All projects · All statuses | The table's two filters | Managing several websites? Filter by project first |
| The auto-write toggle | Turn on so Orova pulls from the queue and writes on its own | Off means articles are written only when you click |
Actions | Turn on multi-row selection | Shows the toolbar at the bottom |
Import from Excel | Add many keywords at once from a file | A template is available to download |
+ Add keyword | Add one keyword with all its settings | Opens the five-part window |
If you see Connect a website first
If the project has no publishing target, the Write screen is blocked and shows only the Connect a website first block with the → Go to the Projects page button. Click it and follow Step 2 above. Come back once connected and the screen opens normally.
There's also a gentler warning: You can add a few more Google connections. It blocks nothing; click Later and you can keep writing.
Add one keyword
Click + Add keyword. The window is split into five parts, and only the first is required.
Fill in the five parts
- 1
Part 1 — Keyword and project. This part is required. Fill in
Keyword(2–255 characters), choose theProject (website)it will publish to, chooseWhat searchers want on Google, then pick theAI writing voiceandArticle language. The voice list has two groups: built-in voices and your voices.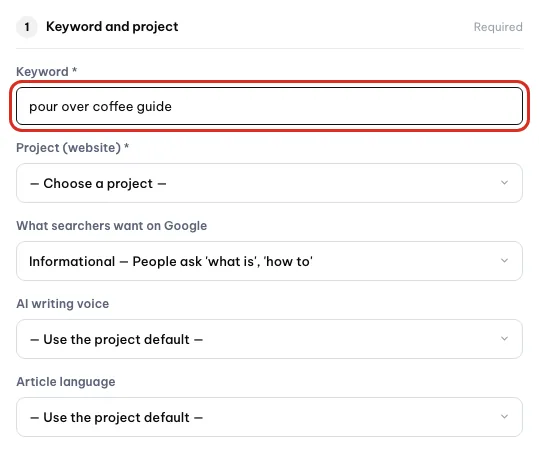
Fill in the keyword and choose the project. - 2
Part 2 — Guidance for Orova to write. Skippable. The
A specific angle you want to focus onfield lets you aim the article at a narrow angle. The outline and extra-notes field lets you hand over the structure you have in mind.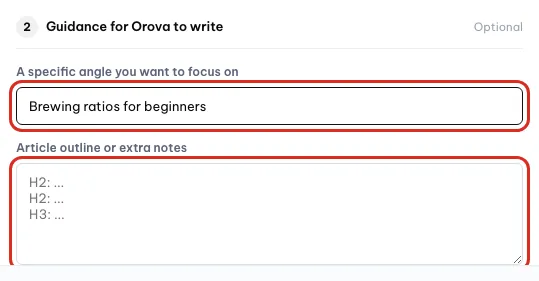
Optionally add an angle and extra notes. - 3
Part 3 — Length and number of images. The defaults are fine. Here you set the word count you want and how many images go into the article.
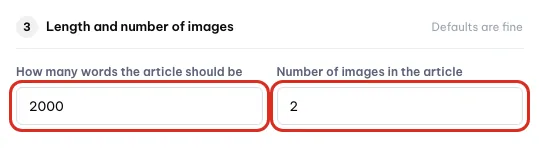
Set length and images, or keep the defaults. - 4
Part 4 — Reference documents. The list of Drive files Orova has read for that specific project. Tick a file and this article references it. An empty list means the project hasn't connected Drive or hasn't added files yet.
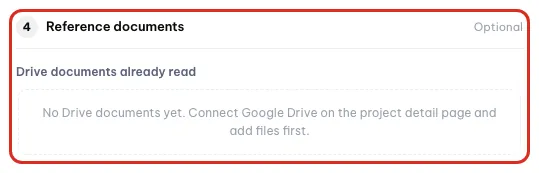
Tick Drive files for this article to reference. - 5
Part 5 — When to publish. Choose
Publish as soon as possibleto go straight into the queue, orSchedule publishingto set a timetable. See the scheduling part just below.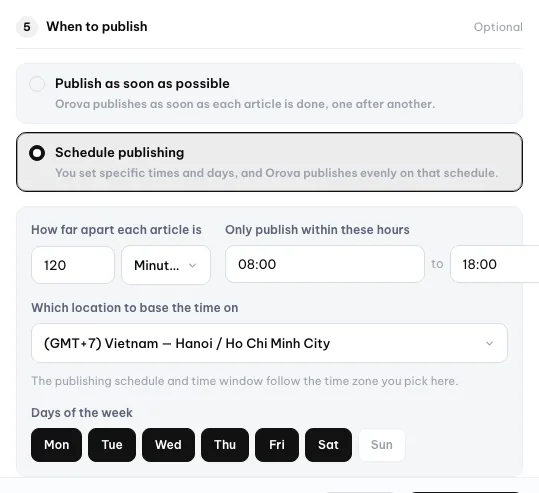
Publish right away or set a schedule. - 6
Save. Click save. The keyword appears in the table with the
Queuedstatus. No article is written at this step.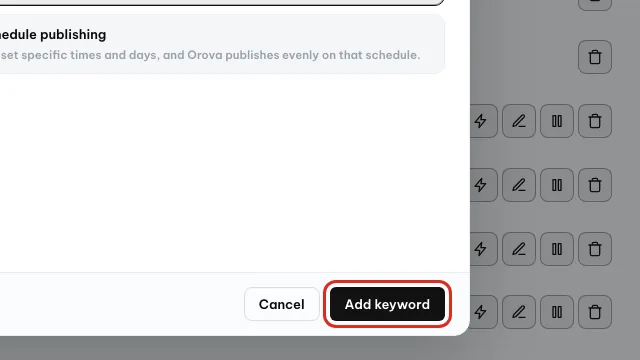
Click to save; the keyword joins the queue.
Schedule publishing
Choosing Schedule publishing opens four settings: the gap between two articles in minutes or hours, the time window from–to within the day, the time zone, and the days of the week from Monday to Sunday. Orova only writes and publishes inside the window you allow.
Tip
Turn on auto-writing
Flip the auto-write toggle at the top of the screen. Right after you turn it on, Orova pushes the first article in the queue through to start the timer. If you turn it on outside the time window you set, Orova tells you it will wait until the window opens before writing.
Warning
The articles really are published to your website
Write now on each row.Import many keywords from Excel
Import in bulk
- 1
Open Import from Excel. Click
Import from Excel. The window opens with a button to download the template.
Click Import from Excel. - 2
Download the template and fill it in. Download the template file and put one keyword per row in the columns provided. Don't rename the columns.

Download the template first. - 3
Choose the shared settings. In the window, choose the project, the shared voice and the shared reference documents for the whole batch.
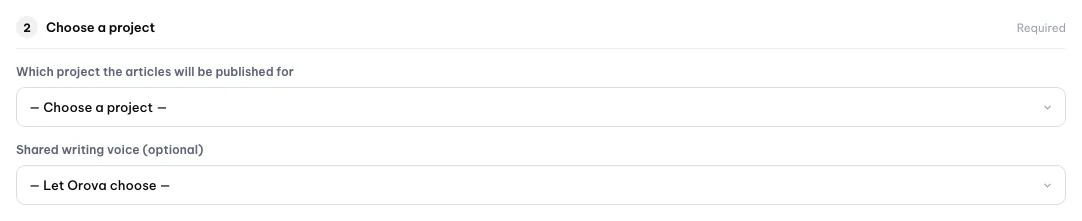
Choose the project and shared voice for all rows. - 4
Upload the file. Pick the file and upload it. The file can be up to 8 MB. When it's done, Orova reports how many rows were imported, how many were invalid, and how many were skipped because quota ran out.

Pick the filled-in file (up to 8 MB).
Track and act on individual rows
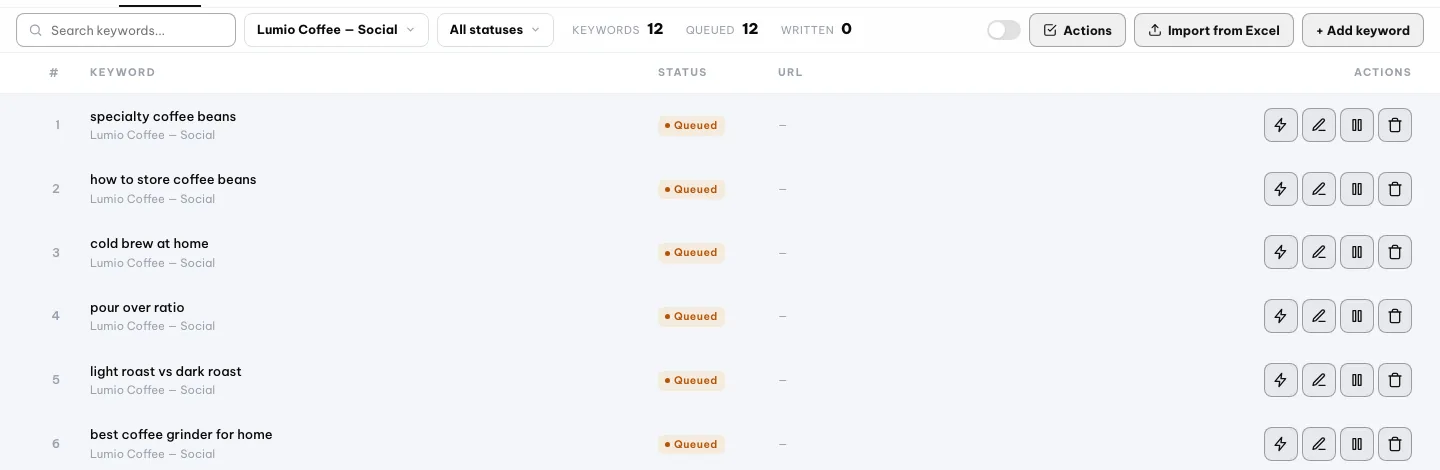
| Button / field | What it does | Notes |
|---|---|---|
Written | The article is finished and sent to the website | The URL column holds the article link |
Queued | Waiting its turn | Click Write now to jump the queue |
Failed | The last writing attempt failed | A Rewrite button appears |
Disabled | You paused this keyword | Click Resume writing to switch it back on |
Each row in the table has these buttons: Write now, Edit, Pause (or Resume writing), Delete. The Rewrite button only appears on a row that failed.
Note
Writing takes 2–5 minutes
Write now, the row switches to a running state. You can close the tab — the job keeps going on the server. Reopen the Write screen to see the result.Bulk edit, pause, delete
Click Actions and tick several rows. A toolbar appears at the bottom of the screen with pause, reactivate, Bulk edit, delete and clear selection.
In the Bulk edit window, only the sections you switch on are changed; anything you leave alone keeps each row's existing value. Changes apply from the next writing run and don't affect already-published articles.
Warning
Deleting a written keyword removes the article from your website
Written status moves the matching article on your website to the Trash. Orova asks for confirmation first. If you only want to stop further writing, use Pause instead of Delete.Note
Limits
07 · Reports
Step 6 — See the results in Reports
Reports pulls real numbers from Google Search Console for each article: how many people saw it, how many clicked, and what position it holds.
Impressions
The number of times Google put your article in front of a searcher. It counts as an impression even if nobody clicks.
Clicks
The number of times people actually clicked through to your article from the search results.
CTR
Click-through rate: clicks divided by impressions. A low CTR means the article does appear, but the title isn't tempting enough to click.
Average position
The article's average spot on Google's results page over the period you selected. The smaller the number, the better.
| Button / field | What it does | Notes |
|---|---|---|
Article | The article title on your website | Articles Orova created carry the By Orova tag |
Project | The website the article lives on | Handy when you run several projects |
Published | The day the article went live | New articles need time before numbers appear |
Clicks | How many times people clicked the article | Pulled from Search Console |
Impressions | How many times Google showed the article | Pulled from Search Console |
CTR | Clicks as a share of impressions | If it's low, rework the title |
Avg. position | Average spot on Google | A small number means a high rank |
Actions | Send the article to Optimize, or delete it | See the warning below |
Using the Reports screen
- 1
Pick a period. At the top of the screen you get 28 days, 7 days, 90 days, 6 months, 1 year, and
Custom date rangeto setFrom–Toyourself, then clickApply.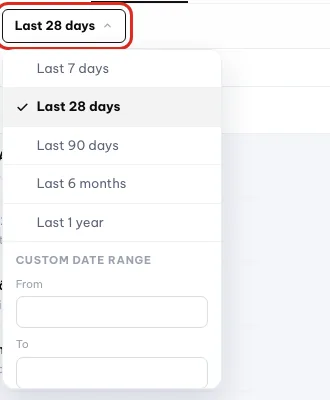
Pick a period, or set a custom date range. - 2
Click Refresh metrics. This button calls Google for the latest numbers. When it finishes, the table reloads itself. It uses no AI quota, because it only reads Google data.

Refresh metrics pulls the latest Google numbers. - 3
Set up automatic refresh. Click
Autoto open a small panel: choose how many days of data to fetch and how often to refresh. The panel states clearly that no AI quota is used.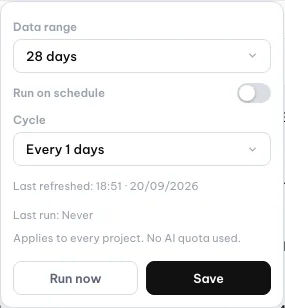
Set how many days to fetch and how often. - 4
Download Excel if you need it. The
Download Excelbutton exports exactly the table you're looking at, so you can send it on or archive it monthly.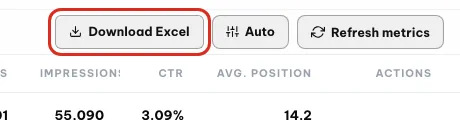
Download Excel exports the current table. - 5
Send weak articles to Optimize. In the
Actionscolumn, clickAdd to Optimizefor an article that ranks near the top but gets few clicks. It waits in theOptimizesection and nothing runs until you start it.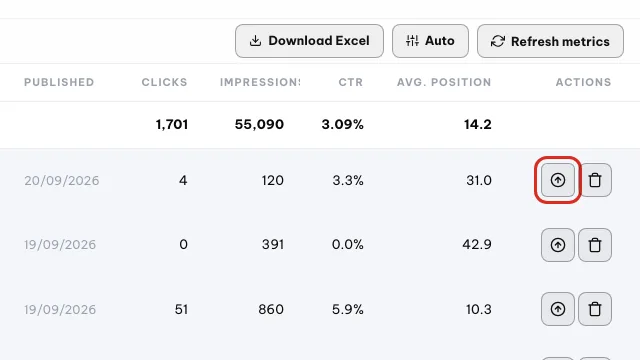
Send a weak article to the Optimize queue.
Warning
Delete here deletes the article on your website
Delete in the Reports table moves the real article on your website to the Trash. With WordPress you can still restore it from the admin area, but be sure before you click.Note
Empty table or zeros in the number columns
GSC not connected tag, so go back to the project page and connect it. Two, the article was just published and Google hasn't registered it yet; wait and check again.08 · Optimize
Step 7 — Refresh posts already on your website
The Optimize tab handles posts that are already live on your website. Orova reads the old post, rewrites it for the goal you pick, then publishes the new version over that same post.
Optimizing an old post
Reworking a post that is already published so it ranks higher. This is not the same as writing a new post. Think of repainting a house instead of building a new one.
Optimize queue
The list of posts waiting for their turn to be reworked. You drop posts into the queue first and run them later, so nothing has to happen right away.
Optimization goal
The instruction you hand to the AI: what this rewrite is for. The same post produces different results depending on the goal you choose.
Use this screen when your website already has posts, but they are slipping in rank, getting few clicks, or the content has gone stale. A post you just wrote does not need optimizing yet.
Warning
Running an optimization publishes for real
Do it in this order
- 1
Open the Optimize tab. In the tab bar at the top of the module, click
Optimize. The top of the page shows three counters:Total,Waiting,Done. Below them is the table of posts in the queue.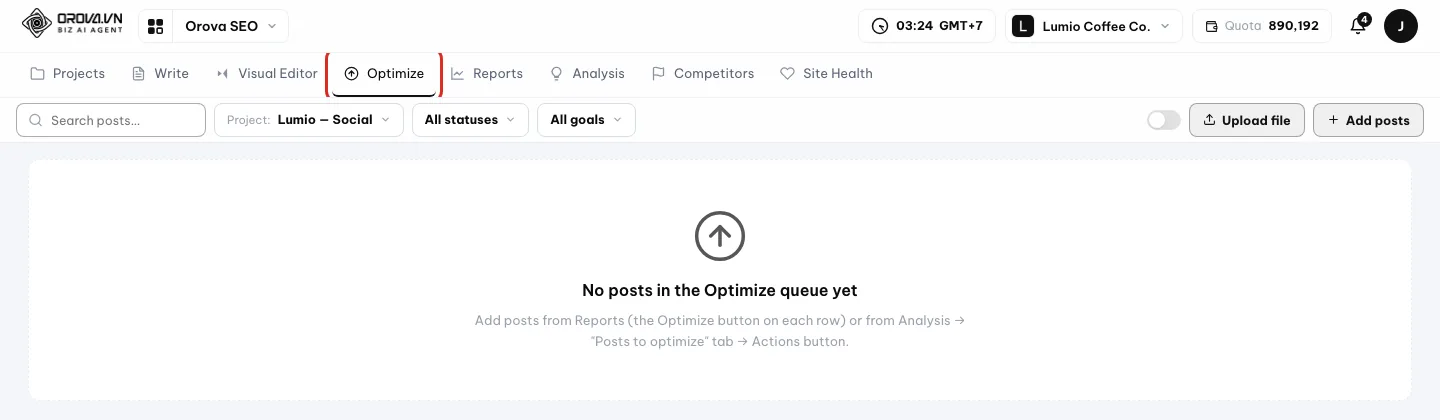
Open Optimize to see the posts waiting. - 2
Put posts into the queue. There are three ways. One, click
Add postsand paste post links — several rows at once is fine. Two, clickUpload fileand send an Excel or CSV file built from the sample sheet you can download there. Three, from theReportstab or theAnalysistab, clickAdd to Optimizeright on the post's row.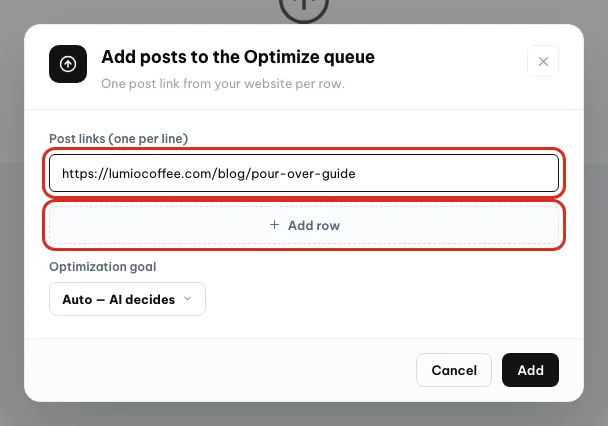
Paste post links, one per row. - 3
Pick a goal for each post. Every row has an
Optimization goalbox. Click it to open the list of six goals. If you are not sure which one to pick, leave it onAuto — AI decides.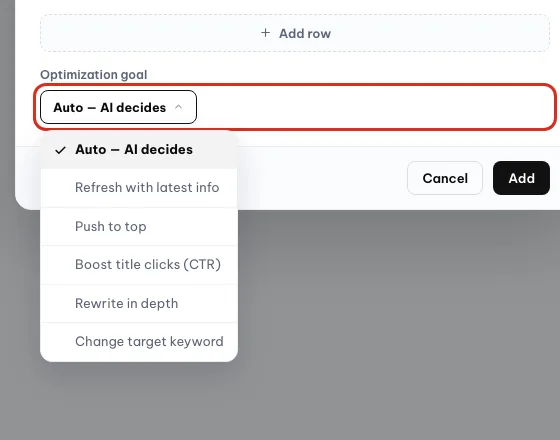
Pick one of the six goals, or keep Auto. - 4
Run one post or run them all. Click the run button on a row to handle that post alone. Click
Run allto work through every waiting post. Each post takes a few minutes and runs in the background, so it finishes even if you close the tab. The row status switches to optimized when it is done. - 5
Turn on auto-optimize if you would rather not click. Flip the
Auto-optimizeswitch at the top of the page. Orova then scans the queue every 5 minutes and runs the waiting posts for you. Turning the switch off stops it; a post already mid-run finishes anyway.
Turn the switch on to run waiting posts automatically. - 6
Filter when the queue gets long. Use the status filter and the
Optimization goalfilter above the table to find posts quickly. Removing a post from the queue does not touch the post on your website.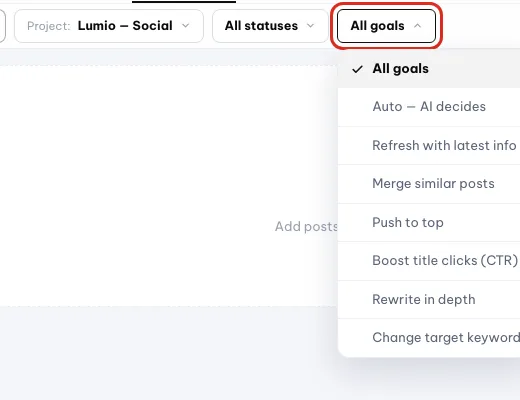
Filter the queue by goal or status.
| Button / box | What it means | Notes |
|---|---|---|
Total | How many posts are in the optimize queue | A counter only, not clickable |
Waiting | Posts in the queue that have not run yet | This is how many posts Run all will handle |
Done | Posts that have been optimized | You can run them again if you want |
Add posts | Paste post links to put them in the queue | Several rows at once is fine |
Upload file | Import a list of posts from Excel or CSV | Download the sample sheet in the same dialog |
Optimization goal | What this rewrite is meant to achieve | Six choices, see the table below |
Run all | Run every waiting post one after another | Uses quota and publishes over real posts |
Auto-optimize switch | Let Orova run the waiting posts for you | Rescans every 5 minutes |
| Status and goal filters | Narrow the table down so it is easier to read | No effect on your data |
| Goal | Pick it when |
|---|---|
Auto — AI decides | You are not sure where the post is weak — let the AI look and choose the angle |
Refresh with latest info | The post is still correct, but its numbers, dates and facts have aged |
Push to top | The post is hovering on page two and needs one more push |
Boost title clicks (CTR) | The post shows up often on Google but few people click it |
Rewrite in depth | The post is too short and thin for what readers expect |
Change target keyword | You want the post to aim at a different keyword |
Note
Change target keyword needs a new keyword
Change target keyword and leave the keyword box empty, Orova shows an error and will not run. Type the new keyword in the box next to it and click again.Tip
Merge several weak posts into one strong post
Analysis tab: tick the posts that overlap, then click Merge into 1 post on the bar that appears for the selected posts. The post you tick first becomes the main one; the rest are only read for ideas.Note
Two messages you will often see after adding posts
09 · Analysis
Step 8 — Analyze your whole website
The Analysis tab is Orova reading your entire website in one pass: it scans every post, pulls rankings from Google, scores each post and ranks what you should work on first.
Whole-site analysis
One sweep across everything, not a look at a single post. Think of a full check-up instead of just a blood pressure reading.
Priority
The label Orova puts on each post so you know which one to fix first. It is based on the post's position on Google and how often it is shown.
Topic cluster
A set of posts that cover the same area. Grouping them shows which areas you already cover well and which are still empty.
Run an analysis when your website has a decent number of posts and you do not know what to do next. The results answer exactly that question.
Note
Connect Google first
Fix these before analyzing block with a button to the project page. Connect Search Console, come back, and it will run.Do it in this order
- 1
Click Analyze now. Pick
Analysisin the tab bar at the top, choose a project and clickAnalyze now. From then on the button is calledUpdate. The run takes 2–4 minutes in the background, so the results are waiting for you even if you close the tab.
Click Analyze now, later called Update. - 2
Read the row of counters at the top. Six counters show the total number of posts, how many Orova wrote, how many get impressions on Google, how many need optimizing, how many topic clusters there are and how many posts are grouped. That row alone gives you the big picture.

The counters sum up your articles. - 3
Open Article list and look at the Priority column. Open the
Article listtab. The priority column is the one worth your attention. Start with theP1 - Golden opportunityposts — those are the closest to the top.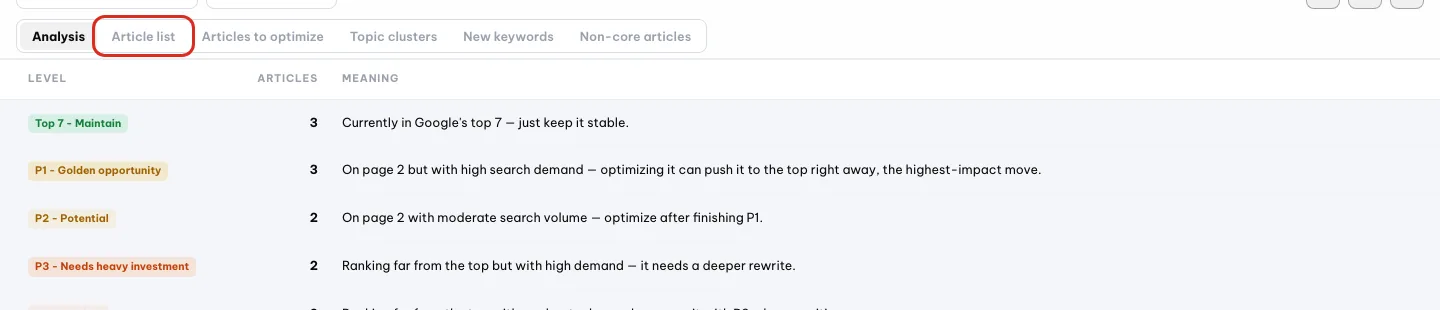
Open Article list; start with P1 posts. - 4
Send new keywords to the writing queue. Open the
New keywordstab. Tick the rows worth writing and clickAdd keywords. They go straight into the queue of theWritetab; nothing is written yet.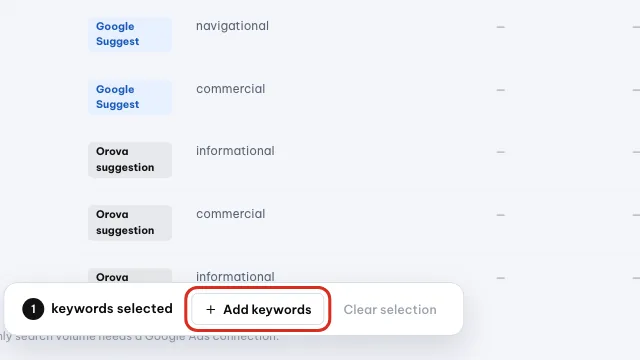
Tick keywords, then click Add keywords. - 5
Push weak posts to Optimize, or merge them. Tick several posts and click
Add to Optimizeto move them into the optimize queue. Or clickMerge into 1 post— the post you tick first becomes the main one.
Send ticked posts to Optimize or merge them. - 6
Let Orova re-analyze on a schedule. Click
Autoto set a recurring run. The dialog states plainly that this uses AI quota, same as Update.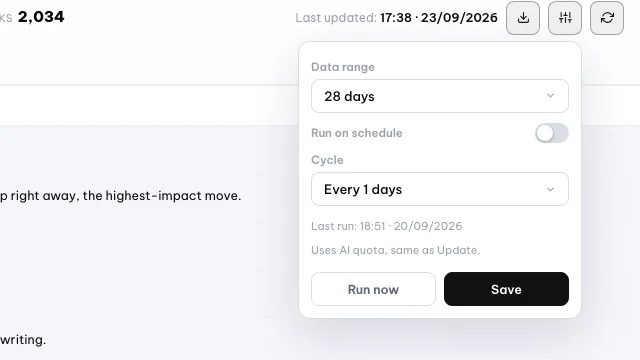
Set a schedule; it uses AI quota like Update.
| Reading order | Tab | The question it answers |
|---|---|---|
| 1 | Analysis | Where the website stands overall and when it was last updated |
| 2 | Article list | Which priority each individual post sits at |
| 3 | Articles to optimize | Which posts to fix right away |
| 4 | Topic clusters | Which content areas are strong and which are thin |
| 5 | New keywords | Which keywords are still worth writing and have not been |
| 6 | Performance | Whether the numbers are going up or down |
| 7 | Non-core articles | Posts outside your main areas, with little to do with your business |
| Level | What it means |
|---|---|
Top 7 - Maintain | The post is in Google's leading group; the job is to keep it there, not to break it |
P1 - Golden opportunity | Close to the top with plenty of searches — one round of fixes lifts it, so do these first |
P2 - Potential | It can climb, but it needs more work than a P1 |
P3 - Needs heavy investment | Climbing means a deep rewrite and real effort |
P4 - Monitor | Nothing to do yet; leave it and keep watching |
P5 - Reassess | The post is not working; consider merging it or changing direction |
Low traffic | It has a ranking, but almost nobody arrives |
No data yet | Google has not returned numbers for this post, usually because it was just published |
| Column | What it means | Notes |
|---|---|---|
Keyword | What people type into Google | Tick it to select it |
Source | Where Orova found this keyword | Search Console, Google Suggest or Orova suggestion |
Search intent | What the person typing it actually wants | Helps you guess what kind of post to write |
Google impressions | How many times Google has shown your post | Empty means there is no data yet |
Current position | Roughly where it sits on Google today | Empty means it has not entered the rankings |
Why write it | Orova's short explanation | Read it before you decide to tick |
Warning
Analysis uses quota
Analyze now or Update is an AI call and costs quota. Scheduling it with Auto does the same. Do not keep clicking it when nothing has changed.10 · Competitors
Step 9 — Watch competitors in your field
The Competitors tab tracks websites in the same field as you: what they have just published, and what you should write because of it. The screen has three sub-tabs.
Competitor
Another website writing about your area and competing for the same spots on Google. You register one by its website address.
Keyword suggestion
The list of topics Orova recommends you write, drawn from your competitors' posts. Every row comes with a reason and a priority.
Use this tab when you are out of post ideas, or when you want to know which topics your competitors are covering that you have left empty.
Warning
The three steps must be done in order
Add competitor first, then Scan competitors, and only then Orova evaluation. Out of order you get the message run Scan competitors first so the AI has data to analyze.Do it in this order
- 1
Add a competitor to the list. Pick
Competitorsin the tab bar at the top, stay on theListtab and clickAdd competitor. Fill in theWebsite address *box — that one is required. The name and the note are optional; add them so the row is easier to recognize. Save, and the competitor appears as a row in the table straight away.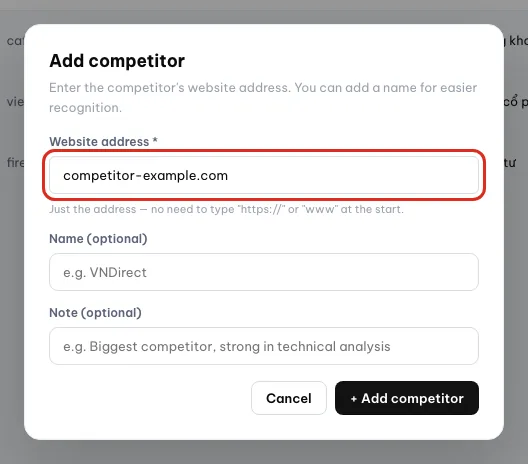
Enter the competitor's website address. - 2
Click Scan competitors so Orova goes and reads. Click
Scan competitors. Orova visits every website in the list and collects their most recent posts. It runs 1–3 minutes in the background, so closing the tab is fine. When it finishes, open thePoststab to see the posts with their publication dates.
Scan competitors collects their latest posts. - 3
Click Orova evaluation to get suggestions. Come back and click
Orova evaluation. The AI reads the posts just scanned and derives the topics you should write. It runs 1–2 minutes in the background and uses quota.
Orova evaluation turns scanned posts into ideas. - 4
Go through the Suggestions table, then push them to the writing queue. Open the
Suggestionstab. Read the reason and priority columns, tick the rows worth doing and clickAdd. The keywords go straight into the queue of theWritetab; nothing is written yet.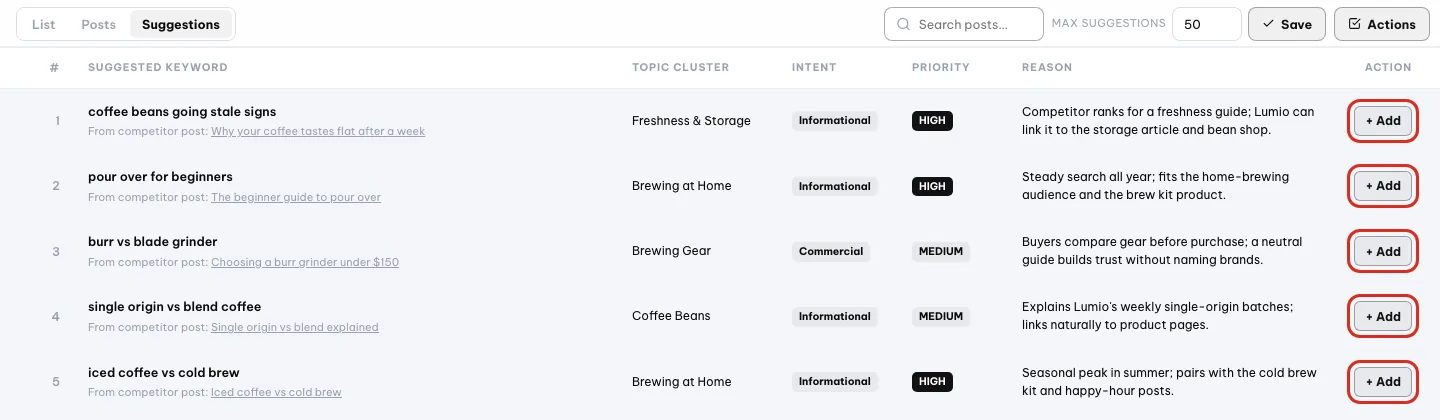
Read the reason and priority, then click + Add to queue a keyword. - 5
Cap how many suggestions you get each time. The
Max suggestionsbox decides how many keywords an evaluation returns at most. Keep the number small when you only want a few solid ideas.
Cap how many suggestions each evaluation returns.
| Button / box | What it means | Notes |
|---|---|---|
List | Sub-tab listing competitor websites | Where you add and remove competitors |
Posts | Sub-tab listing the posts Orova has scanned | Includes a publication date column |
Suggestions | Sub-tab holding the keywords the AI recommends | Only appears after you click Orova evaluation |
Add competitor | Opens the box for a competitor's website address | The address is required; name and note are optional |
Scan competitors | Go read the newest posts of every competitor on the list | Runs 1–3 minutes in the background, no quota |
Orova evaluation | The AI reads the scanned posts and derives keywords to write | Runs 1–2 minutes in the background, uses quota |
Max suggestions | The largest number of keywords per evaluation | Set it before you click evaluate |
Add | Push the ticked keywords into the writing queue | Nothing is written yet, they just get queued |
| Column | What it means | Notes |
|---|---|---|
Suggested keyword | The topic Orova recommends you write | Tick it to select it |
Topic cluster | The content area the keyword belongs to | Helps you write in clusters |
Intent | Which stage the searcher is at | Informational, Commercial, Transactional or Navigational |
Priority | How worth doing first it is | HIGH, MEDIUM or LOW |
Reason | Why Orova suggests this keyword | Read it before ticking |
Action | The Add button pushes it into the writing queue | Works row by row or on many rows at once |
Note
Two common errors when adding a competitor
Tip
Who makes a good competitor
11 · Health check
Step 10 — Run a website health check
The Site Health tab covers the technical side: whether your website runs properly, loads fast or slow, and whether Google can find your posts easily. None of it is about the words in your posts.
Website health check
One technical inspection of the whole website, like a regular medical check-up. Orova runs it and scores it; you only have to read the results.
Overall health score
A single number out of 100 that sums up the state of the website. The higher the score, the less there is to fix.
Loading speed
How quickly your website opens when someone clicks through. Too slow and readers leave before they ever see the post.
Run a check when your posts look good but still will not rank. Very often the cause is technical rather than editorial.
Note
The project needs a website address
Do it in this order
- 1
Click Run health check. Pick
Site Healthin the tab bar at the top, choose a project and click the run button. It takes 1–2 minutes in the background and finishes even if you close the tab. From then on the button is calledRun again.
Click the run button to start a health check. - 2
Read the overall score first, the group scores second. On the
Overviewtab, look at the overall score out of 100 for the general picture. Then read the detailed score by group to see which group is dragging the number down.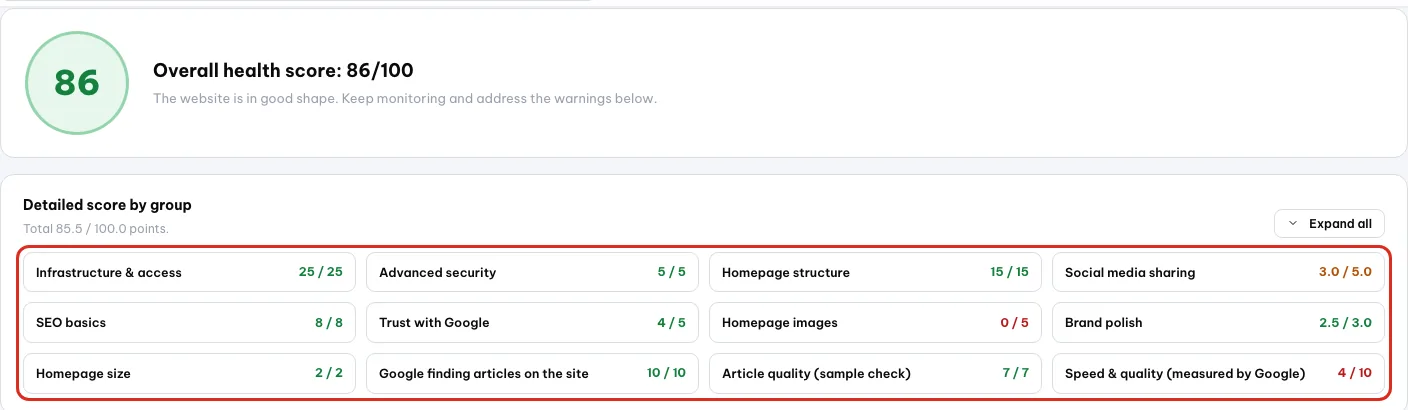
Read the overall score, then the group scores. - 3
Look at the Loading speed section. Open the
Loading speedtab. Google scoresMobileandDesktopseparately, with four figures on each side:Speed,SEO compliance,Accessibility,Best practices. Fix the mobile side first, because most readers are on phones.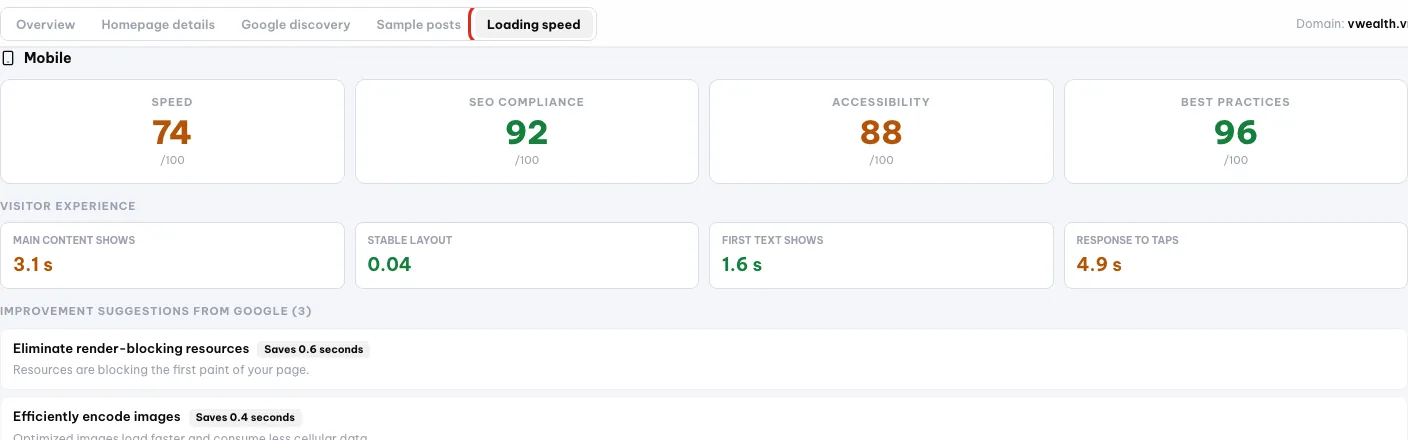
Loading speed shows Google's scores per device. - 4
Read the three experience figures. The same tab has three more lines:
Main content shows,Stable layout,First text shows. They measure how the page feels to a visitor — how long before any text appears, and whether the layout jumps around.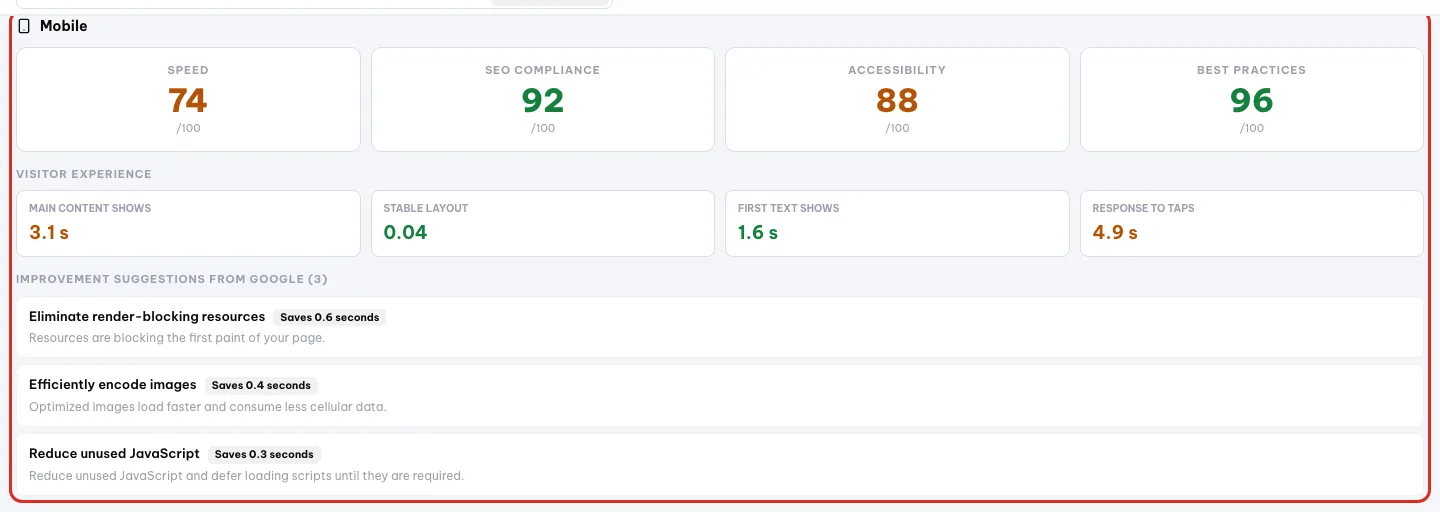
Main content, stable layout and first text times. - 5
Run the check again once things are fixed. Every warning spells out what needs fixing. Send the list to whoever maintains the website, and once it is done click
Run againso the score reflects the new state.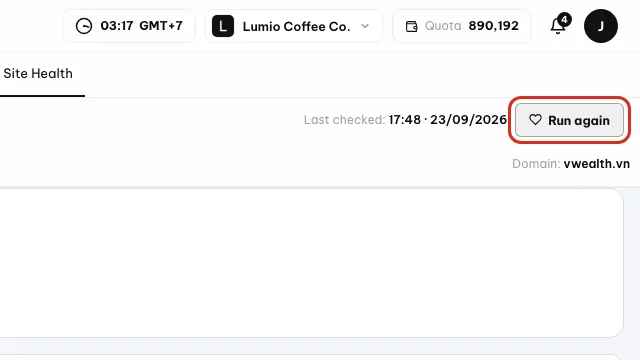
Click Run again once the fixes are done.
| Reading order | Tab | What it tells you |
|---|---|---|
| 1 | Overview | The overall score out of 100, the score per group and the list of warnings |
| 2 | Homepage details | Whether the homepage has all the basics, done properly |
| 3 | Google discovery | Whether Google can find your posts easily |
| 4 | Sample posts | Orova opens a few recent posts and checks each one |
| 5 | Loading speed | The speed scores Google gives for mobile and desktop |
Warning
The health check uses quota
Note
When Google runs out of scoring for the day
Loading speed tab may report that Google's free scoring quota for the day is temporarily used up. That is not your fault. Orova shows the scores from the last successful run; try again the next day.12 · Quota & limits
Quota and the limits worth knowing
Every account gets the full set of features; nothing is locked away behind a cheaper plan. The only difference is how many AI runs you get, and that is called quota.
Quota
The number of runs Orova deducts whenever the AI does work for you. Think of a prepaid wallet: work costs credit, and you top it up when it runs out.
Quota banner
The strip of text at the top of the screen when your balance is nearly or fully spent. It warns you in advance so you are not cut off mid-task.
Your quota balance sits in the left corner of the screen and refreshes itself every few seconds. The quota wallet is shared by every module in the same workspace.
| Action | Costs quota? | Notes |
|---|---|---|
| Writing a new post and generating its images | Yes | Each post is one AI call |
| Optimizing one existing post | Yes | Both Run all and auto-optimize |
Analyze now or Update in the Analysis tab | Yes | The Auto schedule costs the same as clicking it yourself |
Orova evaluation in the Competitors tab | Yes | The Scan competitors step does not |
Run health check | Yes | Each check is one run |
| Re-indexing Google Drive documents | Yes | Only when you click to re-index |
| Creating a project, connecting WordPress or an API, connecting Google | No | Setup is always free |
| Adding keywords, scheduling publishing, importing from Excel | No | Quota is only spent when the post is written |
Scan competitors | No | Orova only reads the websites, no AI call |
Reports, Refresh metrics, Download Excel | No | These only fetch numbers from Google |
| Filtering, searching, reviewing old results | No | Look as often as you like |
Warning
When quota runs out, the AI buttons pause
Tip
The yellow banner is an early reminder
- A workspace can create unlimited SEO projects; each project is its own website (domain) with its own configuration.
- Each project takes up to 100,000 keywords.
- The Excel file for importing keywords can weigh up to 8 MB.
- The project logo is a square 256×256 image, up to 4 MB.
- Each project connects to one publishing destination: WordPress or an API, never both.
- Importing from Excel without enough quota: the extra rows are skipped and Orova tells you exactly how many.
Note
A tab is missing from the tab bar at the top
Reports, Analysis, Competitors or Site Health entirely. Ask the workspace owner to enable it for you.13 · FAQ
Common questions and the errors people hit
The messages and situations newcomers run into most, with the cause and what to do about each one.
If your case is not here, open Support in your workspace and send a request to the Orova team.
WordPress will not connect — the confirmation step never goes through
There are three common causes. One, your website hides the default login path — paste the exact custom login address into the URL box. Two, WordPress is older than 5.6, so this authorization mechanism does not exist yet — ask your administrator to upgrade. Three, you are logged in with a non-administrator account — sign out and sign back in as an admin.
I connected via API but now I want to switch to WordPress
Each project connects to one publishing destination, so the WordPress button is locked with a message saying the project is already connected via API. Open the project detail page, disconnect the API first, and the Connect WordPress button becomes clickable. The same applies the other way around.
A row in the Write table shows the status Failed
That post could not be written, usually because the website temporarily refused it or the connection dropped. Click Rewrite on that row to run it again. If it still fails, open the project page and check the publishing destination connection.
The Analysis tab says something must be fixed before analyzing
The project is missing Google connections, usually Search Console. Click the button to the project page, connect Search Console, wait for the status to turn connected, then come back and click Analyze now.
The Competitors tab says I have to scan competitors first
You clicked Orova evaluation while Orova had no competitor posts to read. Click Scan competitors first, wait 1–3 minutes for the scan to finish, check that the Posts tab has data, and only then click evaluate.
The health check says Google is out of scoring for the day
Google's speed scoring tool has a daily free allowance and it has been used up. This is not a fault in your website. The other result tabs still work; only the Loading speed tab shows the scores from the last successful run. Try again the next day, ideally early in the morning.
Reports loads but every number column is empty
Two possibilities. One, the project is not connected to Search Console — the table carries a not-connected label, so open the project page and connect Search Console. Two, the posts are new and Google has no numbers yet: Google reports with a few days' delay, so wait and then click Refresh metrics.
If I delete a keyword, does the post on my website disappear
Yes. Deleting a keyword that has already been written moves the matching post on your website into the WordPress Trash. You can restore it from WordPress, but do not use delete just to tidy up the list. To stop writing, click Pause instead of Delete.
If I close the tab mid-run, do I lose the work
No. Every long task runs in the background and saves its own results: writing a post takes 2–5 minutes, analysis 2–4 minutes, a health check 1–2 minutes, a competitor scan 1–3 minutes. Close the tab, come back later, and the results are there.
With no quota left, which buttons still work
Every AI button pauses: writing posts, running optimizations, analysis, Orova evaluation, health checks and re-indexing Drive documents. Everything that does not call the AI works as usual: viewing and filtering tables, opening Reports, clicking Refresh metrics and Download Excel, adding keywords to the queue, and Scan competitors.
The tab bar at the top is missing a few tabs compared with this guide
Your permission group in the workspace has not enabled those items, so Orova hides them from the tab bar entirely. Ask the workspace owner to open the permissions for your account and the items come back.
I started an optimization by mistake — can I cancel it
Not with a single button. Orova will rewrite the post and publish it over the live one. If you do not like the new version, restore the old one from the revision history in WordPress, or queue the post for optimization again with a different goal.
Tip
A safe habit for newcomers
/ Need help?
Can't find what you need? Open the Support section in your workspace, or send us a message.