
Editorial calendar template: copy-ready grid and 7-step setup

Building a reliable editorial calendar template is the single fastest way to transform erratic content creation into a predictable publishing machine that drives commercial pipeline. When marketing teams operate without a central operational schedule, output stalls, review bottlenecks multiply, and distribution turns into chaotic scrambling. By working through this step-by-step implementation guide, you will get a copy-ready template grid with example rows and construct an ungated, multi-channel editorial system in Google Sheets equipped with automated dropdown validation, a 1-to-5 content repurposing framework, an emergency pause protocol, and a 30-day post-publish performance tracker. To complete this setup, you need a Google account (or Microsoft Excel), admin access to your brand channels, your quarterly content pillars, and roughly 45 minutes of focused time. If you are an individual hobbyist publishing spontaneous personal notes once a month without business goals, you do not need this framework.
What an Editorial Calendar Template Delivers for Growing Teams
An editorial calendar template establishes a single source of truth for planning, drafting, reviewing, and publishing content across all marketing channels. Building this operational framework involves seven sequential steps: setting up core taxonomy, automating status dropdowns, embedding repurposing formulas, establishing quality checklists, defining review workflows, configuring crisis buffers, and tracking post-publish metrics. Completing the initial setup takes approximately 45 minutes, followed by 15 minutes of weekly administrative upkeep.
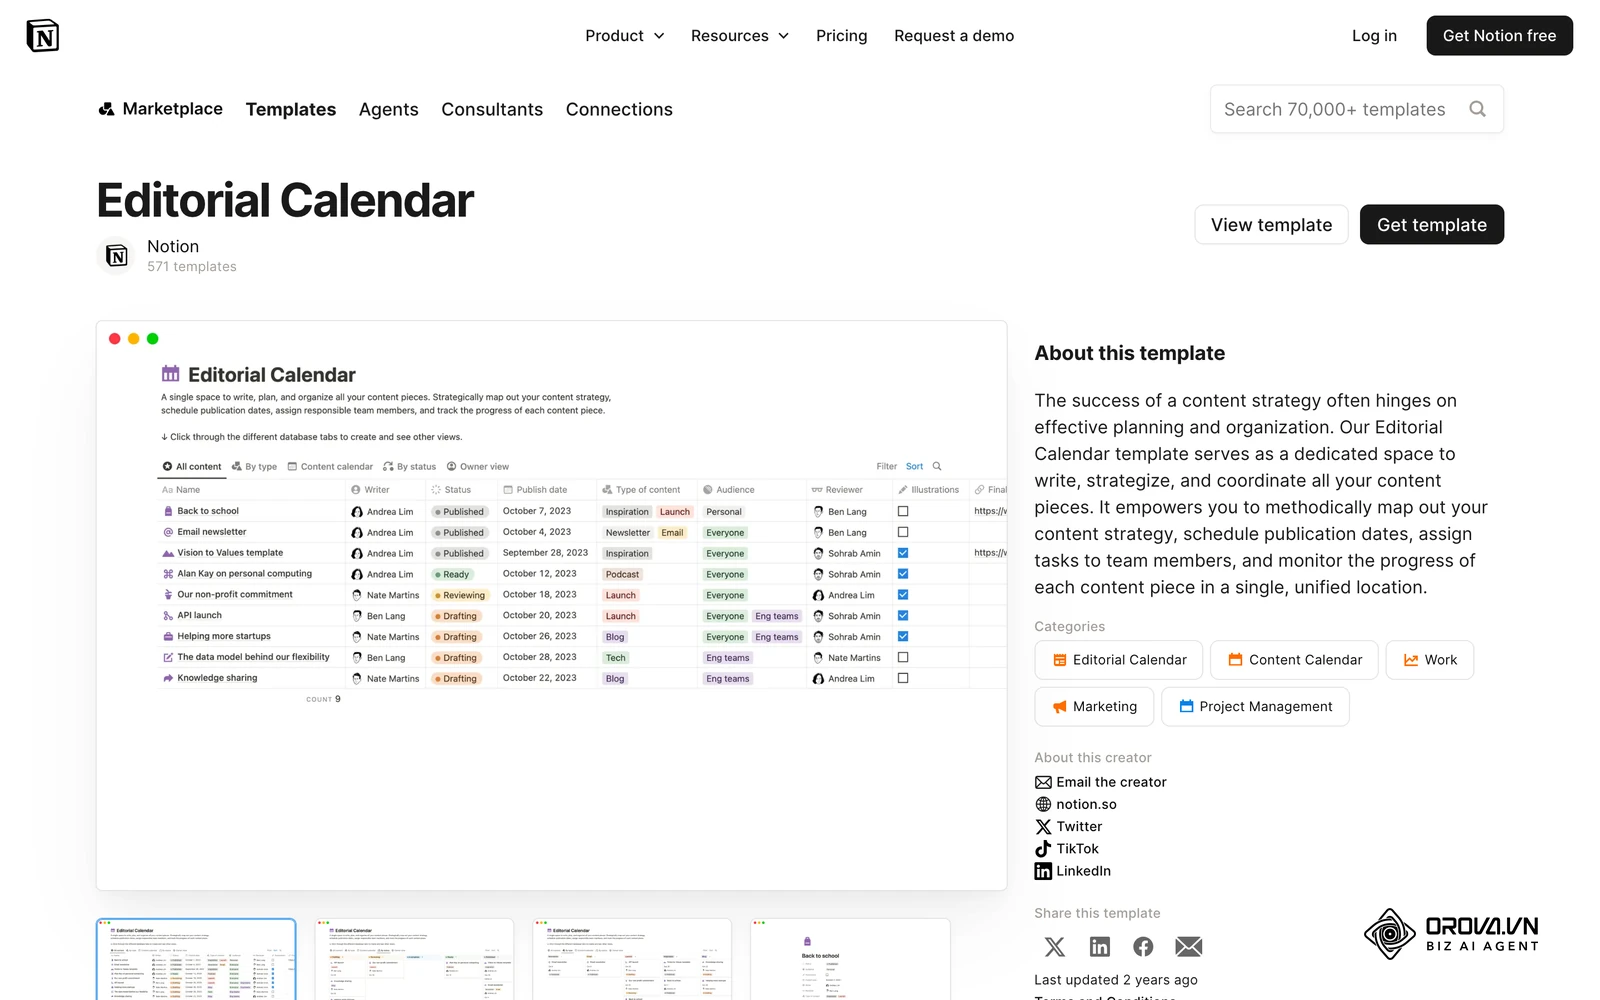
Teams frequently confuse an editorial calendar with a broader strategic schedule. While an overarching content calendar outlines high-level campaign themes, annual launches, and macro positioning goals, an editorial calendar governs day-to-day tactical production. It maps exact deadlines, creative specifications, reviewer assignments, asset links, and live distribution timestamps for every deliverable.
You do not need to submit an email address or create an account to use the template: the full grid is printed in the next section, ready to paste into a blank Google Sheet or Excel workbook. Operating from a unified tracking sheet ensures that creative assets support deliberate commercial objectives rather than ad-hoc publishing impulses.
The Editorial Calendar Template: Copy-Ready Grid With Example Rows
Type the header row below into row 1 of a blank sheet (columns A through M), then paste the example rows underneath to see how one parent article and its derivative social posts sit together. Delete the example rows once your own assets are in.
| Asset ID | Target Publish Date | Working Title | Content Pillar | Primary Channel | Format Type | Funnel Stage | Primary Keyword | Content Lead | Reviewer | Production Status | Live URL | Notes & Assets |
|---|---|---|---|---|---|---|---|---|---|---|---|---|
| ART-101 | 2026-11-03 | Editorial calendar template: 7-step setup | Content operations | Blog | Long-form guide | Top of Funnel (Awareness) | editorial calendar template | Writer A | Editor B | 4. In Review | (fill when live) | Brief + draft doc link |
| ART-101-A | 2026-11-05 | The columns every content team needs | Content operations | 8-slide carousel | Top of Funnel (Awareness) | (none) | Designer C | Editor B | 3. In Drafting | (fill when live) | Slide file link | |
| ART-101-B | 2026-11-08 | Why our posts stopped clashing | Content operations | Text hook + takeaways | Middle of Funnel (Evaluation) | (none) | Writer A | Editor B | 2. Assigned | (fill when live) | Pull 3 quotes from ART-101 | |
| ART-102 | 2026-11-10 | How many posts to keep in reserve | Team workflow | Newsletter | Executive summary | Middle of Funnel (Evaluation) | content buffer | Writer D | Editor B | 1. Idea Backlog | (fill when live) | Outline only |
How to fill each column so the grid stays usable:
| Column | What to enter | Allowed values |
|---|---|---|
| A: Asset ID | Parent code, then a letter suffix for each derivative | ART-101, ART-101-A, ART-101-B |
| B: Target Publish Date | The go-live date, never the draft deadline | Date format YYYY-MM-DD |
| E: Primary Channel | One channel per row | Dropdown: Blog, LinkedIn, Facebook, YouTube, Newsletter |
| G: Funnel Stage | The stage the asset serves | Dropdown: Top, Middle, Bottom of Funnel |
| J: Reviewer | One named person, not a team | A single name |
| K: Production Status | Where the asset is right now | Dropdown: 1. Idea Backlog to 7. Paused |
| L: Live URL | The published link, added on the day it goes live | Full published URL |
The seven steps below show how to build this grid from scratch, add the validation rules, and extend it with repurposing, buffer, and 30-day tracking tabs.
Prerequisites to Prepare Before Setting Up Your Calendar
Before opening a blank spreadsheet, assemble your operational assets so you can configure validation rules in a single session without interruption.
| Prerequisite | Where to Find It | Estimated Time | Impact If Missing |
|---|---|---|---|
| Master Channel Access List | Channel admin panels & social management logins | 10 minutes | Inability to verify character limits, media aspect ratios, or live posting permissions |
| Strategic Content Pillars | Brand strategy briefs or quarterly marketing plans | 15 minutes | Articles skew toward random topics with no alignment to commercial funnel stages |
| Production Team Roster | Organizational chart or department directory | 5 minutes | Ambiguous task ownership and unassigned editorial reviews |
| Spreadsheet Software | Google Sheets or Microsoft Excel | 2 minutes | Inability to host collaborative multi-user editing and dropdown validation rules |
| Brand Style and Voice Rules | Brand asset library or editorial guidelines | 10 minutes | Inconsistent tone of voice, fragmented typography, and off-brand visuals |
Gather these prerequisites in a temporary document before beginning the build. Having your channels, pillars, and collaborators finalized prevents structural rewrites later.
Step 1: Structure Your Master Columns and Core Taxonomy
The goal of this step is to define the standard metadata columns required to track any content asset from initial ideation through live distribution.
To begin, open Google Sheets, create a new spreadsheet, and rename the initial sheet tab to Master Editorial Grid. Click row 1, apply bold text formatting, and fill the header row with a neutral dark background. Enter the following thirteen column headers across columns A through M:
- Column A: Asset ID
- Column B: Target Publish Date
- Column C: Working Title
- Column D: Content Pillar
- Column E: Primary Channel
- Column F: Format Type
- Column G: Funnel Stage
- Column H: Primary Keyword
- Column I: Content Lead
- Column J: Reviewer
- Column K: Production Status
- Column L: Live URL
- Column M: Notes & Assets
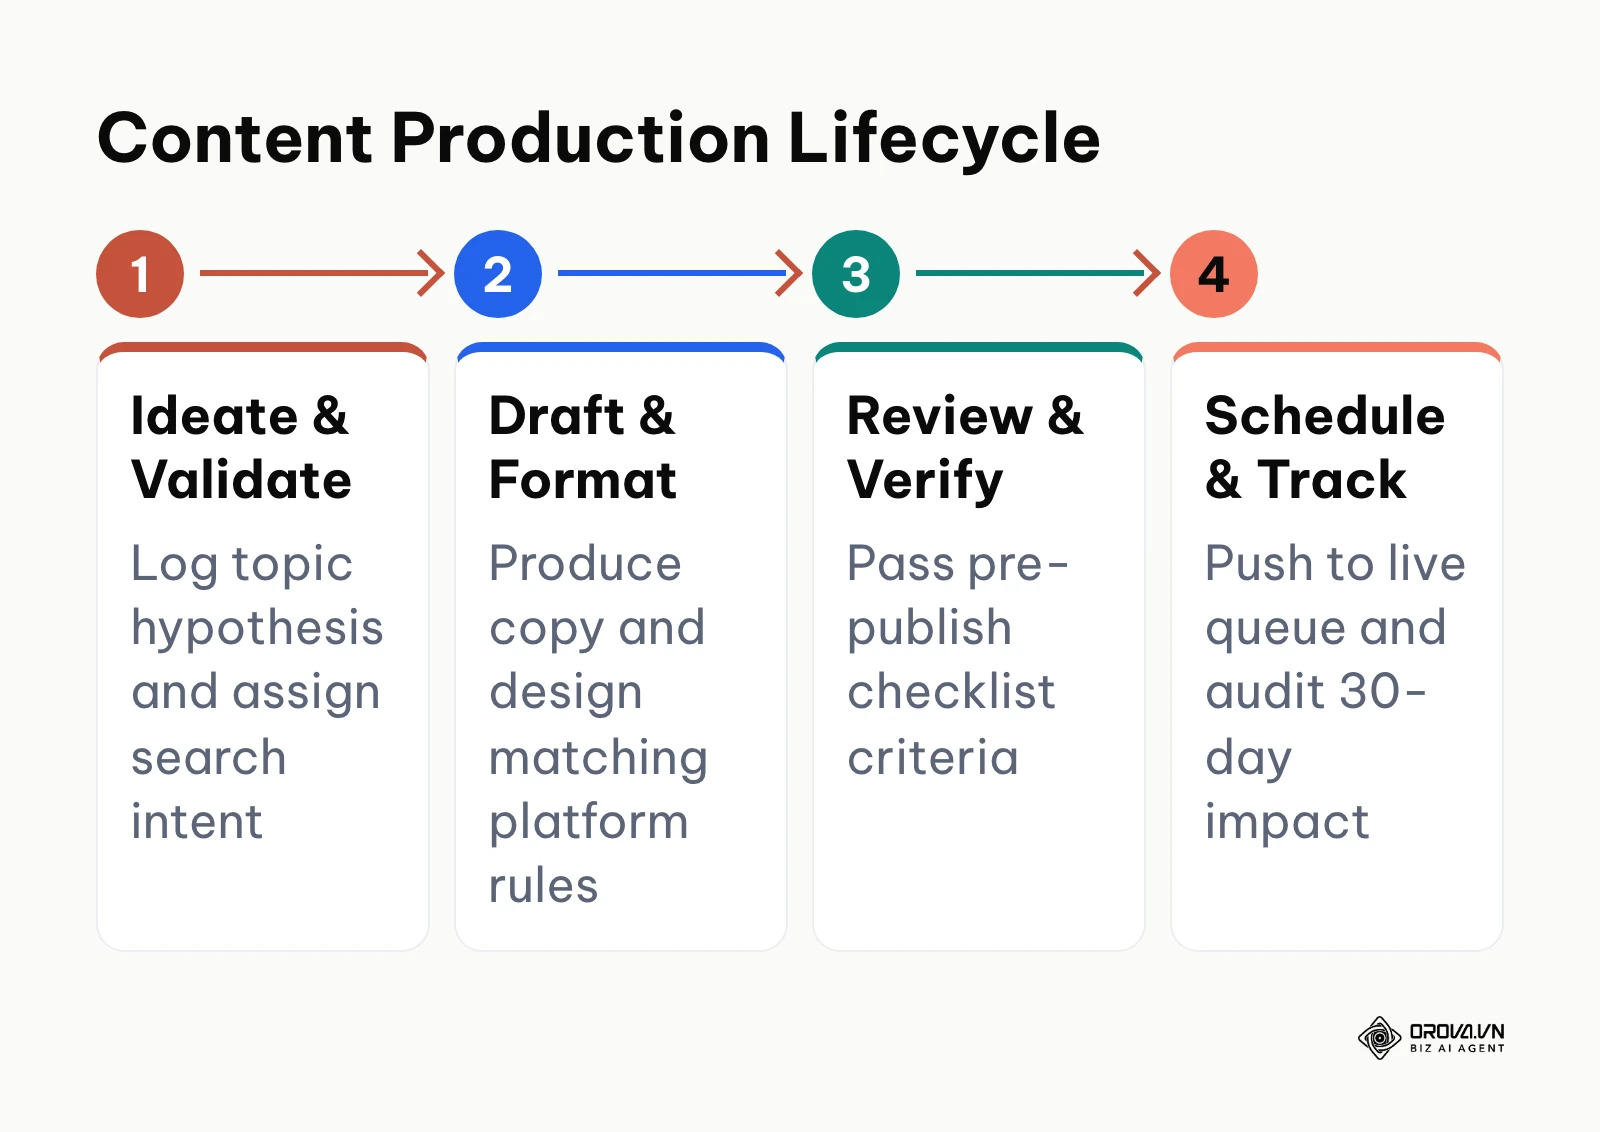
Click View in the top menu, navigate to Freeze, and select 1 row. Next, highlight columns A through M, double-click the boundary between column headers to auto-fit text width, and adjust column C (Working Title) to a fixed width of 260 pixels to allow comfortable scanning of headlines. The diagram below summarizes how content moves through these structured stages.
You know this step is completed correctly when row 1 remains pinned at the top as you scroll downward, every column header is clearly readable on a standard display, and no horizontal scroll is required to inspect columns A through K.
A common mistake in step 1 is adding twenty or more granular columns during the initial setup, such as word count targets, multiple image URLs, and secondary author fields. When a spreadsheet feels burdensome, contributors abandon it within weeks. If team members begin bypassing data entry, immediately hide non-essential columns and restrict your active grid to these thirteen core fields.
Worked Example: Standardizing Asset Metadata
Worked example: A four-person software marketing team producing two long-form guides and ten social updates weekly suffered from conflicting deadlines. The team opened Google Sheets, entered the thirteen standard columns above, froze the top header, and designated column B strictly for final distribution dates. When writers initially entered draft submission targets into column B, the social manager scheduled incomplete assets by mistake; the team resolved this by adding a dedicated Draft Due Date sub-column directly beside the target publish date. As a result, the entire department gained an unambiguous view of editorial progress without scheduling confusion.
Step 2: Configure Automated Dropdowns and Color Rules
The goal of this step is to replace free-text cells with standardized dropdown chips to prevent spelling discrepancies and enable visual progress scanning.
Highlight column K (Production Status) from row 2 downward. Click Data in the top menu, select Data validation, and click Add rule in the right-hand sidebar. Under the Criteria dropdown, choose Dropdown. Populate the rule with seven distinct production stages, assigning distinct colors to each:
- Option 1: 1. Idea Backlog (Light Grey)
- Option 2: 2. Assigned (Light Blue)
- Option 3: 3. In Drafting (Light Yellow)
- Option 4: 4. In Review (Light Orange)
- Option 5: 5. Scheduled (Light Purple)
- Option 6: 6. Published (Light Green)
- Option 7: 7. Paused (Light Red)
Click Advanced options at the bottom of the sidebar, set the display style to Chip, and check Reject input under If the data is invalid. Repeat this validation process for Column E (Primary Channel) with options such as Blog, LinkedIn, Facebook, YouTube, and Newsletter. Finally, configure Column G (Funnel Stage) with options Top of Funnel (Awareness), Middle of Funnel (Evaluation), and Bottom of Funnel (Conversion).
You know this step is completed correctly when clicking any cell in column K opens an interactive, color-coded selection menu, and typing arbitrary text into the cell triggers a rejection warning.
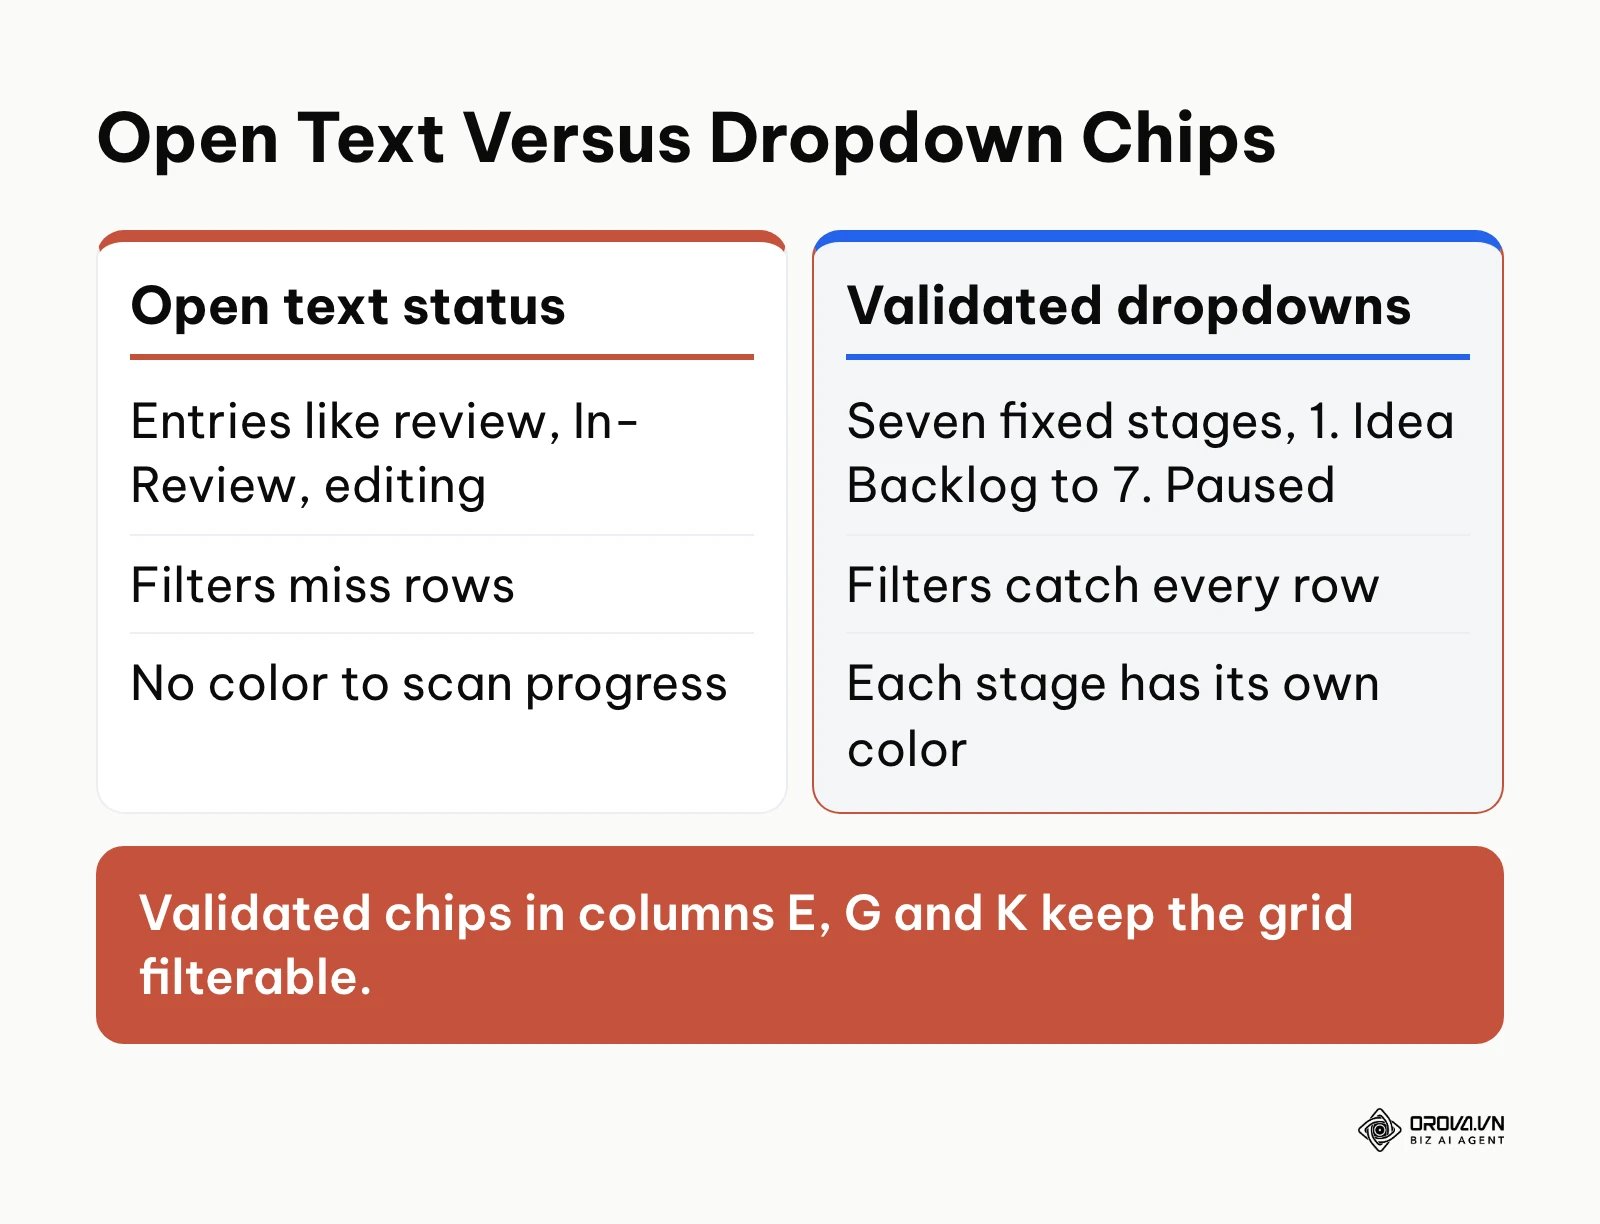
A common mistake is leaving status fields as open text, resulting in entries like "review", "In-Review", and "editing" across different rows. This breaks automated filtering and prevents leadership from assessing production health. Enforcing strict chip validation eliminates typographical variation.
Step 3: Embed the 1-to-5 Content Repurposing Matrix
The goal of this step is to systematically turn every long-form asset into five published pieces (the article plus four derivative posts) across a structured 14-day publishing window.
Click the + button in the lower-left corner of Google Sheets to add a new tab, and label it Repurposing Matrix. Enter six column headers across row 1: Parent Asset ID, Derivative Format, Target Channel, Cadence Interval, Angle Focus, and Publishing Window. A single deep-dive article must generate distinct native formats rather than identical link spam.
The table below illustrates an integrated 14-day multi-channel publishing schedule derived from a single flagship guide.
| Day | Parent Asset | Derivative Format | Target Channel | Spacing from Launch | Primary Goal |
|---|---|---|---|---|---|
| Day 1 | Pillar Guide | Full Long-Form Article | Company Blog | 0 Days | Search indexing & deep education |
| Day 3 | Pillar Guide | 8-Slide Visual Carousel | LinkedIn Page | +2 Days | Professional engagement & framework sharing |
| Day 6 | Pillar Guide | Text Hook & Key Takeaways | Threads / Facebook | +5 Days | Community discussion & feedback gathering |
| Day 9 | Pillar Guide | Short Video Clip | TikTok / Reels / YouTube Shorts | +8 Days | Visual storytelling & top-funnel reach |
| Day 14 | Pillar Guide | Executive Summary & Case Insight | Bi-Weekly Newsletter | +13 Days | Subscriber retention & assisted conversion |
Connect your matrix to the master grid by referencing the Asset ID from column A. When a core article is assigned ID ART-101, its four derivative rows receive child identifiers ART-101-A through ART-101-D.
You know this step is completed correctly when every published blog post has four derivative rows with staggered publication dates spanning two full weeks.
A frequent error is publishing all five derivative social assets on the exact same day the blog post goes live. This floods your audience, depresses algorithmic reach, and leaves subsequent calendar days barren. Maintain a minimum gap of 48 to 72 hours between derivative releases to maximize cumulative impressions.
Tired of copying rows from a spreadsheet into eight different apps? With Orova Social, you compose a post once, publish it to Facebook, Instagram, TikTok, YouTube, Threads, LinkedIn, Zalo OA, and Telegram, and see everything on a content calendar by day, week, or month. AI drafts captions in your brand voice, and scheduled posts that miss their slot are published automatically afterwards.
Step 4: Establish the 7-Step Pre-Publish Checklist
The goal of this step is to enforce a mandatory quality control checkpoint before any asset advances to scheduled distribution status.
In your spreadsheet, create a third tab named Pre-Publish Checklist. Construct a validation table with columns for Check Item, Verification Standard, Mandatory Tool, and Signoff Status. Every asset must satisfy all seven checkpoints before the production status in column K may change from 4. In Review to 5. Scheduled:
- Keyword and Search Intent Alignment: Confirm the primary keyword appears in the title, URL slug, and introduction, addressing user intent without stuffing.
- Internal Link Insertion: Confirm the draft includes contextual links to related company guides, such as our walkthrough on marketing campaign planning.
- Brand Voice and Tone Review: Check the draft against your established brand tone of voice documentation to eliminate jargon and cliches.
- Asset Dimension and Media Sizing: Verify visual banners meet platform specifications (1080x1080 square for social feeds, 1080x1920 vertical for mobile shorts, or 1200x630 for link previews).
- Tracking Parameter Validation: Ensure all destination URLs include clean UTM parameters (utm_source, utm_medium, utm_campaign) built without spaces or uppercase letters.
- Bottom-Funnel Call to Action: Verify that the content directs readers toward relevant commercial solutions or bottom of funnel content assets.
- Attribution and Fact-Checking: Confirm that every statistic, third-party claim, and external quotation cites the primary governing source by name and release year.
You know this step is completed correctly when reviewers check all seven criteria and record their initials in Column J before updating an asset row to 5. Scheduled.
A common pitfall is skipping the tracking parameter check during late-night publishing sprints. When links lack UTM parameters, traffic appears as direct or unassigned in analytics, making it impossible to measure channel attribution. Never schedule an asset without pre-validated URLs.
Step 5: Map Out the Social Editorial Calendar Workflow
The goal of this step is to define clear handoffs between writers, graphic designers, reviewers, and channel managers to prevent administrative bottlenecks.
To implement this workflow, select Tools in the top Google Sheets menu, click Notification settings, then Edit notifications, and choose to be emailed when any changes are made. Google Sheets sends these alerts only to the person who sets the rule and cannot limit them to one column, so ask each editor and channel manager to turn on their own notifications and filter the sheet by column K (Production Status) when the alert arrives.
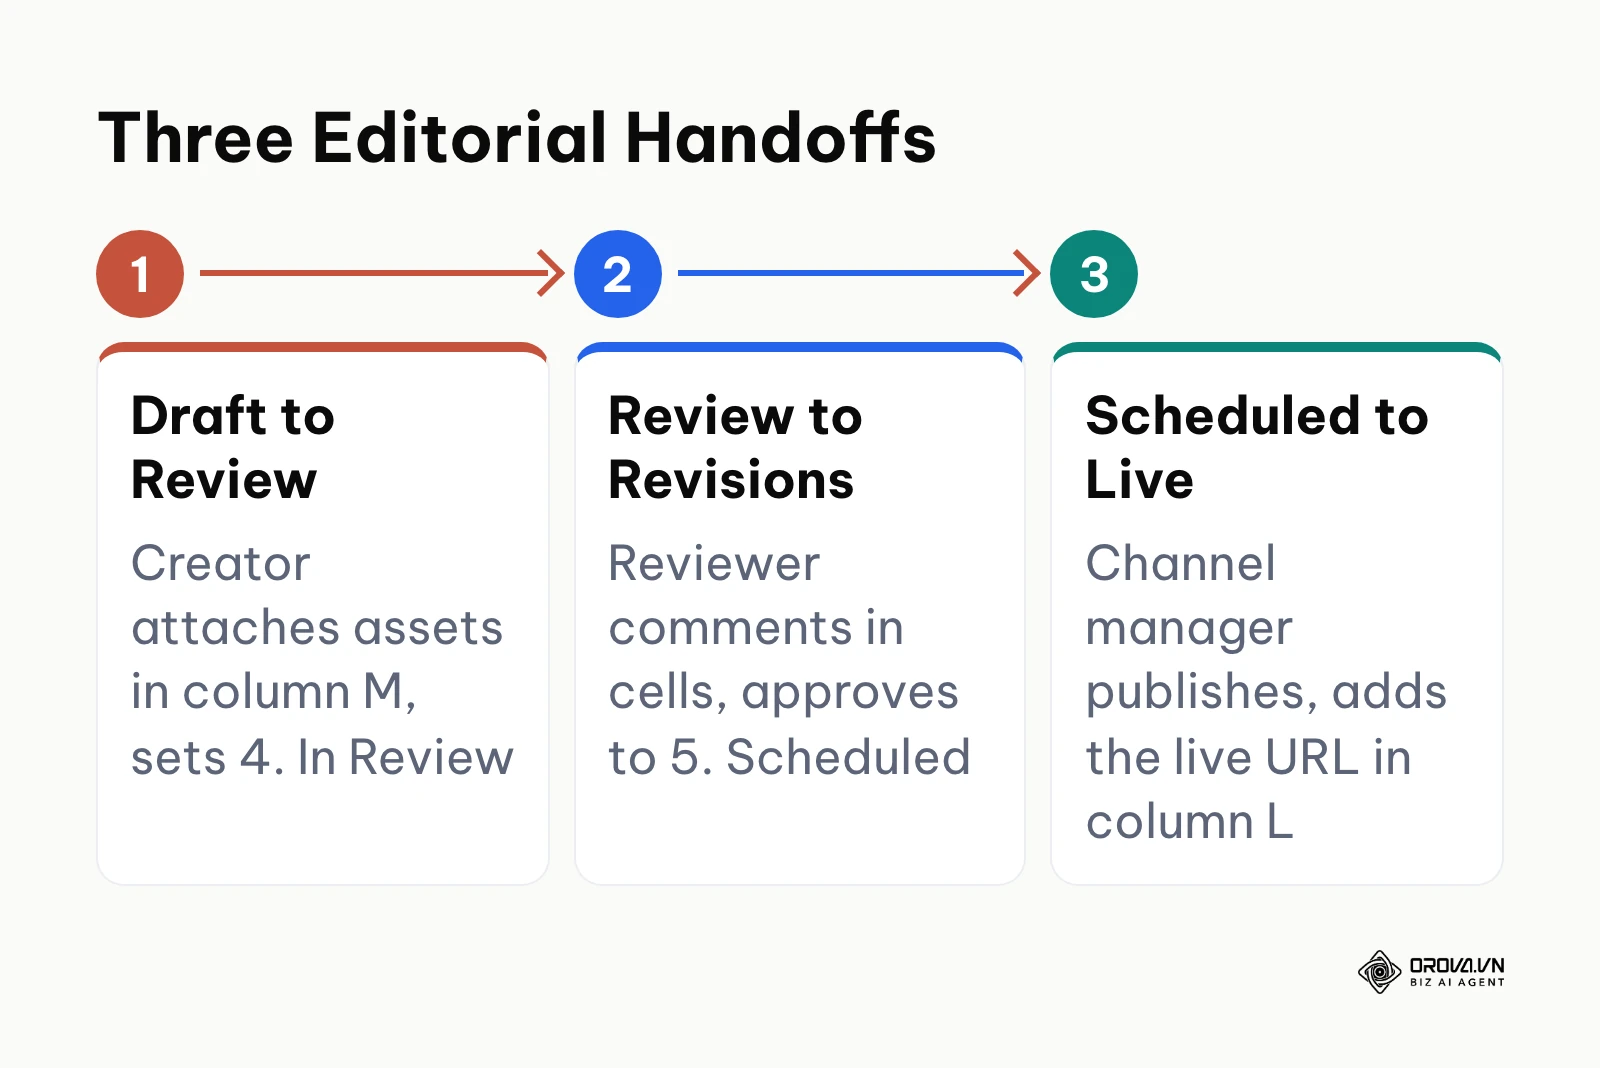
Establish three distinct operational handoffs within your editorial team:
- Handoff 1 (Draft to Review): The content creator completes copy, attaches asset links in column M, and switches the chip to 4. In Review. The designated editor receives an email alert and has 24 hours to review.
- Handoff 2 (Review to Revisions): If changes are required, the reviewer adds comments directly to the relevant cells and keeps the chip on 4. In Review. Once approved, the reviewer switches the status to 5. Scheduled.
- Handoff 3 (Scheduled to Live): The social channel manager uploads assets into live posting queues and updates column L with the live destination URL upon publication.
You know this step is completed correctly when team members execute handoffs entirely through status changes and in-cell comments without relying on disorganized chat messages.
A major failure point is ambiguous review ownership where multiple team members assume someone else is reviewing the asset. This leads to missed publication slots. Assign a single named individual in column J for every active row.
Worked Example: Streamlining Review Handoffs
Worked example: A boutique creative agency producing twelve social posts weekly across three client brands struggled with missed deadlines caused by unstructured communication. The account director turned on change notifications in Google Sheets and established a firm rule: all feedback had to be logged as cell comments within row-level assets. When client reviewers initially tried messaging changes through chat, editors redirected them to the spreadsheet. Within three weeks, the agency eliminated missed deadlines, and every approved post carried an auditable, timestamped review history.
Step 6: Configure Buffer Stock and the Emergency Pause Protocol
The goal of this step is to safeguard publishing consistency during internal staff absences and prevent brand reputation damage during external crises.
To build your buffer stock, create a dedicated tab titled Buffer Bank. Maintain evergreen, non-time-sensitive educational posts that can deploy at a moment's notice. Use the following formula to size your safety reserve:
Required Buffer Stock = Weekly Publishing Frequency × 2 Weeks
If your brand publishes three times per week, keep exactly six fully approved, evergreen assets in the Buffer Bank tab at all times. If a writer falls ill or an approval stalls, pull an asset from the buffer reserve and insert it into the master calendar.
| Posts per Week | Required Buffer Stock | Refill When the Bank Drops To |
|---|---|---|
| 1 | 2 approved assets | 1 asset |
| 3 | 6 approved assets | 2 assets |
| 5 | 10 approved assets | 4 assets |
| 10 (social-heavy) | 20 approved assets | 8 assets |
Next, document your Emergency Pause Protocol directly at the top of the Master Editorial Grid tab in rows 2 and 3 as a frozen, callout banner. Define four strict operational steps:
- Identify Trigger Event: A critical service outage, unexpected public relations crisis, or major national tragedy occurs.
- Initiate Freeze: The designated communications lead switches all scheduled rows for the next 72 hours from 5. Scheduled to 7. Paused.
- Clear Automated Queues: The social manager pauses all active external scheduling queues to prevent scheduled promotional messages from going out during a sensitive period.
- Conduct Post-Crisis Review: The leadership team audits paused content, rewrites inappropriate copy, and reactivates the publication timeline once normal conditions resume.
You know this step is completed correctly when your Buffer Bank tab contains six completed, evergreen drafts and your team can execute an emergency pause across all channels in under ten minutes.
A common mistake is storing time-sensitive campaign assets in your buffer stock. If a buffer post references an expired quarterly promotion or seasonal holiday, deploying it during an emergency causes confusion. Ensure every asset in the buffer bank remains valid year-round.
Step 7: Build the 30-Day Post-Publishing Performance Tracker
The goal of this step is to close the operational loop by auditing content performance 30 days post-launch, ensuring your strategy adapts based on data.
Return to the Master Editorial Grid tab and add five post-publication audit columns across columns N through R:
- Column N: 30-Day Organic Impressions
- Column O: 30-Day Engagements / Clicks
- Column P: Conversion Goal Count
- Column Q: Performance Rating
- Column R: Strategic Action URL
Under Column Q, apply data validation with three dropdown chips: 1. Exceeded Target (Light Green), 2. Met Target (Light Blue), and 3. Underperformed (Light Red). Set a recurring calendar reminder on the first Monday of each month to pull metrics for all content published between 30 and 60 days prior.
You know this step is completed correctly when every asset row published over 30 days ago displays verified performance metrics and a clear verdict in column Q.
A common mistake is treating the editorial calendar solely as a pre-publishing checklist and ignoring post-launch data. Without a 30-day review column, teams continue investing resources into formats and topics that fail to generate pipeline.
Worked Example: Auditing Post-Publishing Pipeline
Worked example: A mid-market B2B business publishing six articles monthly added 30-day performance columns to their Google Sheets master grid. During their initial monthly audit, the team evaluated six articles published the previous month using data from Google Search Console and CRM signups. They discovered that while four conceptual articles generated high impressions, two technical tutorials generated four times as many product trials. The editor adjusted the subsequent month's calendar to double technical tutorial production, systematically improving lead generation from search traffic.
Master Editorial Calendar Workflow Checklist
Use this operational checklist to audit your calendar setup from start to finish. Print or duplicate this reference table to ensure full compliance before launch.
| Step | Core Activity | Completion Indicator | Estimated Time |
|---|---|---|---|
| Step 1: Structure Master Columns | Create spreadsheet, freeze header, and establish 13 core taxonomy fields | Pinned header row with non-overlapping columns A through M | 10 minutes |
| Step 2: Configure Validation | Add dropdown rules and colored chips for Status, Channel, and Funnel Stage | Interactive, color-coded dropdown chips in columns E, G, and K | 10 minutes |
| Step 3: Embed Repurposing Matrix | Set up child asset tab mapping 1 core guide into 5 staggered social assets | Dedicated matrix tab with 14-day publishing schedule formulas | 8 minutes |
| Step 4: Establish Checklist | Build 7-point quality control tab covering SEO, tone, media, and UTMs | Standardized pre-publish checklist requiring signoff before scheduling | 7 minutes |
| Step 5: Map Team Workflow | Set up automated notification rules and define 3 handoff stages | Automated email triggers on status changes and named reviewer assignments | 5 minutes |
| Step 6: Configure Crisis Protocols | Calculate 2-week buffer stock and post 4-step emergency pause instructions | 6 evergreen reserve assets in buffer tab and visible pause banner | 10 minutes |
| Step 7: Build 30-Day Tracker | Add post-publish metrics columns and schedule recurring monthly audits | Columns N through R populated with impressions, clicks, and verdicts | 5 minutes |
Common Editorial Calendar Mistakes and How to Fix Them
Operating a shared editorial tracking system involves cross-functional coordination. The table below details frequent operational failures and their solutions.
| Operational Error | Common Root Cause | Practical Solution |
|---|---|---|
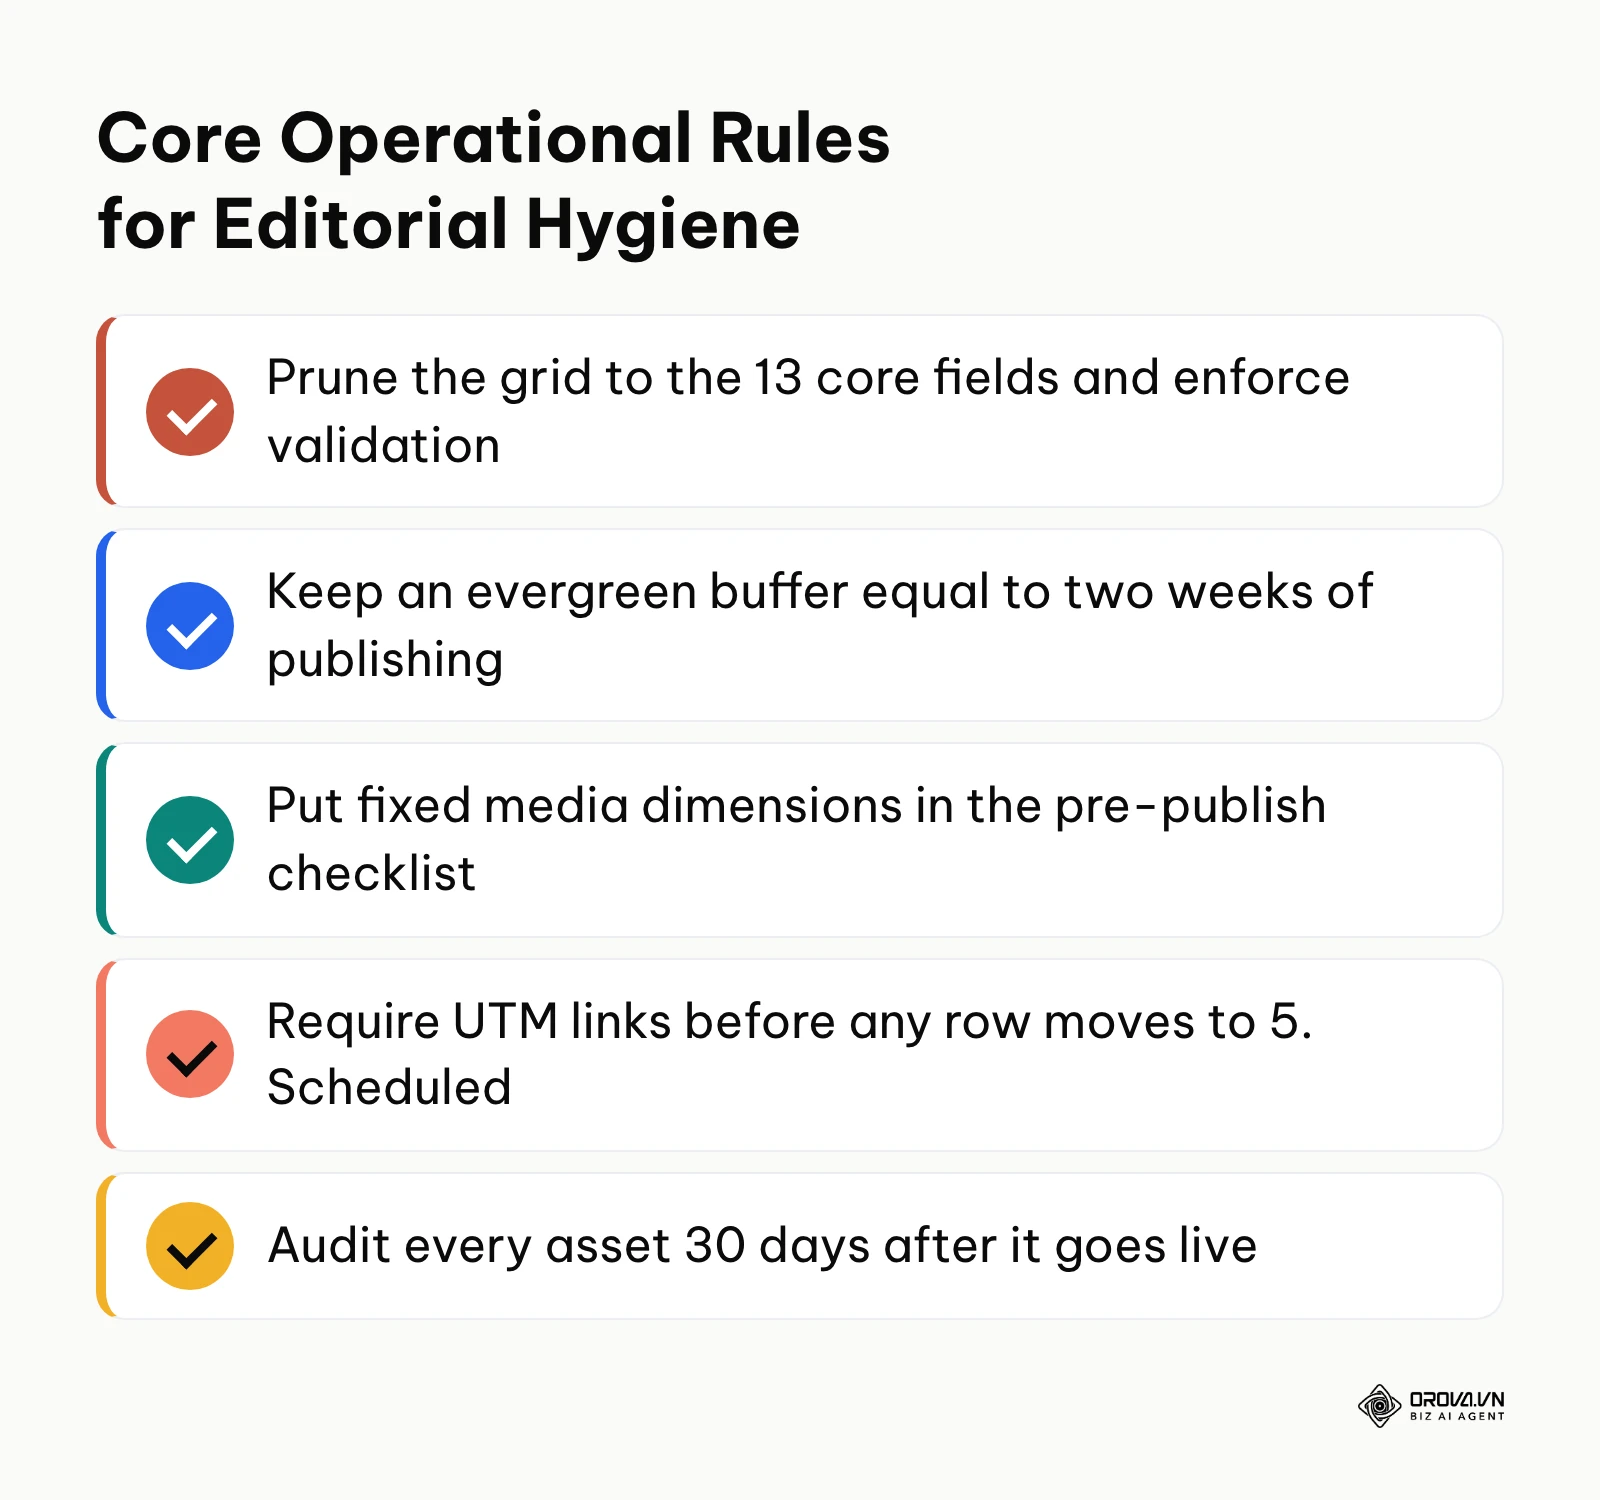
| Incomplete spreadsheet rows | Contributors find data entry cumbersome | Prune tracking columns to the essential 13 core fields and enforce validation |
| Broken scheduling cadence | Writers miss drafting deadlines | Build an evergreen buffer stock equal to two weeks of standard publishing volume |
| Inconsistent visual branding | Designers work without platform specifications | Embed fixed dimension requirements (1080x1080, 1080x1920) in the pre-publish checklist |
| Unattributed social traffic | Team members deploy raw URLs without tracking | Require pre-built UTM links before allowing status updates to 5. Scheduled |
| Overlapping promotional posts | Channels lack holistic calendar visibility | Centralize blog and social tracking inside a single master multi-channel grid |
| Siloed post-launch data | Marketers move to new content without reviewing past work | Institute a mandatory 30-day audit cadence on the first Monday of each month |
Ready to move your editorial calendar from a sheet to a scheduling workspace? Set up a brand profile once so every post follows it, let AI write captions and create on-brand images, then export your posting schedule to Excel for reporting. Sign up for Orova Social: it is free until 7 July 2027.
Measuring Success: How to Know Your Calendar Workflow Is Working
To verify that your editorial calendar template is improving operational efficiency, monitor three objective process metrics over a 90-day evaluation period:
First, measure your On-Time Publication Rate. Calculate the percentage of assets that go live on their target publish date without emergency rescheduling. Set a target your team agrees on, and investigate any month where the rate falls. Review this metric monthly by comparing column B (Target Publish Date) against actual live timestamps in column L.
Second, monitor Buffer Health. Check your Buffer Bank tab bi-weekly to ensure your safety reserve never dips below your two-week target. If your reserve drops to the refill level in the Step 6 table, pause non-critical projects and dedicate an editorial sprint to replenishing evergreen content.
Third, track 30-Day Optimization Velocity. Review column R (Strategic Action) to confirm that underperforming assets receive updates, title adjustments, or internal link additions within 60 days of release. A functioning editorial calendar guides long-term content enhancement rather than merely recording past publishing events.
Editorial Calendar Trends in Coming Years: Author Perspectives
Transition from Static Grids to Automated Operating Systems
As of 2026, marketing teams increasingly struggle with the manual overhead of updating disconnected spreadsheet cells across disparate browser tabs. Over the next two to three years, I believe standalone spreadsheets will increasingly give way to tools where the editorial schedule and the publishing queue live in the same place. Marketing organizations that rely entirely on static rows and manual copy-pasting will face higher operational costs compared to teams running unified, event-driven pipelines. To prepare for this shift, teams should standardize their metadata taxonomies today so that migrating data into programmatic systems requires minimal restructuring. This transition could slow down if platform application interfaces become more restrictive or impose prohibitive developer fees.
Generative AI Shifting from Drafting to Calendar Orchestration
Most marketing discussions around artificial intelligence focus narrowly on generating first-draft copy. However, I expect that within the next twenty-four to thirty-six months, AI will primarily function as an editorial orchestration layer rather than a basic text generator. Machine intelligence will analyze audience engagement patterns, identify topical gaps in your archives, and automatically populate your editorial calendar template with structured briefs, optimal posting times, and derivative format suggestions. Marketers should focus on mastering editorial governance, brand differentiation, and factual verification rather than basic prompt generation. This development may stall if search algorithms heavily penalize automated content footprints, forcing brands back toward entirely manual planning cycles.
Channel Fragmentation Mandating Distributed Repurposing Architectures
Audience attention is spread across more platforms than a single feed can reach. In my view, publishing standalone blog posts or single-channel updates will become economically unviable for lean marketing teams over the next three years. Editorial calendars must evolve into multi-tier repurposing engines where a central strategic thesis immediately cascades into short-form video, vertical slides, and conversational community snippets. Organizations must design their calendar workflows around modular content architectures from day one. This expectation could prove incorrect if users consolidate heavily into a single dominant social network, diminishing the necessity of multi-channel distribution.
Frequently Asked Questions About Editorial Calendar Templates
What is the fundamental difference between an editorial calendar and a content calendar?
An editorial calendar governs tactical production details, including deadlines, assigned authors, review stages, and platform specifications for individual deliverables. A strategic content calendar operates at a higher organizational level, mapping broad campaign themes, quarterly messaging priorities, and brand initiatives. While the content calendar defines what themes the business explores, the editorial calendar dictates how and when individual assets are created and published.
How much buffer content should an editorial team maintain in reserve?
An editorial team should maintain an evergreen buffer stock equal to two weeks of standard publishing output. For example, if your brand releases three assets each week, keep exactly six fully approved, evergreen pieces in your reserve tab. This cushion absorbs unexpected disruptions, such as staff illness or extended review cycles, without leaving your publishing queue empty.
How should an editorial team handle an asset stuck in review past its publish time?
If an asset remains blocked in review two hours prior to its scheduled publication slot, the team should immediately deploy an approved asset from the evergreen buffer stock. Never force an unverified draft live to meet an arbitrary deadline. Reassign the delayed asset to a subsequent calendar slot and resolve the review bottleneck during your next team sprint.
How can a single template balance monthly SEO planning with daily social posting?
A unified template balances long-term SEO and daily social media by employing a parent-child spreadsheet architecture. The master grid tracks high-level articles and primary SEO keywords on a monthly cadence, while a linked repurposing tab breaks each parent asset into daily social derivatives scheduled across two-week intervals. This structure prevents fast-moving daily posts from cluttering long-term strategic plans.
What role does artificial intelligence play in managing an editorial calendar template?
Artificial intelligence assists calendar management by analyzing historical engagement trends, suggesting optimal posting windows, generating initial topic briefs, and drafting multi-platform social captions. When applied to editorial operations, AI accelerates repetitive administrative tasks, allowing human editors to focus on positioning, voice, and quality verification.
Should small teams begin with dedicated software or a spreadsheet template?
Small teams should begin with a structured spreadsheet template in Google Sheets before investing in specialized project management software. Spreadsheets provide complete flexibility to refine your custom taxonomy, approval workflows, and status tracking without software subscription fees. Once your team outgrows manual sheet maintenance, you can transition your standardized workflow into specialized software like managing all social media in one place platforms.
Where Should You Start?
Setting up a functioning content schedule does not require an overhaul of your marketing department. Choose the single starting path below that matches your current operating reality:
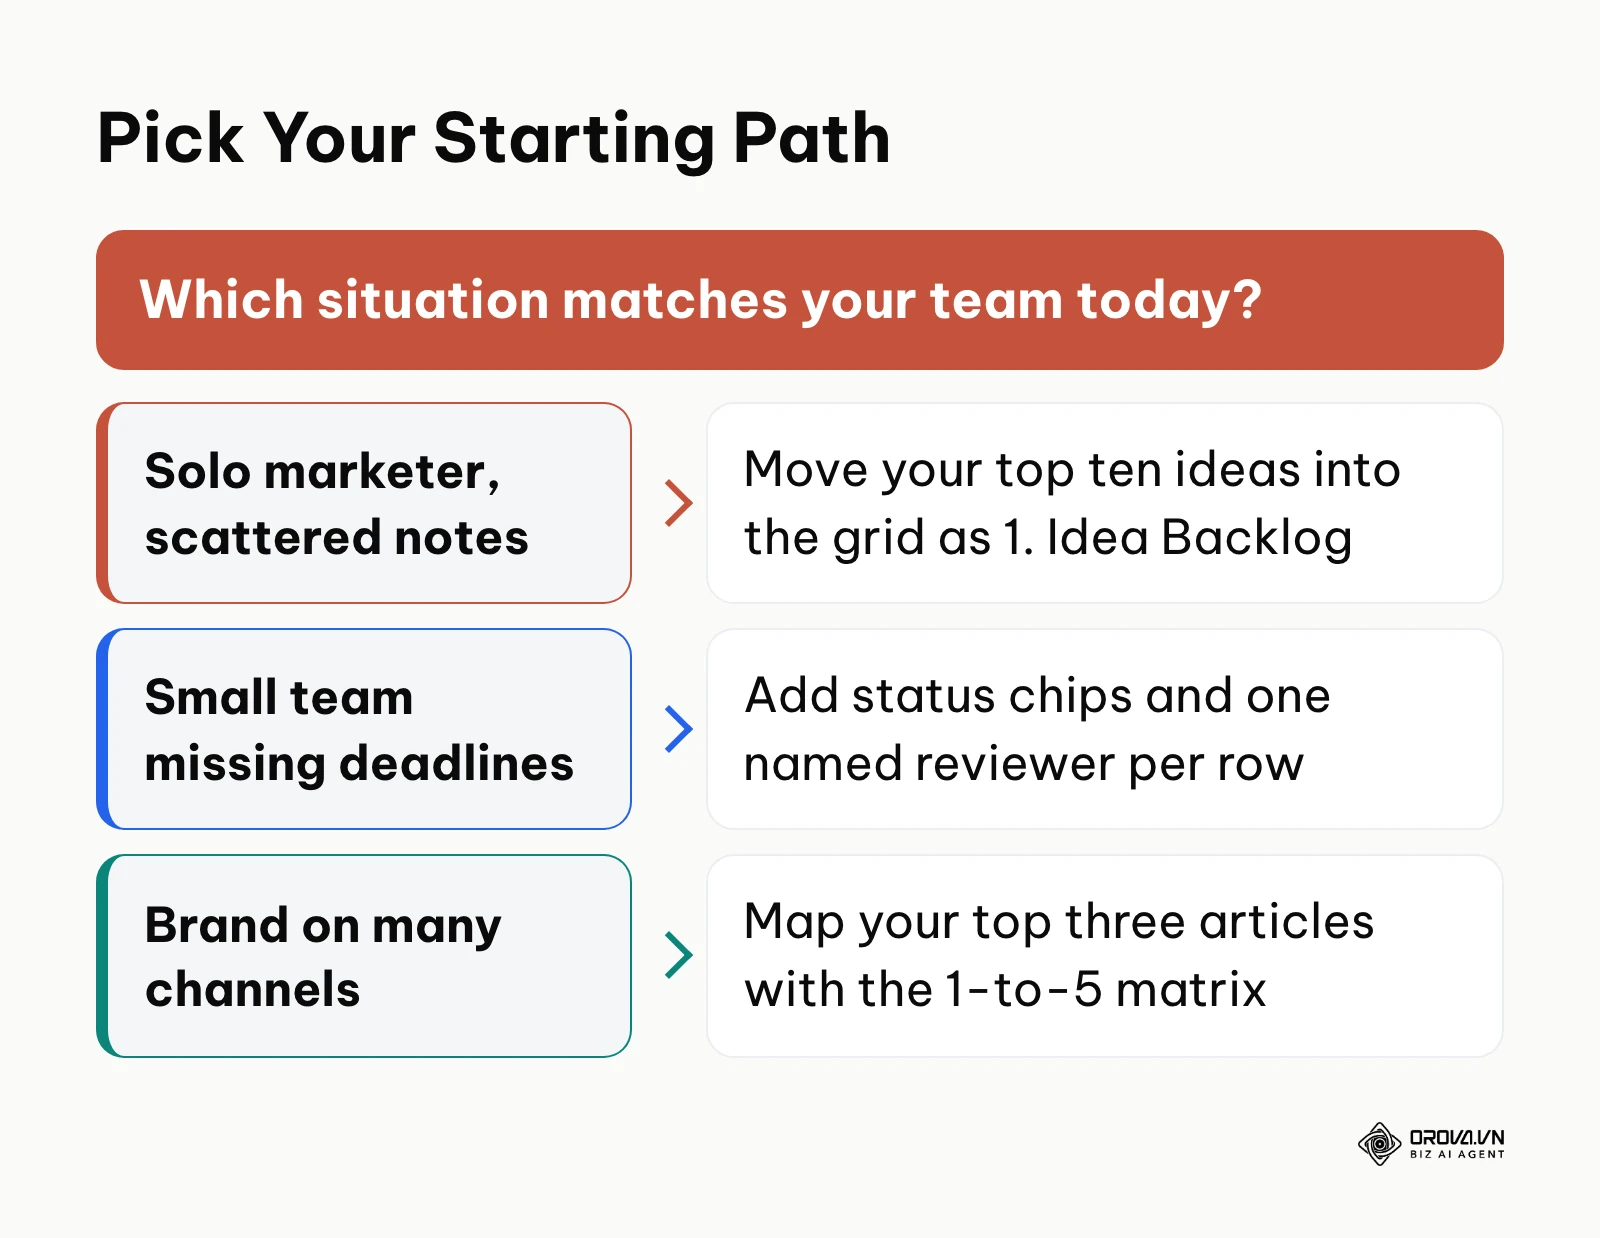
If you are a solo marketer managing ideas across scattered notes and message threads, spend sixty minutes consolidating your backlog. Open our template, navigate to the Master Editorial Grid tab, and transfer your top ten realistic topic ideas into rows 2 through 11. Assign each a target date, select 1. Idea Backlog, and leave the remaining columns blank until your next production session.
If you are a small in-house marketing team missing deadlines due to unclear reviews, focus on standardizing your handoff stages this afternoon. Open your current tracking sheet, implement the color-coded status dropdown chips detailed in Step 2, and assign a single reviewer in Column J for every active asset. Instruct your team that no asset may be scheduled without passing the 7-step pre-publish checklist.
If you are an established brand managing multi-channel distribution, implement the 1-to-5 repurposing matrix outlined in Step 3. Select your top three highest-performing articles from the past quarter, map each into five derivative social formats across a 14-day window, and schedule them into your distribution queue to expand organic reach.
Taking any of these immediate steps will establish operational control over your publishing pipeline using a proven editorial calendar template.
About the author

Builder of Orova
Nguyễn Đỗ Trọng Ân has 8 years of experience in marketing, including 6 years managing market development across Asia. He builds Orova, a Biz AI Agent that never sleeps: it plans, runs and optimizes work for businesses.
Run your business with AI Agents
Orova is the always-on Biz AI Agent — it plans, runs, and optimizes the work for you.
Save time, unlock productivity.