
How to schedule TikTok posts without losing trending sounds

Here is the short answer to how to schedule tiktok posts: upload your finished video in TikTok Studio on a desktop browser (or in the TikTok app, where the schedule option is available for your account), write the caption, switch the posting time from "Now" to "Schedule", pick a date and time, and confirm. A third-party scheduler that supports TikTok works the same way, but it can only send a finished video file, which is why trending sounds are the real problem to solve. Learning this properly is the turning point where a creator or brand stops chasing daily deadlines and starts building a sustainable content engine. The short-form video ecosystem moves at an incredibly rapid pace, demanding consistent output that can quickly overwhelm anyone trying to film, edit, and publish in real-time every single day. Many creators still edit directly on their mobile devices, rush to find trending audio tracks, and force themselves to post manually because they harbor a deep fear that automation tools will somehow ruin their account's algorithmic reach.
The standard advice found online usually just points you to desktop websites, completely ignoring the mobile-first nature of short-form video creation and the stringent technical limitations surrounding commercial music libraries. This comprehensive guide reconstructs the entire publishing process from the ground up. Throughout this deep dive, you will learn the exact technical methods to automate your publishing calendar while strategically preserving those crucial trending sounds, whether you decide to use native platform applications or advanced third-party software architectures.
How to schedule TikTok posts: The core concept
Scheduling TikTok posts simply means uploading your finalized video file, writing your caption, selecting your hashtags, and assigning a specific future date and time for the platform's servers to automatically publish the content on your behalf. This fundamentally separates the chaotic creation phase from the precise distribution phase.
This strategy is absolutely essential for social media managers handling multiple client accounts, dedicated creators who batch-film their content in single sessions, and international brands aiming to reach global audiences active in opposing time zones. Conversely, you should avoid scheduling if your content relies strictly on raw, real-time reactions to breaking news or live events where timing and immediate community interaction cannot be accurately predicted in advance.
To understand why scheduling is so critical, look at the mechanics of content fatigue. A common driver of creator burnout is the feeling of having to be online at a specific moment every day to hit a publishing window. By shifting to an asynchronous workflow, you reclaim your cognitive bandwidth. A steady, predictable stream of content also makes it easier for your audience to know when to expect you, and gives you cleaner data about which posting times work.
However, automating this process introduces specific technical hurdles, particularly regarding Application Programming Interfaces (APIs). When you use external software to push a video to a social platform, that software communicates via an API. Through the API, the tool can only send a finished video file. It cannot attach a sound from TikTok's in-app library, so any music has to be baked into the file already, and copyrighted tracks risk being muted. Understanding how to navigate this exact limitation is what separates amateur accounts from professional media operations.
Preparation: Building the ultimate content calendar workflow
Before you even touch a scheduling tool, you must establish a robust organizational infrastructure. Attempting to schedule posts by pulling random video files directly from your camera roll will inevitably lead to mismatched captions, forgotten hashtags, and missing audio links. You need a centralized system of record.
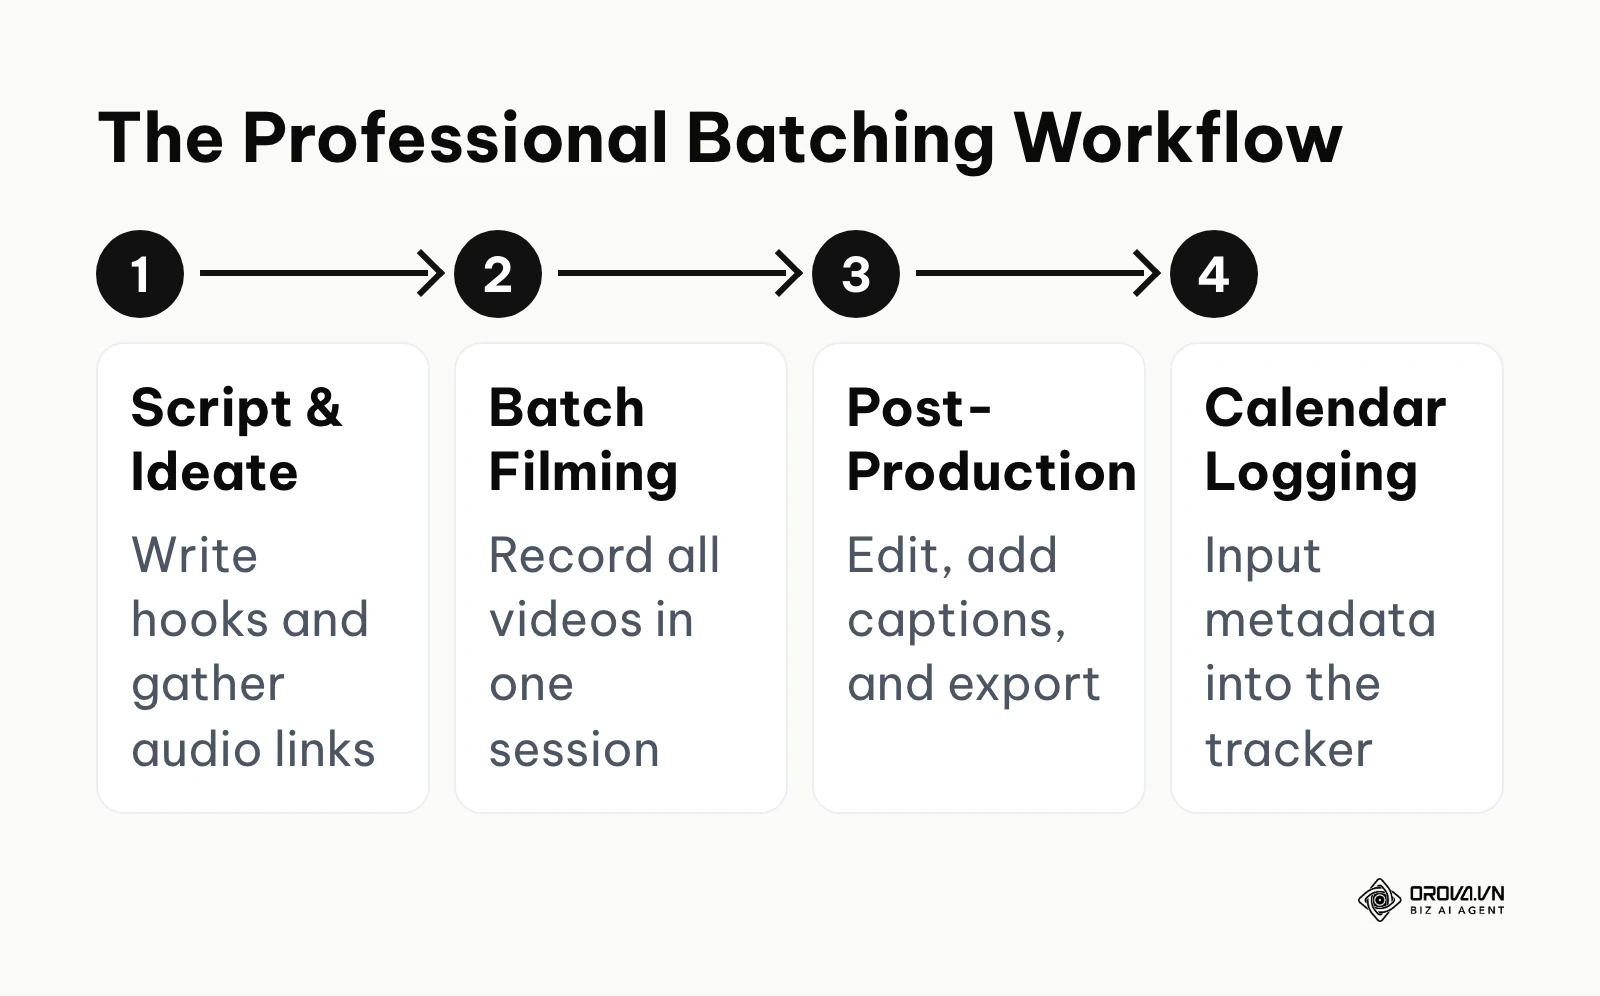
The foundation of any successful automation strategy is the content calendar workflow. This is not merely a list of dates; it is a comprehensive database tracking the lifecycle of every single media asset. Batching production, rather than shooting and posting every day, is where most of the time savings come from.
To implement this, you must construct a structured database. A simple spreadsheet is highly effective.
| Asset Requirement | Where to Source It | Time Required to Prepare |
|---|---|---|
| Finalized MP4 Video File | Video editing software export folder | 10-30 minutes per video |
| SEO-Optimized Caption | Copywriting document or AI tool | 5-10 minutes per post |
| Researched Hashtags | Competitor analysis or trend discovery | 15 minutes per batch |
| Target Audio URL | Saved sounds folder within the native app | 5 minutes per track |
| Scheduled Date & Time | Audience analytics dashboard | 10 minutes monthly |
The workflow itself should be strictly segmented. First, dedicate a day solely to ideation and scripting. Second, execute a "batch filming" session where you record multiple videos back-to-back wearing different outfits to simulate different days. Third, move all raw footage into post-production for editing, color correction, and subtitling. Only after all these steps are complete do you move to the final phase: calendar logging and scheduling.
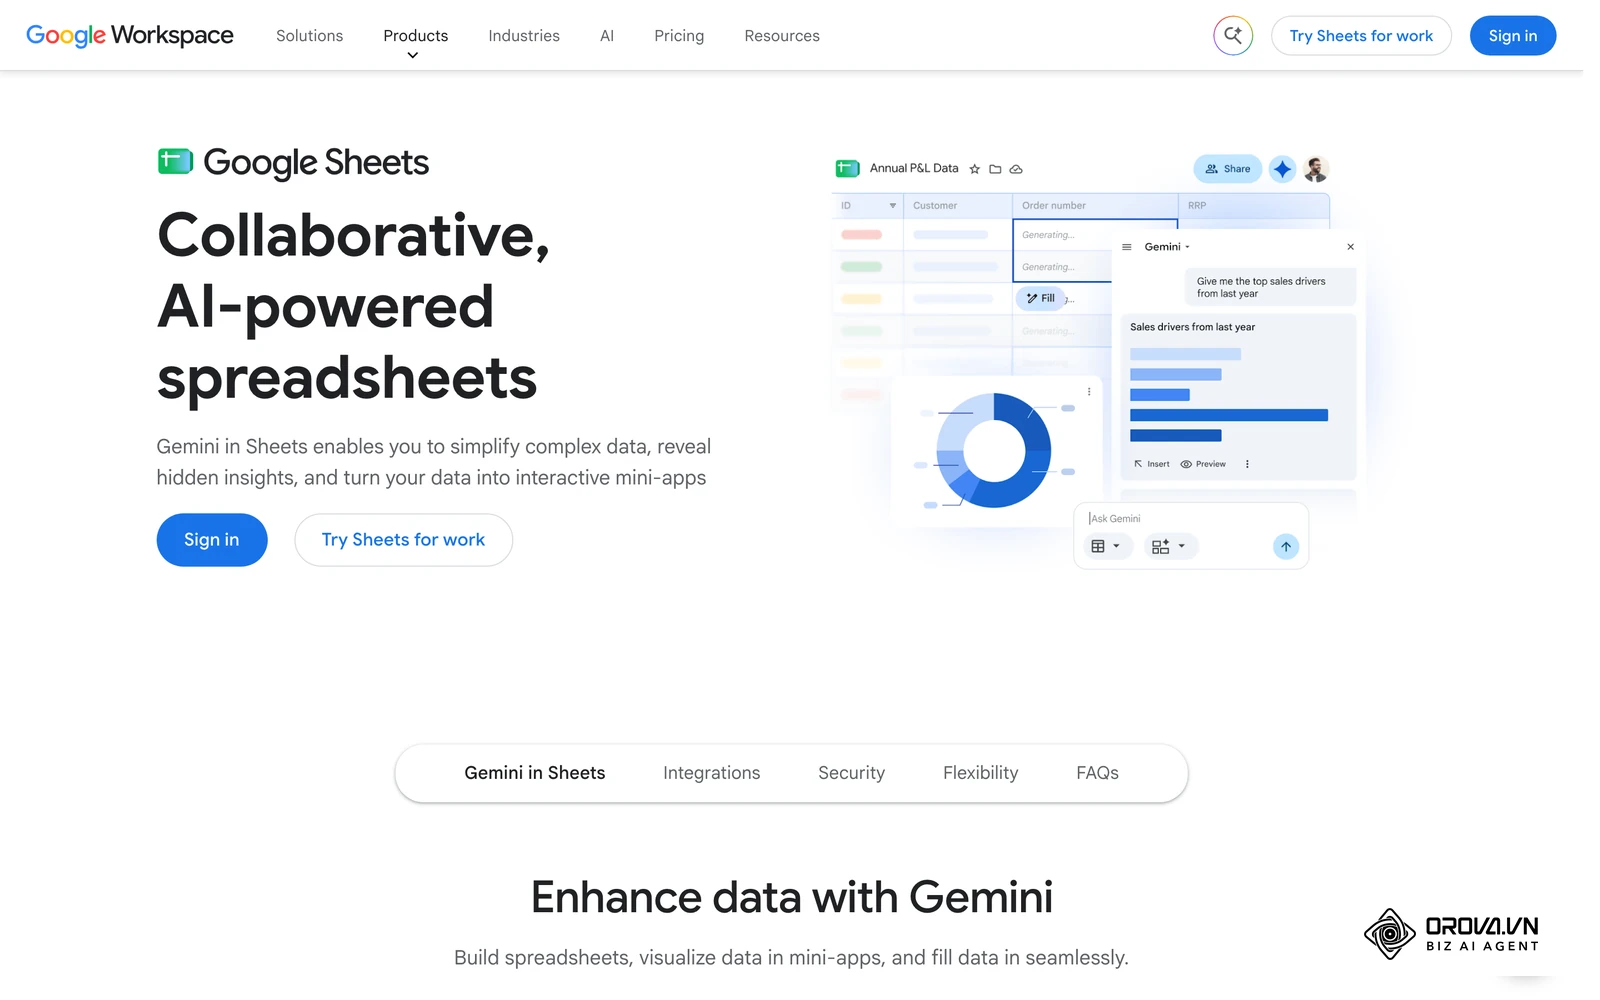
Illustrative example: Context: A social media manager at a rapidly growing independent cosmetics brand was struggling to maintain a presence across networks. Steps taken: They transitioned from chaotic daily manual posts to a rigorous weekly batching system utilizing a shared cloud spreadsheet. They mapped out thirty days of content in one sitting. Hurdles & Fix: Initially, the team forgot to log specific audio links for trending transitions, causing massive delays and confusion during the final scheduling phase. They fixed this by adding a mandatory, color-coded "Audio URL" column to their database that prevented moving to the next stage unless filled. Visible Results: The brand successfully maintained a steady tempo of two high-quality posts per day, entirely eliminating weekend manual labor and stabilizing their baseline viewership metrics.
When building your database, ensure you have a designated column tracking the exact status of the video (e.g., "Scripted", "Filmed", "Edited", "Scheduled", "Published"). This prevents duplicate uploads and provides a clear bird's-eye view of your content pipeline. If you plan to heavily integrate text generation, you might want to learn how to write Instagram captions with AI and apply those same prompt engineering principles to your short-form video copy, saving even more time during the preparation phase.
Step-by-step: From desktop to phone and trending sounds
This section breaks down the exact mechanical operations required to automate your publishing across different hardware ecosystems, while directly addressing the most prominent technical limitations.
Step 1: Choosing your scheduler ecosystem
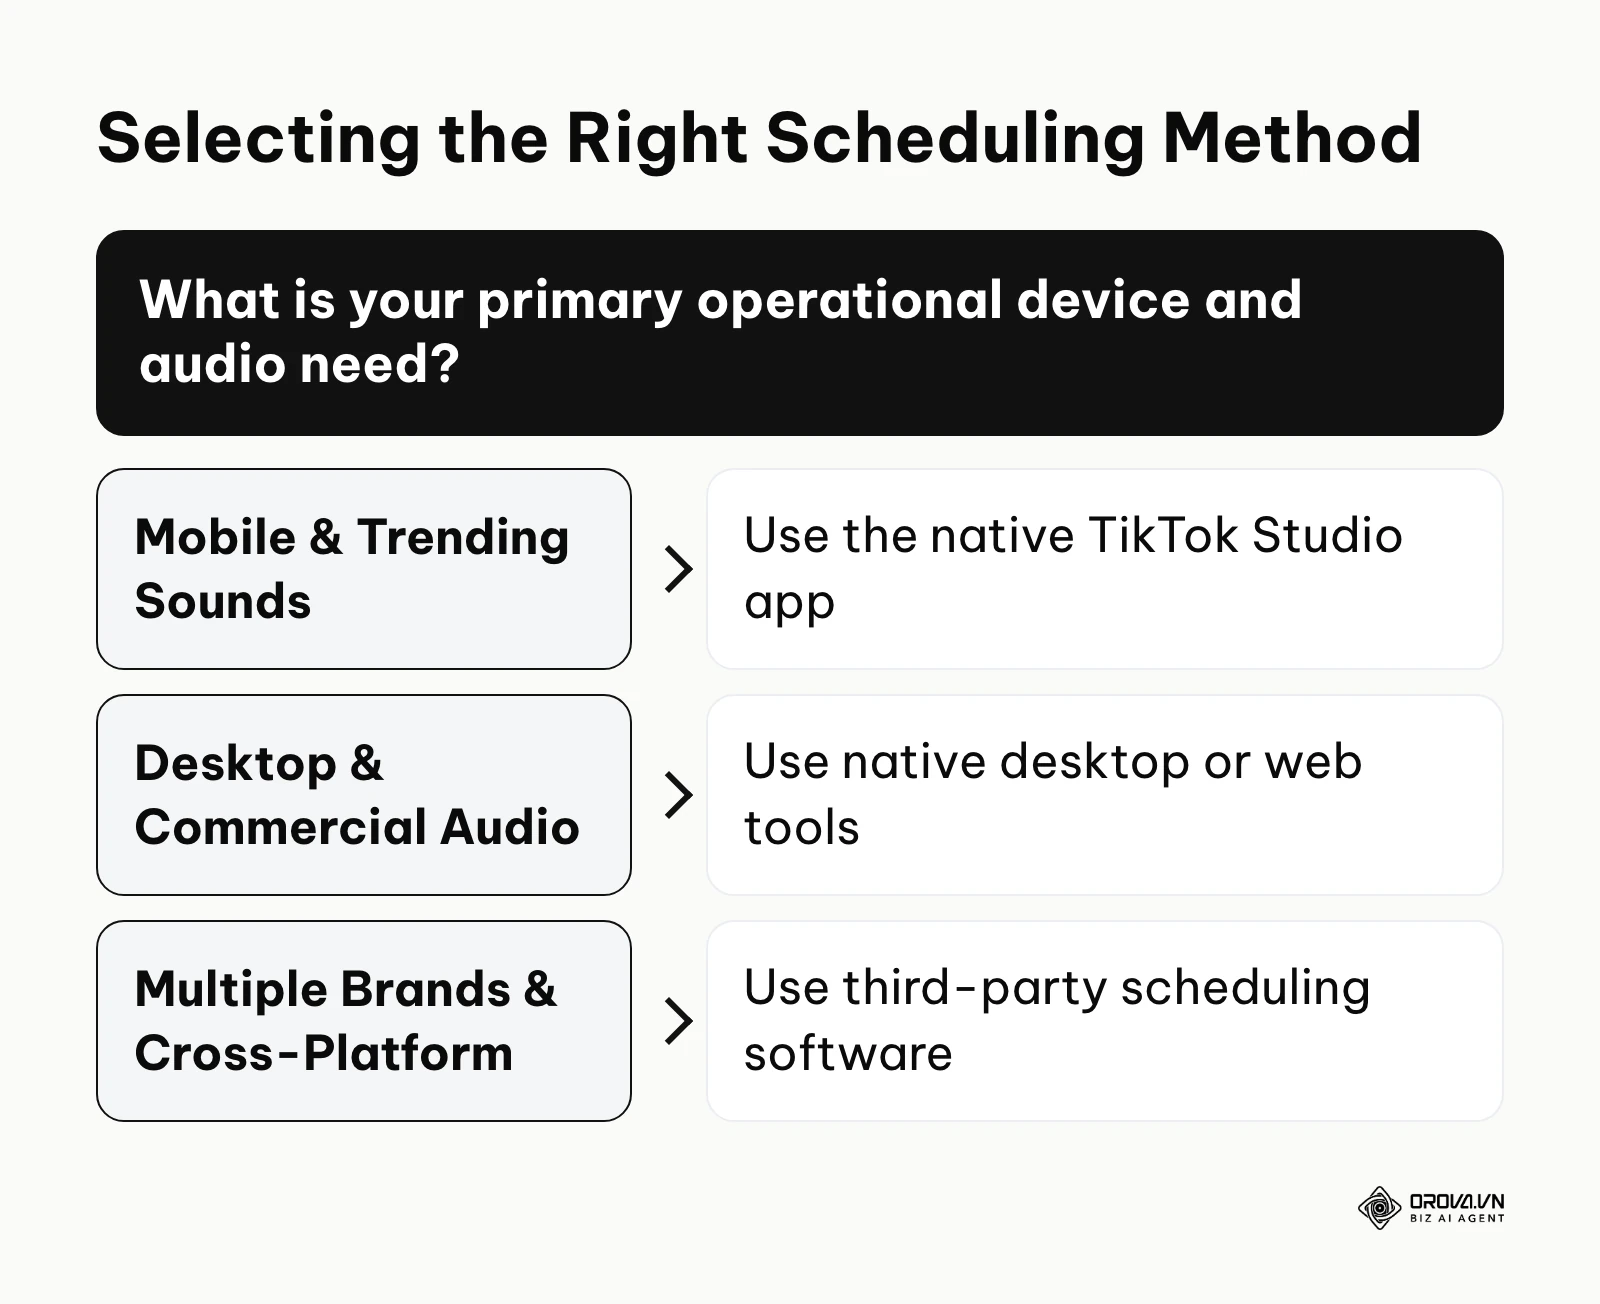
Your first major operational decision is selecting the environment in which you will execute the scheduling. You generally have three paths. First, the native desktop web browser interface. This is reliable, built directly by the platform, and ideal for users who edit on heavy desktop software like Premiere Pro. Second, the TikTok mobile app (and the TikTok Studio app), where a schedule option is available for some accounts. This is critical if you are searching for the best free tiktok scheduler that natively integrates with your phone's camera roll without requiring complex file transfers. Third, enterprise-grade third-party software. These tools are necessary when you manage dozens of accounts or need unified analytics dashboards, though they come with severe audio restrictions.
Step 2: How to schedule TikTok posts on phone
A massive gap in most online tutorials is the assumption that professional creators use desktop computers to schedule content. In reality, the vast majority of short-form content is shot, edited, and finalized directly on smartphones. Transferring a 4K vertical video from a phone to a laptop purely to click a calendar button is a broken workflow that damages file compression and wastes time.
Scheduling inside the app is rolling out unevenly: depending on your account and region, you may or may not see the option. If it is there, the flow typically looks like this (labels can differ slightly between app versions).
- Open the application and navigate to the main creation interface by tapping the central plus icon.
- Instead of recording natively, tap the "Upload" button to access your device's local storage.
- Select your finalized, fully edited video file. Do not select multiple clips unless you intend for the app's internal engine to stitch them together automatically.
- Proceed through the editing screen. Here, ensure any native text overlays are placed within the safe zones (avoiding the right-side icons and bottom caption area).
- On the final "Post" screen, locate the "More options" menu. This is often represented by a small gear icon or text link depending on the current UI version.
- Toggle the switch labeled "Schedule post".
- A time and date picker will appear. Select your desired future publishing slot. TikTok's help center describes a limited scheduling window (a short minimum lead time and a maximum number of days ahead), so check the current limits there rather than relying on old screenshots.
- Return to the main screen and tap the "Schedule" button, which has replaced the standard "Post" button.
If you do not see a schedule option in the app, use TikTok Studio in a desktop browser instead (Step 3). Once a post is scheduled, assume you cannot swap the video file; if you spot an error, delete the scheduled post and set it up again rather than hoping to patch it later.
Step 3: Scheduling via Desktop Web Browser
For agencies and brands relying on desktop workflows, the web interface is the standard operational standard.
- Navigate to the platform's main website and log into your account.
- Click the upload button to open TikTok Studio's upload page.
- Drag and drop your MP4 or WebM file into the designated upload zone. Pay strict attention to file size limits, which are prominently displayed.
- While the video uploads and processes, fill out your caption. The desktop interface provides a much clearer view for typing long-form SEO copy and organizing hashtags.
- Choose your video cover. The desktop tool allows you to scrub through the timeline with high precision to find the perfect frame.
- In the posting settings, change the posting time from "Now" to "Schedule".
- Pick the date and the time. Check the time zone shown next to the picker.
- Click the final "Schedule" button. Your scheduled videos then appear in TikTok Studio's list of posts, where you can review them before they go live.
Step 4: The sound strategy and copyright hurdles
This is the most critical technical barrier in automated publishing. If you operate a standard user account, you have access to the Original Audio library (trending sounds, memes, popular music). However, if you switch to a Business Account (scheduling itself does not require one), your music choices narrow. TikTok's help pages explain that business accounts use the Commercial Music Library, a set of tracks cleared for commercial use, rather than the full library of popular songs.
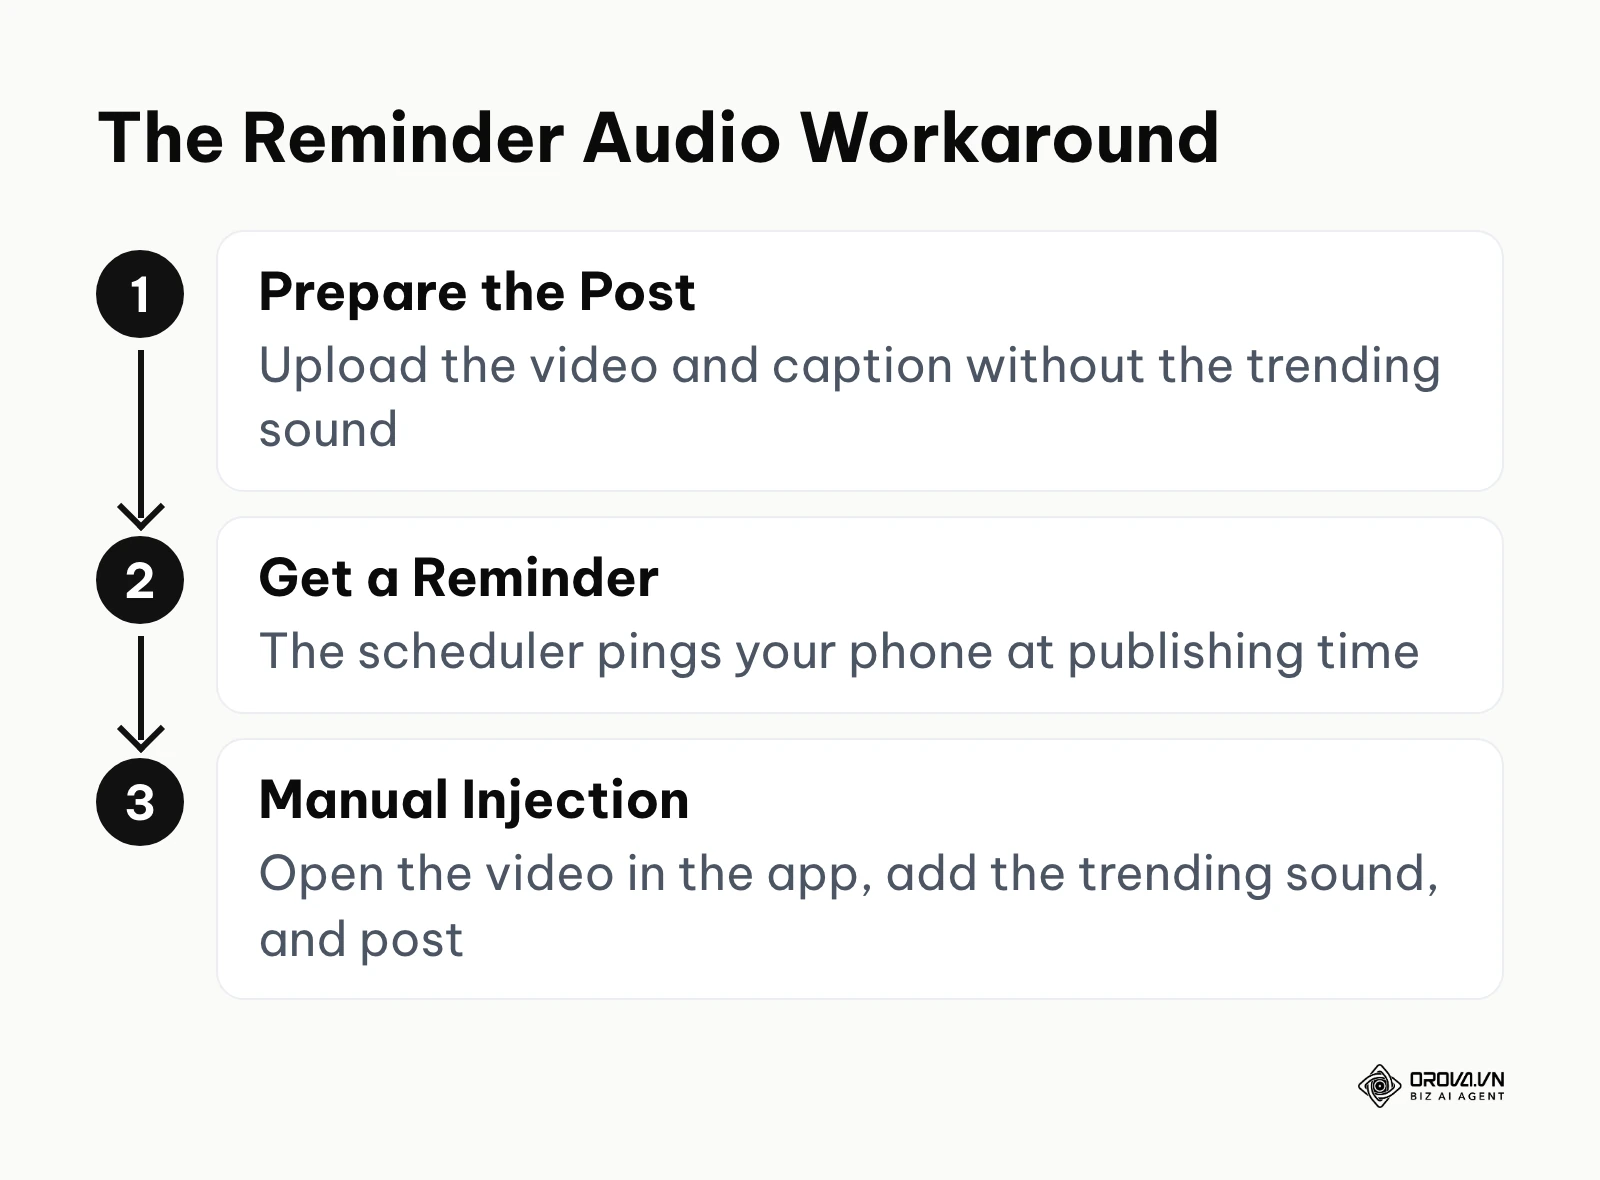
Furthermore, external third-party software cannot pick a sound from TikTok's library for you, because it only sends a finished file. If that file contains a copyrighted song, TikTok's copyright checks may mute the audio after publishing, which ruins the content.
How do you keep trending sounds while scheduling? You must employ specific workarounds.
Method A: The Notification Engine. Instead of full automation, you use a scheduler that offers reminder-style publishing. You upload all your assets to the tool. At the scheduled time, it sends a reminder to your phone. You open it, copy the prepared caption, and open the video in the TikTok app. You then manually add the trending sound from your saved folder and post immediately. This provides the organization of scheduling with the audio access of manual posting.

Method B: Bake in cleared audio. If you edit in an app such as CapCut, choose tracks that are labelled for commercial use and add them during editing, so the audio is part of the file before it reaches any scheduler. This does not make a copyrighted hit safe; it simply means the music you schedule is music you are allowed to use.
Step 5: Handling Carousels and Stories
Standard scheduling protocols are heavily optimized for single video files. Image carousels (multiple photos set to music) and ephemeral content (Stories that disappear after 24 hours) possess entirely different backend architectures.
Support for scheduling photo posts differs between TikTok's own tools and third-party schedulers, and it changes over time. Before you plan a month of photo slides, test one photo post through the exact tool you intend to use and check how it looks once live. If the result loses the sound or the swipe format you wanted, publish photo posts from the TikTok app instead.
Stories are built for quick, raw updates, so treat them as a manual format. If you must plan Stories, you should prepare the assets in your camera roll and set calendar reminders on your phone to upload them manually.
Step 6: The pre-publish checklist
Automation breeds complacency. When you schedule thirty videos at once, a single recurring error will ruin an entire month of content. You must execute a rigorous quality assurance check before finalizing the queue.
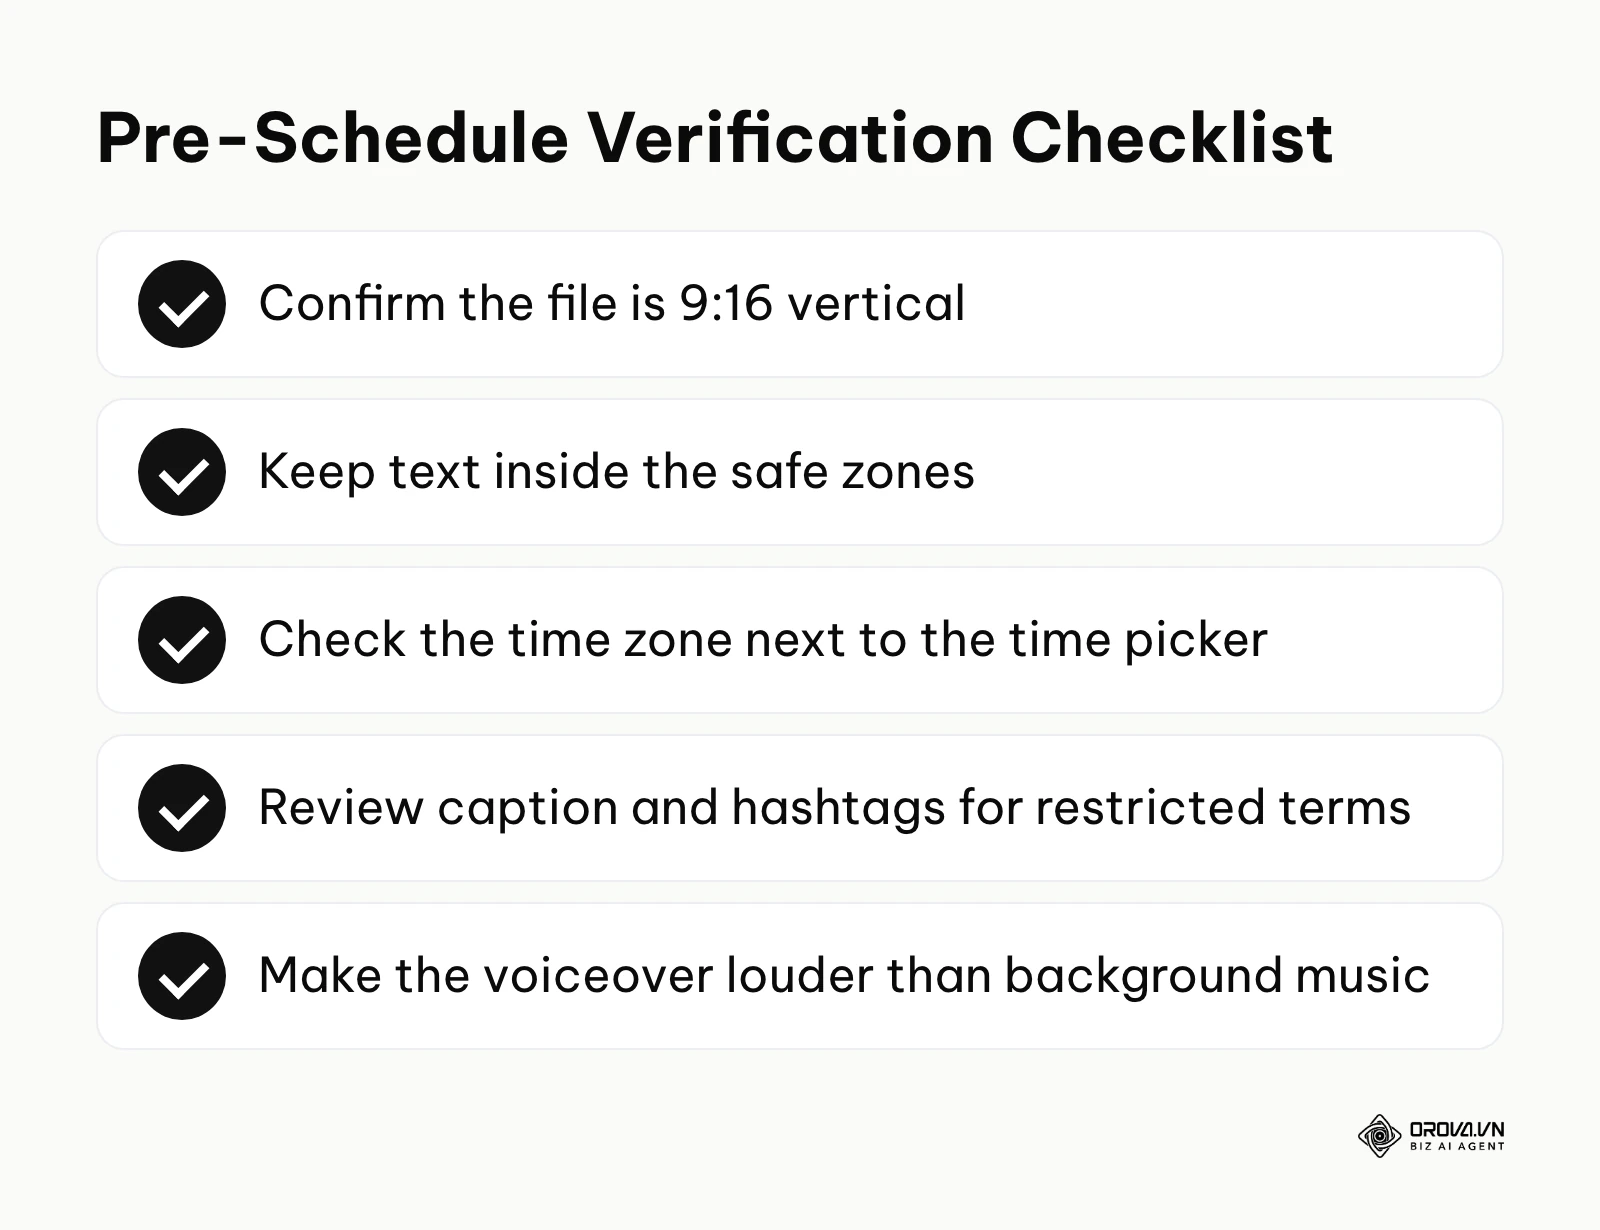
First, verify the aspect ratio; the file must be strictly 9:16 (vertical). Second, check the text safe zones; ensure crucial visual information isn't blocked by the platform's standard UI elements like the like button or caption block. Third, confirm the time zone; desktop web browsers often default to your computer's local time, but some third-party apps might default to Coordinated Universal Time (UTC) if not configured correctly. Fourth, review the caption for banned words or restricted hashtags that could trigger an algorithmic shadowban. Finally, check the audio mix; ensure your voiceover is distinct and much louder than any background music you have baked into the file.
Step 7: Troubleshooting "failed to publish" errors
The most agonizing experience in content management is waking up to discover your scheduled post failed to go live. When this occurs, do not simply try uploading it again immediately. You must diagnose the root cause to prevent a recursive error loop.
Common causes include corrupted files (often caused by transferring them via messaging apps rather than cloud storage), export settings outside the platform's file limits, or a scheduling tool losing its connection to your account. Check the notification or error message first, then fix the cause before you upload again.
Illustrative example: Context: A solo travel vlogger was exploring remote locations and needed to maintain a daily presence. Steps taken: They edited a full week of high-definition videos and scheduled them while sitting in an airport lounge before a long trip without internet access. Hurdles & Fix: A few days later, they realized one video had failed to publish. A Wi-Fi drop during the airport upload had corrupted the transfer. They fixed this by using their local backup, deleting the broken scheduled post, and uploading the file again over a stable connection. Visible Results: The rest of the week went out on time while they were offline, and the one gap was closed within a day.
Plan TikTok alongside the rest of your channels. Orova Social lets you compose a post once and publish it to eight channels, including TikTok, Instagram, Facebook and YouTube, with scheduling, a day, week or month content calendar, and AI-written captions in your brand voice.
Deep Analysis: Does scheduling TikTok posts hurt views?
The most pervasive myth in the digital marketing community is that utilizing scheduling tools directly causes a reduction in algorithmic reach. Many creators vehemently argue that you must post manually, claiming the platform artificially suppresses automated content. To answer the question—does scheduling tiktok posts hurt views—we must analyze how the ingestion algorithm actually functions.
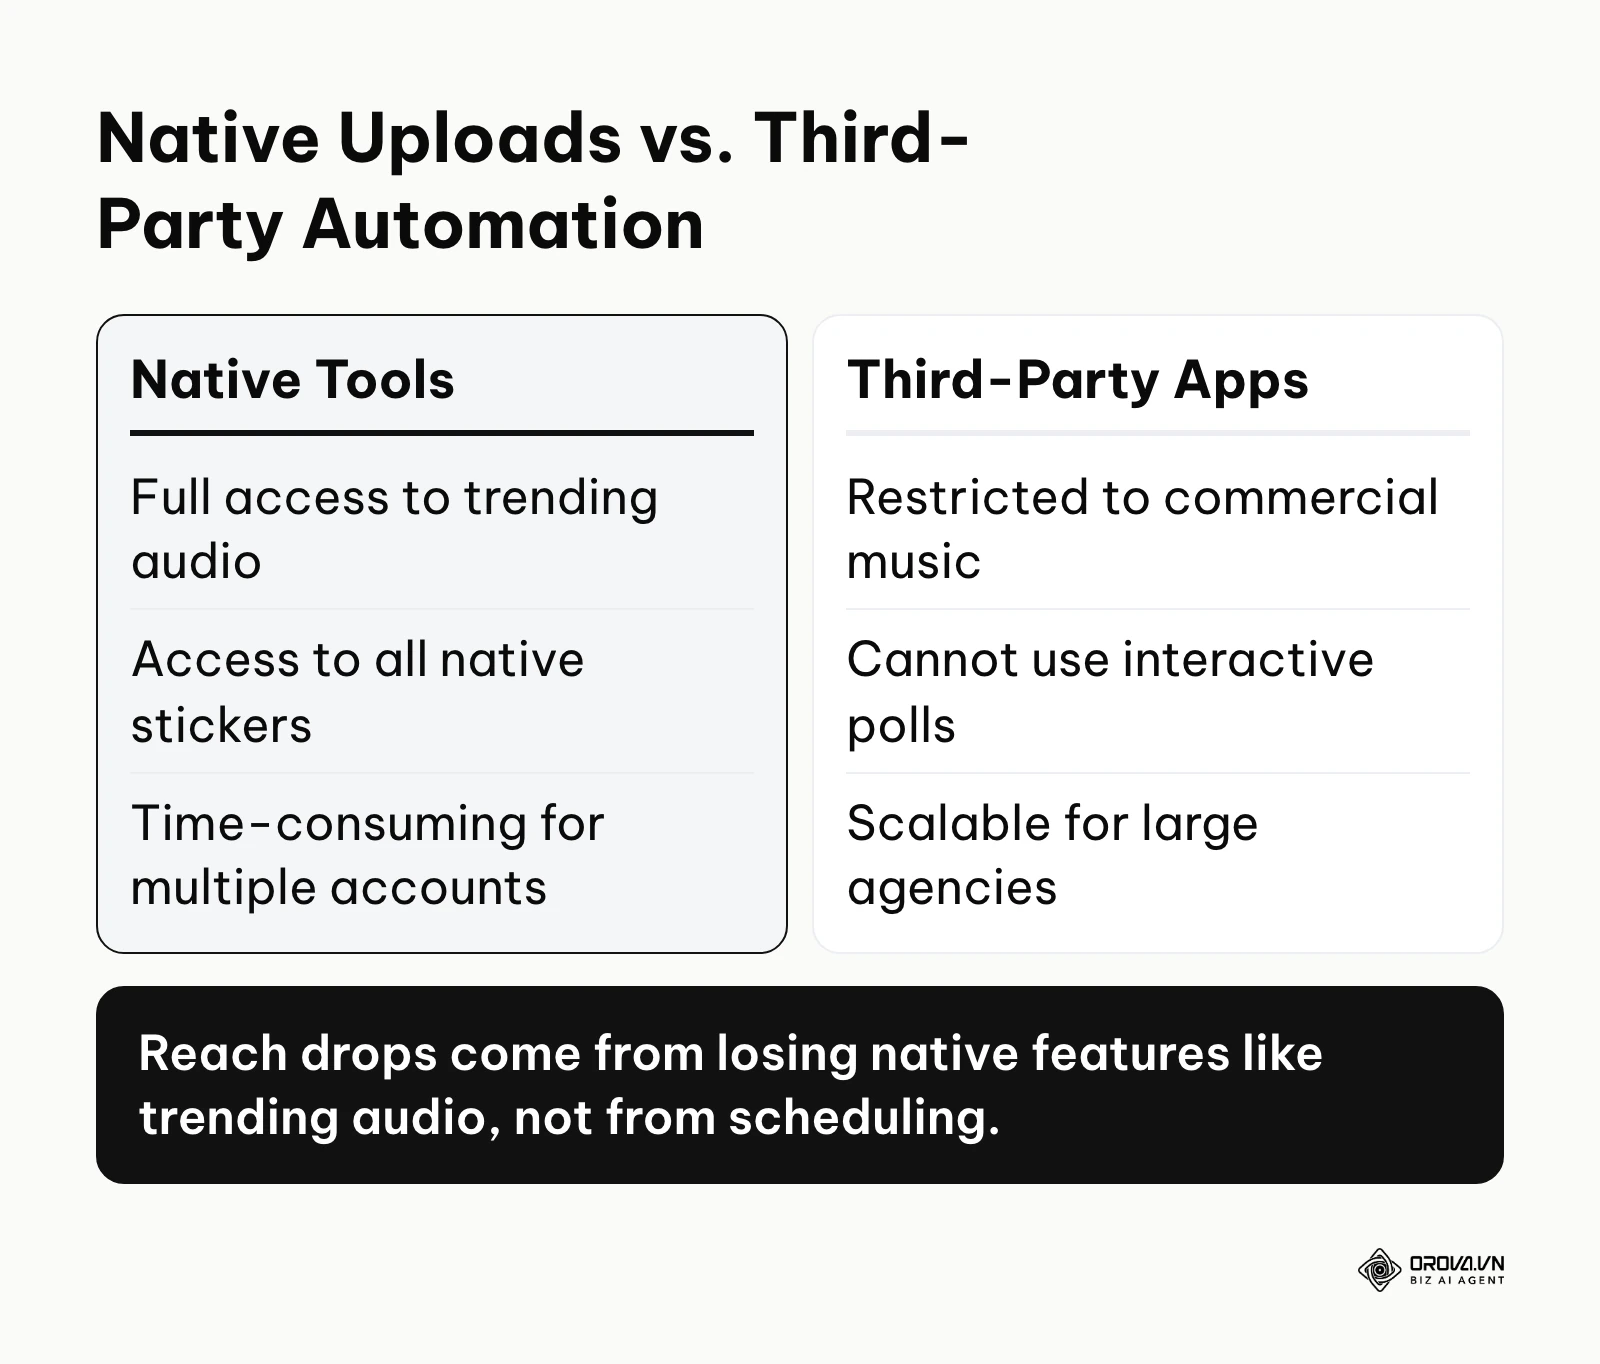
TikTok has not published anything saying that scheduled posts are ranked lower, and TikTok Studio offers scheduling itself, which would make little sense if scheduling were punished. What viewers do with the video (watching, rewatching, commenting, sharing) is what drives distribution.
Why, then, do so many creators experience a drop in views when they switch to scheduling? The correlation is real, but the causation is misunderstood. The drop in reach is almost entirely due to the loss of native features. When you schedule via third-party tools, you typically lose access to trending Original Audio, native interactive stickers (like polls or Q&A boxes), and platform-specific location tags. These native features tend to increase viewer retention and interaction. By stripping these elements out to achieve automation, you inadvertently make your content less engaging.
| Method | Ideal Use Case | Critical Weakness |
|---|---|---|
| Native App Scheduling | Solo creators prioritizing maximum engagement. | Highly time-consuming; no unified dashboard for multiple brands. |
| Third-Party Automation | Large agencies managing dozens of corporate accounts. | Forced reliance on commercial audio; lack of interactive stickers. |
| Hybrid (Reminder Method) | Creators balancing scale with trend participation. | Requires manual intervention at the exact time of posting. |
If you run a corporate account where talking-head educational content is the priority and commercial background music is sufficient, third-party automation will not hurt your views at all. However, if your brand identity relies on lip-syncing to viral audio trends, automating through external tools will hurt your reach, because you cannot attach the trending sound and copyrighted music in the file may be muted.
If you are expanding your strategy to other networks, you will encounter similar architectural challenges; it is worth reading how to schedule Instagram posts and how to schedule a Facebook post to see how the Meta side of your calendar works differently.
Measuring the impact of your scheduling strategy
Implementing an automated workflow is a significant operational shift, and you must quantitatively measure its impact to ensure it is actually benefiting your business. You should track specific operational and performance metrics to validate the new system.
| Metric to Track | Meaning and Business Value | Danger Threshold |
|---|---|---|
| Time Saved per Week | Hours recovered from manual uploading tasks. | Less than 2 hours saved indicates a broken workflow. |
| Publishing Consistency | The variance in your actual posting schedule vs planned. | Missing more than 10% of scheduled slots due to technical errors. |
| Average View Duration | How long users watch the scheduled videos. | A sudden 20% drop after switching to automation indicates audio/quality issues. |
| Cross-Platform Output | Total number of unique assets deployed across networks. | Stagnant volume despite using automation tools. |
You should establish a baseline before you begin scheduling. Record your average views, engagement rate, and time spent managing the account for two weeks. Then, implement your new automated content calendar and run it for a full month.
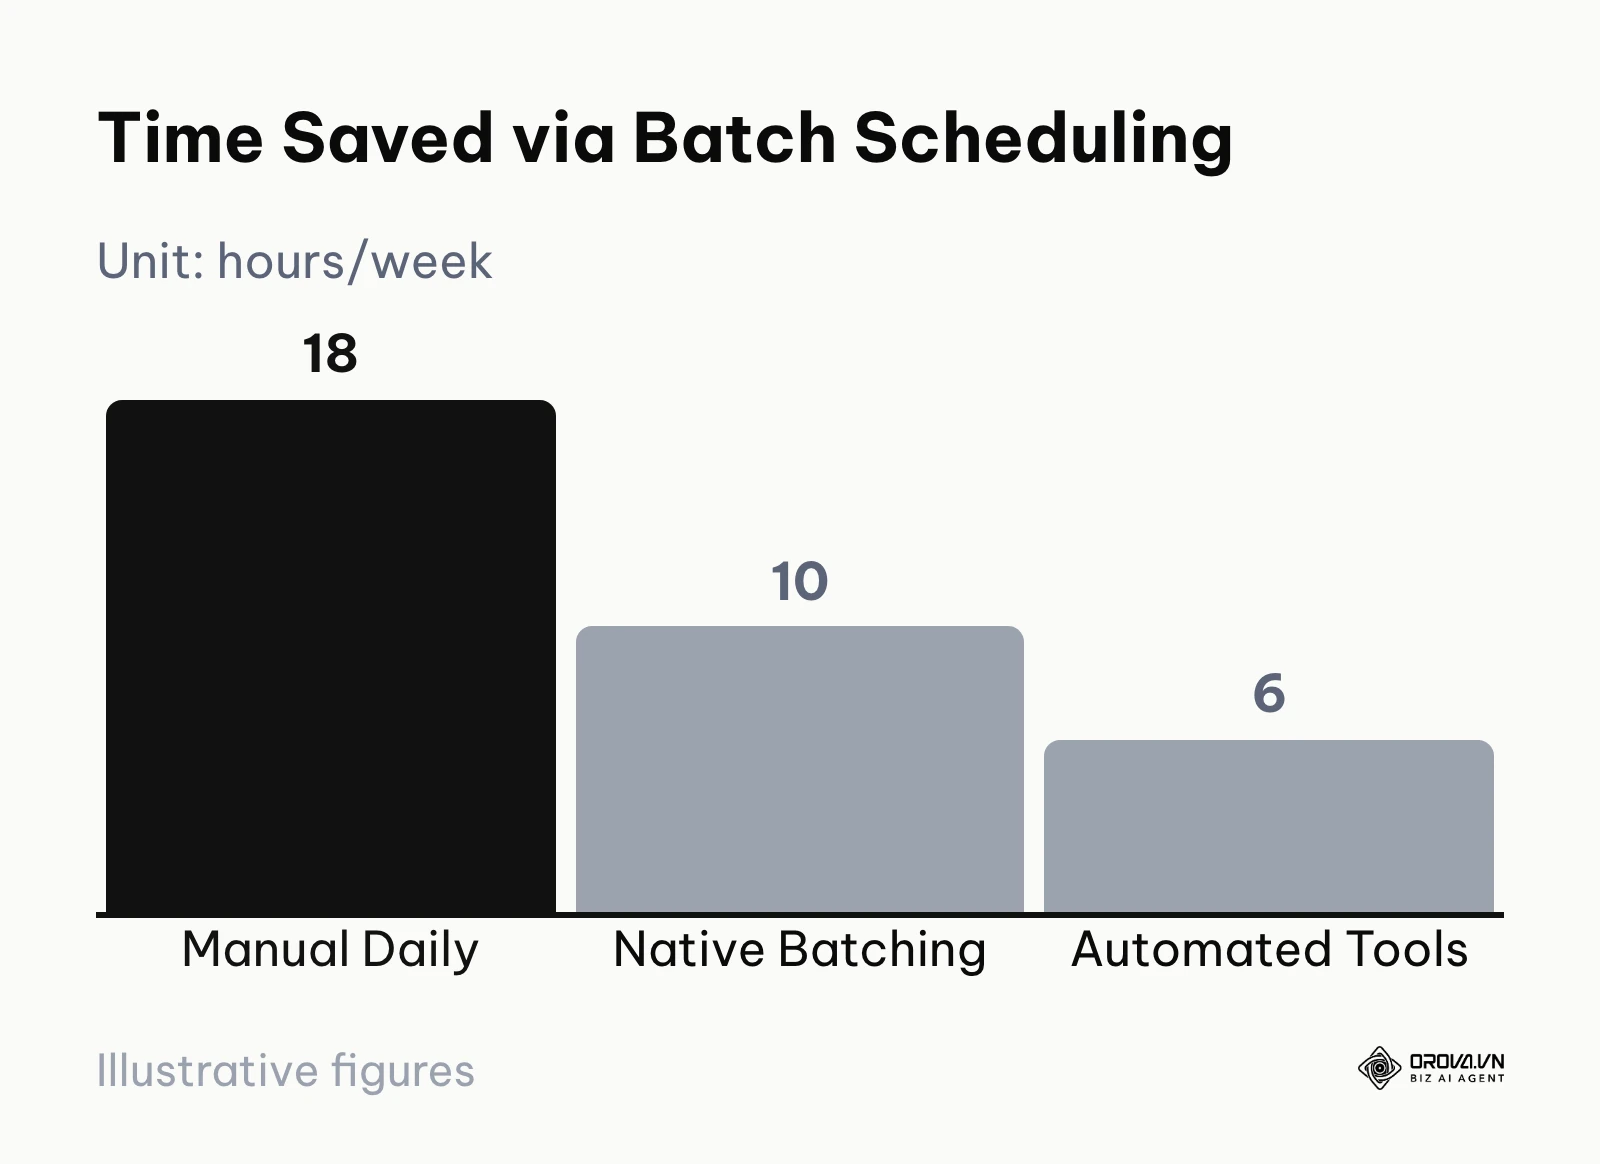
Illustrative example: a manager who spends 18 hours a week posting manually every day might bring that down to around 10 hours with native batching, and to around 6 hours once a scheduling tool handles the publishing step. Those figures are an example of what to measure, not a benchmark.
At the end of the month, compare the data. You will likely see a slight initial dip in raw views as you adjust to new audio limitations, but this should be vastly offset by the massive increase in total output volume and the sheer amount of time saved by your team. If you are integrating this data into a broader corporate reporting structure, you should carefully select the right marketing dashboard KPIs to accurately reflect the ROI of this operational efficiency.
Turn one long recording into a week of short videos. Orova Social cuts long video into 9:16 vertical clips with subtitles, schedules them, and publishes a post automatically if its scheduled time was missed. It is free until July 7, 2027, no card needed.
Common mistakes when scheduling TikTok posts
Transitioning from manual posting to an automated system introduces a new category of potential errors. Even seasoned social media professionals frequently stumble over these technical hurdles.
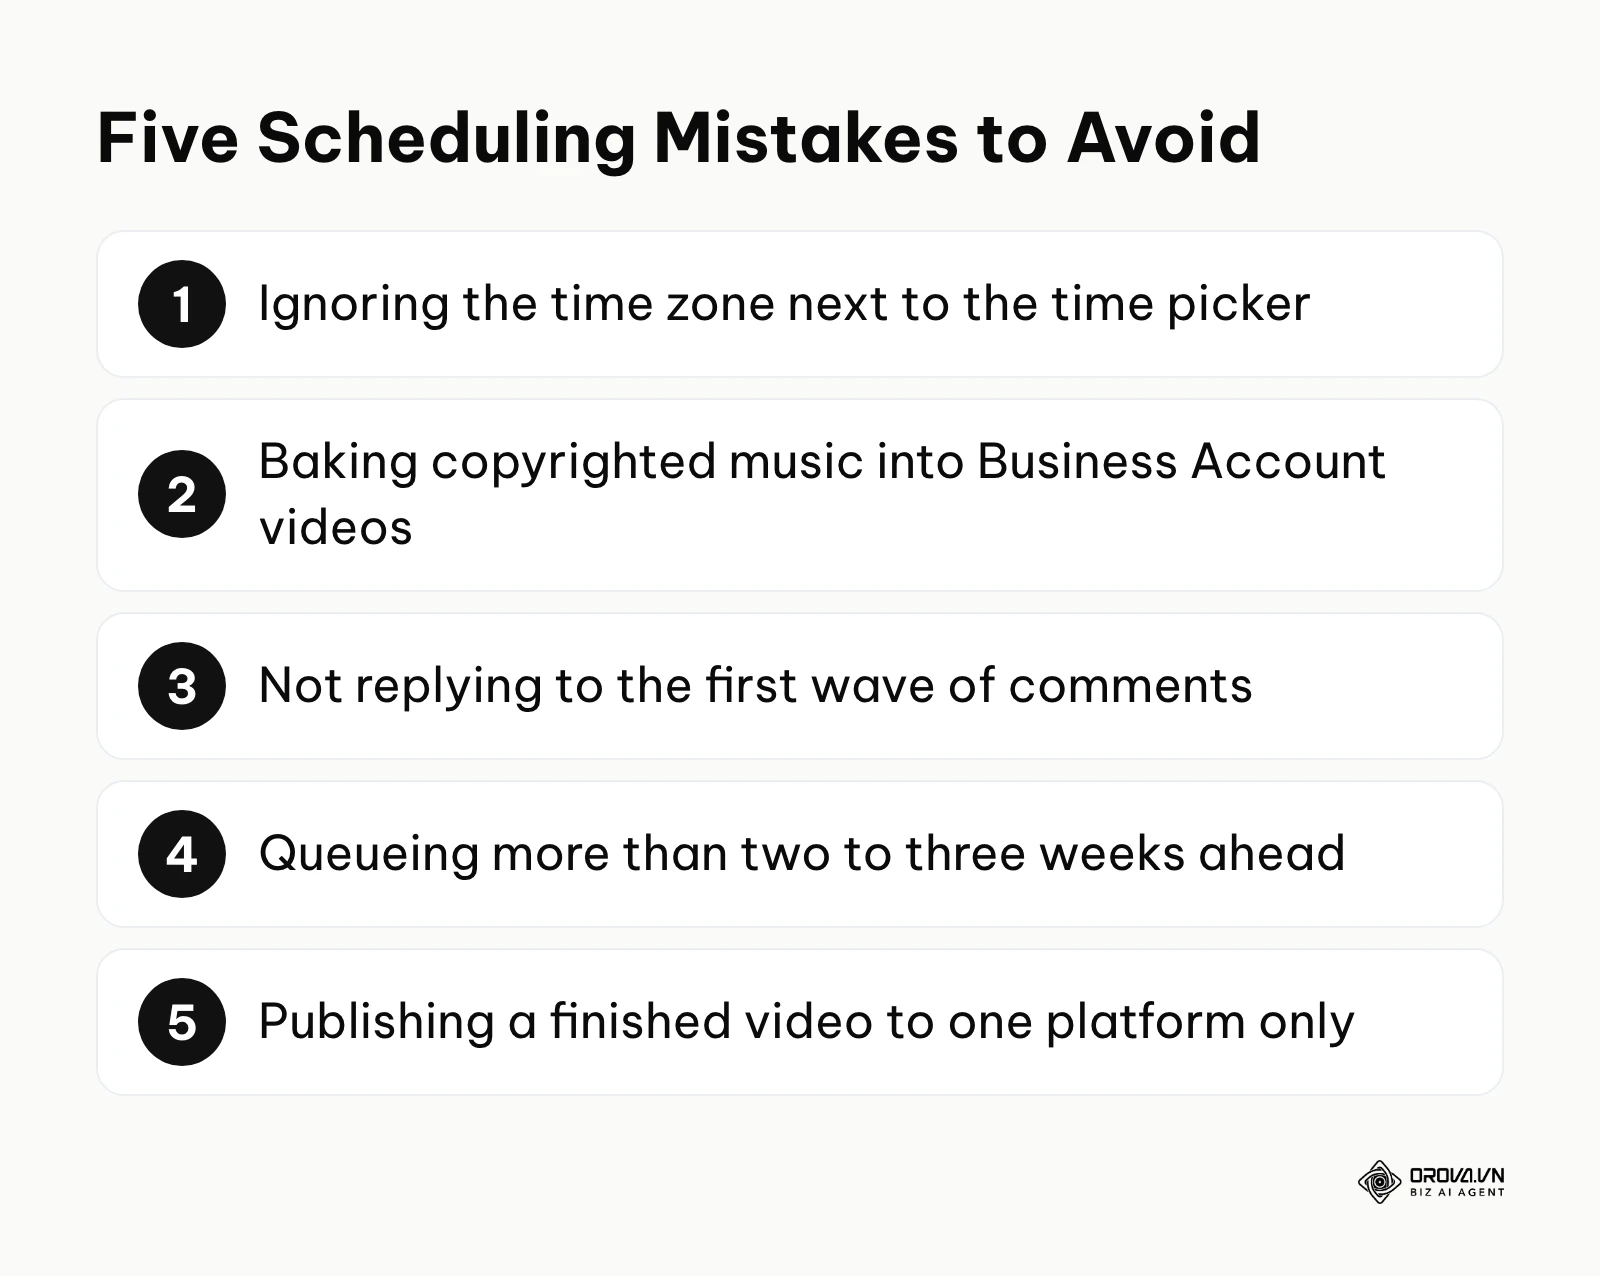
The most catastrophic mistake is ignoring time zone configurations. If you are based in New York but your target audience is entirely in Tokyo, you must calculate the offset precisely. Desktop browsers often default to your machine's local time, while cloud-based schedulers might default to their server's location (often UTC). Always triple-check the specific timezone label next to the time picker before hitting confirm.
Another frequent error is utilizing the wrong music library classification. As detailed earlier, a Business Account does not need to be upgraded for scheduling, but it does narrow your music to the Commercial Music Library. Attempting to bypass this by downloading a trending song from another site, baking it into your video file, and scheduling it is likely to end in a muted video, because copyright checks look at the audio itself, regardless of how the file was uploaded.
A critical strategic failure is "post and ghost" behavior. Scheduling a video allows you to step away from the computer, but the first comments are where a conversation starts. If your video publishes automatically at 2:00 PM, but you don't open the app to reply to the first wave of comments until 8:00 PM, you miss the moment when replies keep viewers coming back to the thread.
Batching too far in advance is also a subtle trap. While it feels productive to schedule three months of content in one day, short-form video culture shifts weekly. A meme or format that is highly relevant today will feel painfully outdated eight weeks from now. Limit your automated queue to a maximum of two to three weeks to maintain cultural relevance.
Finally, neglecting cross-platform syndication represents a massive missed opportunity. If you have already invested the capital to produce a high-quality vertical video, manually uploading it to only one platform is highly inefficient. When you scale, a social media scheduler that publishes one video to several networks from a single calendar removes most of that repetitive work.
Illustrative example: Context: A freelance digital manager was handling three distinct restaurant clients and attempting to scale their operations. Steps taken: They utilized a desktop tool to schedule a full month of highly produced food review videos for all three accounts simultaneously, aiming to take a vacation. Hurdles & Fix: They failed to check the account type limitations. All three accounts were classified as Business profiles, and the manager had used popular, copyrighted hip-hop tracks. Upon publishing, every single scheduled video was instantly muted by the platform's copyright scanners, resulting in zero engagement. They fixed this crisis by immediately pausing the queue, switching back to native scheduling workflows, and manually applying cleared Commercial Music Library tracks to the remaining videos before finalizing the schedule. Visible Results: They restored audio on all subsequent posts, and viewer retention recovered once the videos were no longer silent.
Future trends in TikTok scheduling: Author's perspective
As the ecosystem matures, the underlying technology governing how we distribute content is undergoing a massive shift. Based on my analysis of current API developments and platform behavior as of 2026, I believe the landscape of video automation will change drastically in the coming years.
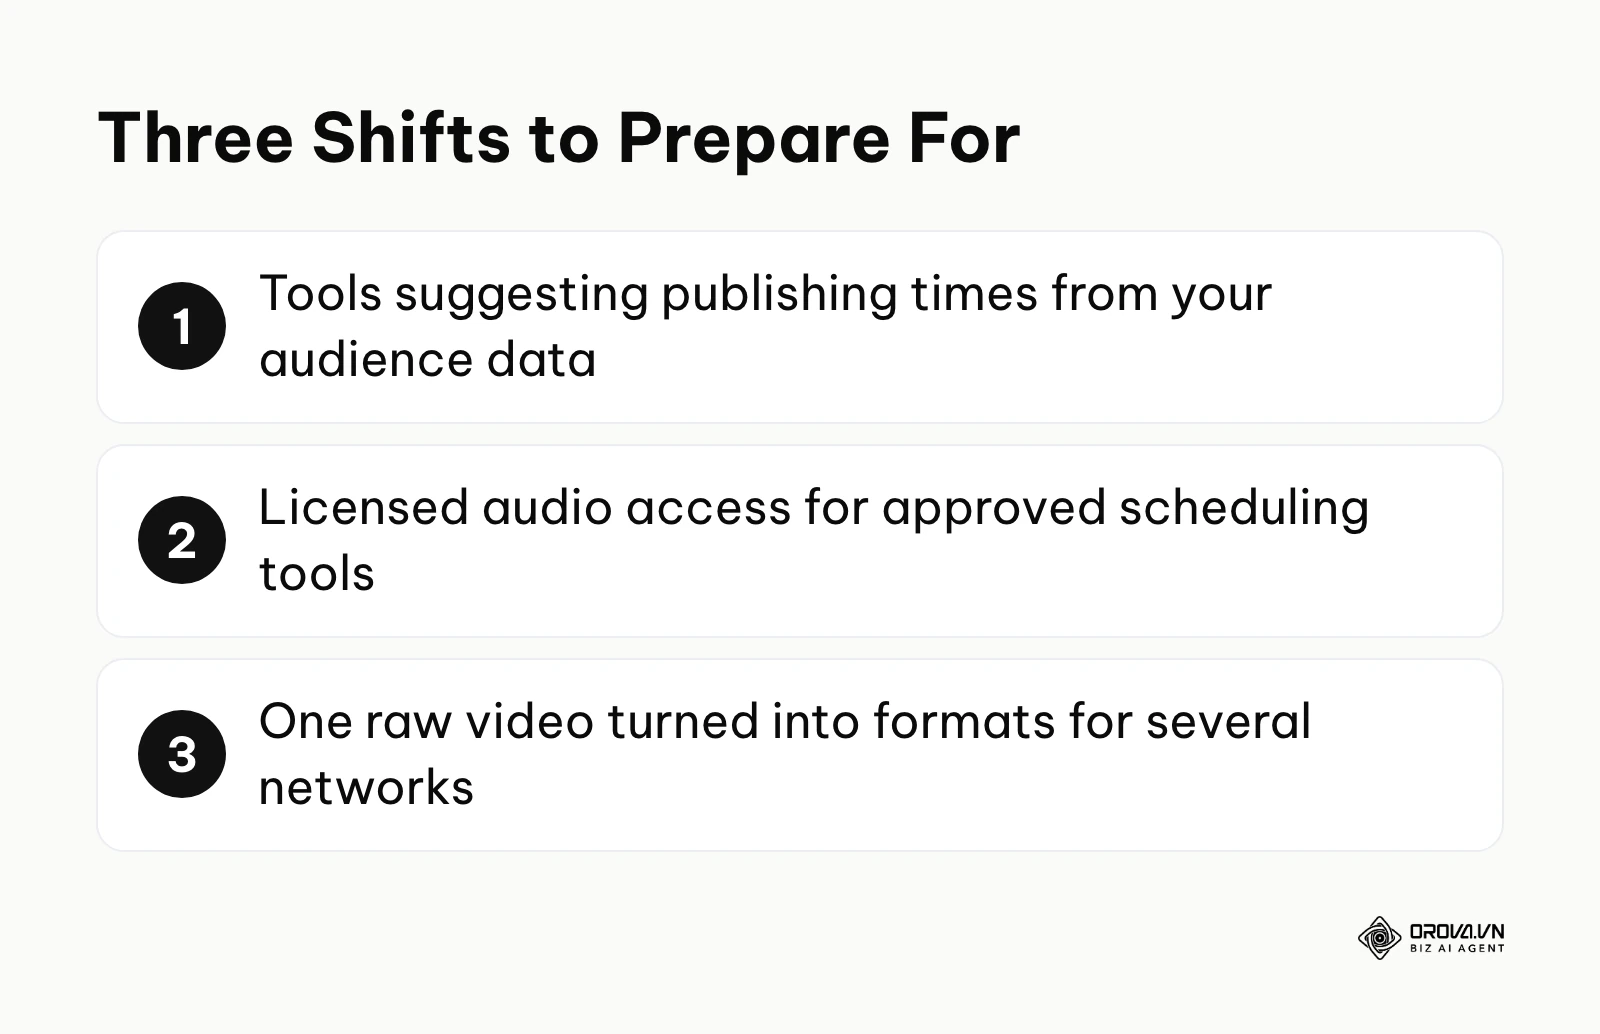
The rise of AI-driven timing optimization
Currently, most scheduling tools require you to manually select a date and time based on historical analytics. I am observing a rapid shift toward predictive publishing. In the next two to three years, I believe scheduling interfaces will completely remove the manual time picker. Instead, I expect tools to suggest or pick publishing times for you based on when your own audience tends to be active. To prepare for this, you should focus less on finding "the perfect time to post" and more on building a highly consistent content library that the AI can draw from.
Seamless API integration for audio licensing
The current friction between third-party schedulers and native trending sounds is unsustainable for the platform's enterprise growth. I think it is plausible that platforms will eventually open some form of licensed audio access to approved tools. Instead of a hard block, third-party tools might gain the ability to dynamically link to native audio tracks via reference codes during the scheduling phase. You should prepare by organizing your audio strategy tightly; start keeping a database of sound IDs alongside your video files, anticipating a workflow where you paste a sound ID into your scheduler rather than relying on manual intervention.
Automated repurposing and format conversion
The burden of manually formatting one video for four different platforms is immense. I strongly lean toward a future where the scheduling tool itself acts as the primary post-production engine. You will upload a single raw asset, and the software will automatically generate the captions, crop the aspect ratio intelligently tracking the subject's face, and schedule it across networks simultaneously. If you want to understand how automation is fundamentally altering the broader marketing landscape beyond just video, looking into whether an AI marketing agency model fits your long-term vision is a critical next step.
Frequently asked questions about TikTok scheduling
Can you schedule a post that is currently sitting in your native drafts folder?
Do not count on it. Whether a draft can be scheduled depends on the tool and the app version you are using. The dependable route is to keep the original finished video file, start a new upload, and choose the schedule option before you confirm.
Why can't I use a specific popular song when trying to schedule my video?
There are two usual reasons. If you operate a Business Account, you are limited to the Commercial Music Library, because mainstream music is not licensed for commercial use. If you schedule via a third-party application, the tool can only send a finished file, so it cannot attach a sound from TikTok's in-app library at all.
How does AI help with the overall content planning and scheduling workflow?
AI drastically accelerates the preparation phase. It does not remove the audio limits of scheduling tools, but AI tools can analyze your past top-performing videos to suggest future topics, automatically generate SEO-optimized captions based on your video transcript, and identify the most relevant hashtag clusters. This reduces the time spent in the spreadsheet calendar from hours to minutes.
What is the maximum advance time allowed for scheduling a video natively?
TikTok sets both a minimum lead time and a maximum number of days ahead for native scheduling, and these limits can change, so check TikTok's help center for the current numbers. The window is measured in days, not months. If you need to plan months ahead, keep the finished assets in your spreadsheet and move them into TikTok's scheduler once they fall inside the window.
Where to start?
If you currently have zero scheduling infrastructure and suffer from daily panic trying to produce a video, do not attempt to build a massive automated system today. Your first step is to simply utilize the native desktop web browser. Edit your video as usual, transfer it to your computer, and schedule tomorrow's post. Achieving just 24 hours of breathing room is the critical first milestone.
If you are already using your phone to edit but constantly lose track of your files and audio links, your immediate action should be formalizing a database. Open a blank spreadsheet, create the core columns (Date, Video Topic, Audio Link, Status), and log your next three ideas. Do not shoot any video until the spreadsheet is populated.
If you are a manager handling multiple brands and feeling overwhelmed by the native app's limitations, you must transition to a professional workflow immediately. Your step today is to audit your accounts. Determine which brands rely on trending sounds and which can survive on commercial music. For the commercial accounts, begin migrating them to a centralized third-party software to instantly reclaim hours of manual labor, finally mastering how to schedule tiktok posts at scale.
About the author

Builder of Orova
Nguyễn Đỗ Trọng Ân has 8 years of experience in marketing, including 6 years managing market development across Asia. He builds Orova, a Biz AI Agent that never sleeps: it plans, runs and optimizes work for businesses.
Run your business with AI Agents
Orova is the always-on Biz AI Agent — it plans, runs, and optimizes the work for you.
Save time, unlock productivity.