
This page is written for someone who has never opened Orova. Every section starts by explaining the new words, then moves on to the buttons you press.
Orova Link & QR lives inside your workspace. The module has three tabs: Create link & QR, List and Analytics. The guide follows the order you will actually work in: pick a code type, enter the content, customise the look, download it, then decide whether to keep it static or upgrade it to a dynamic code.
One principle runs through everything: a static QR code is free but cannot be edited and cannot count scans; a short link bundled with a dynamic QR costs quota every month, and in return you can change the destination after printing and read the numbers.
00 · Introduction
What Orova Link & QR is
The module does two things: QR codes for other people to scan with a phone, and short links you can paste where space is tight. Both can be measured if you choose the dynamic version.
QR code
The black and white square a phone can scan. Inside it sits a small piece of content: a link, a Wi-Fi password, a phone number or a contact card. Think of it as a sign that machines read instead of eyes.
Short link
A short address shaped like orova.vn/l/<code>. Anyone who opens it is forwarded to your destination page. Paste it in an Instagram bio, for example, instead of a long URL.
Workspace
The shared space for you and your colleagues inside Orova. Every QR code and link belongs to the workspace, not to one person. Anyone with edit rights in that workspace can see and change them.
Where you use them in real life: a code on a café menu so guests can see the dishes, a code on a flyer leading to a promotion page, a code on a trade-show standee, a Wi-Fi code stuck on the table, or a short link in a social media bio.
The most important thing to remember before you start: there are two kinds of code. A static code bakes the content into the image. A dynamic code only holds an Orova short link, and the real content sits on the server, so you can change it whenever you like.
Note
What you need before you start
01 · Getting in
Your first visit and the three tabs
The module only has three tabs. Once you know what each one does, you will not get lost.
Tab
The row of words across the top of the screen you click to move between sub-screens. Like the dividers in a filing cabinet.
You come to this screen whenever you need a new code, want to look up an old one, or want to know how many people have scanned it.
Open the module
- 1
Open your workspace. Sign in to Orova and pick the workspace you want to work in. If you have several, make sure you are in the right one — the code you create will live there.
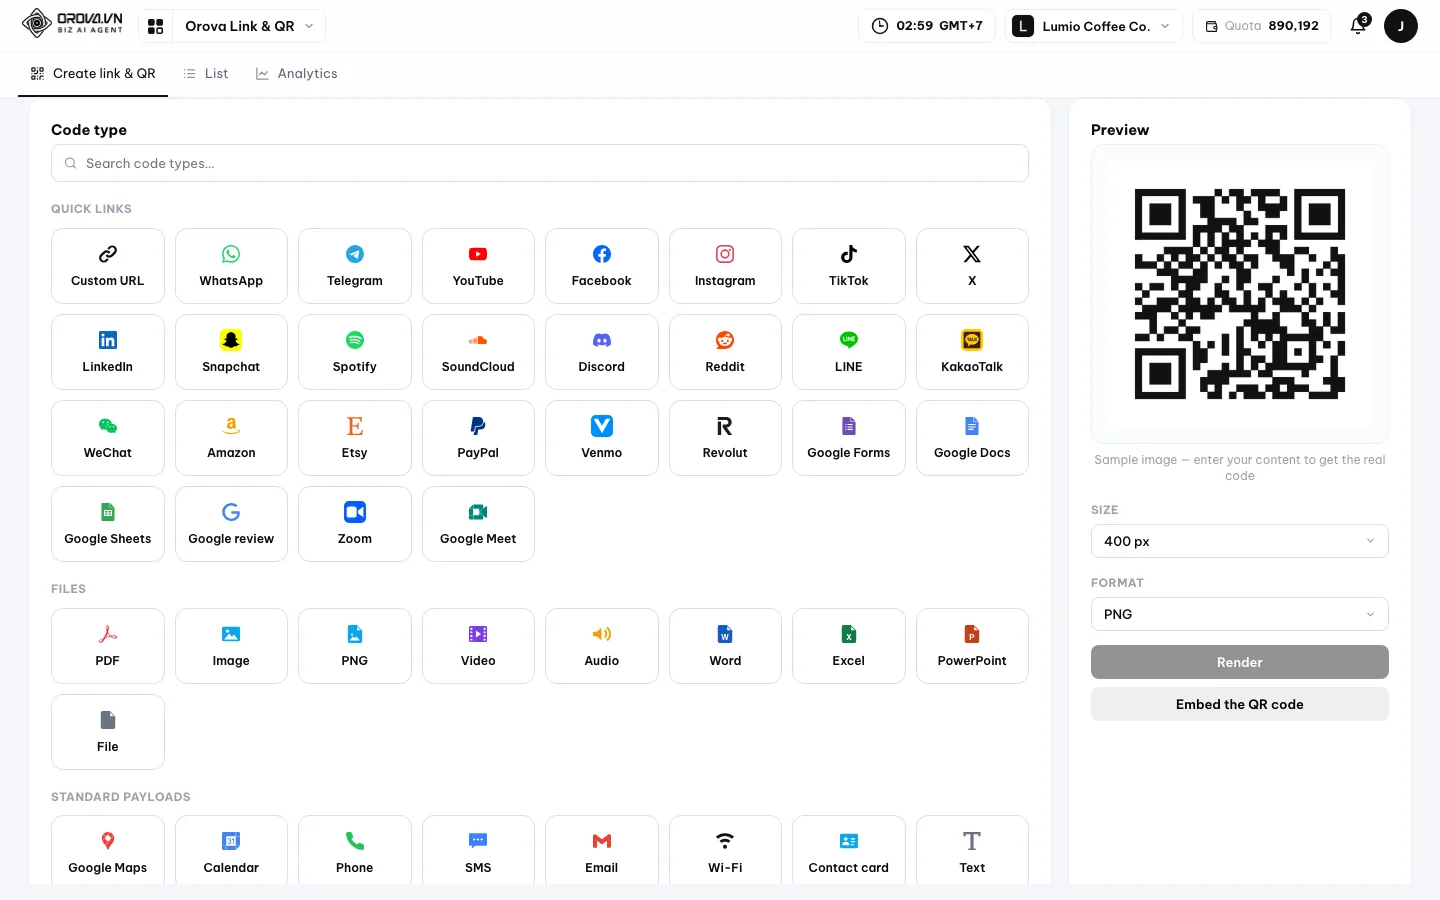
Create link & QR tab of Orova Link & QR in the Lumio Coffee workspace. - 2
Open the module menu and pick
Orova Link & QR. Click the module name at the top of the page — a list of every Orova module drops down. PickOrova Link & QR; the module opens on theCreate link & QRtab.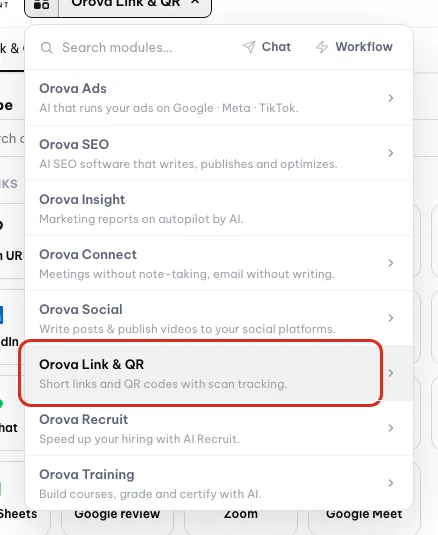
Module menu with Link & QR circled in red. - 3
Look at the three tabs across the top.
Create link & QRis where you build a new code.Listgathers every code created in the workspace.Analyticsshows the scans and clicks of each dynamic code.
The three tabs: Create link & QR, List, Analytics. - 4
Look at the panel on the right. Before you type anything, the right-hand panel shows a sample image with the line
Enter content to see a preview. That is a demo code, not yours. As soon as you enter content, the real code is drawn in its place.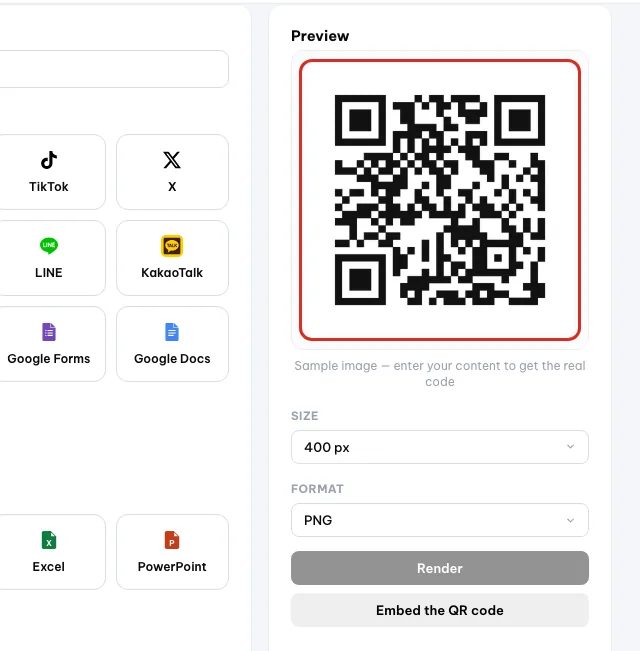
Preview panel on the right with the QR image, size, format and Render.
| Button / field | What it does | Notes |
|---|---|---|
Create link & QR | Pick a code type, enter content, customise and save a new code | The tab that opens by default |
List | One table with every code in the workspace: Link + QR bundles, static QR codes and legacy /s/ codes | Edit destination, pause, delete and download all happen here |
Analytics | Scans by day, by hour, by device, by region and by source | Only dynamic codes have numbers; static codes always read zero |
Tip
02 · Code type
Pick the right code type for the job
The first step is always the code type. It decides which fields you will be asked for next.
Code type
The kind of content you want to put inside the QR code. Pick Wi-Fi and Orova asks for a network name and password. Pick Link and Orova asks for a web address.
The screen splits the code types into four groups: Quick links, Files, Standard payloads and Payments. You only need to find the one tile you want — there is no need to understand the whole grid.
Find and pick a code type
- 1
Type in the
Search code types…box. The search box sits just above the grid. Type a few letters, for examplewifi, and the grid filters on the spot with no page reload.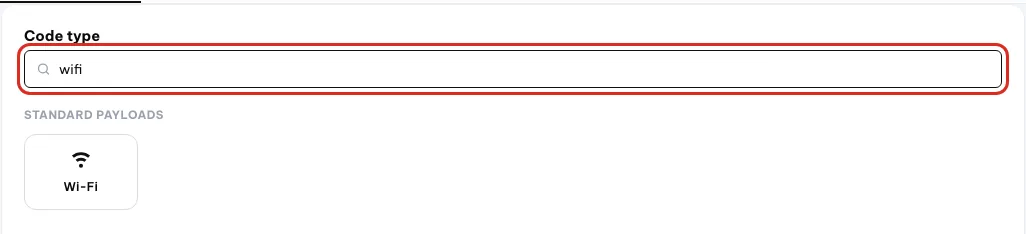
Typing wifi in the Search code types box. - 2
Click the tile you want. The grid closes and the
Contentstep opens with exactly the fields that type needs.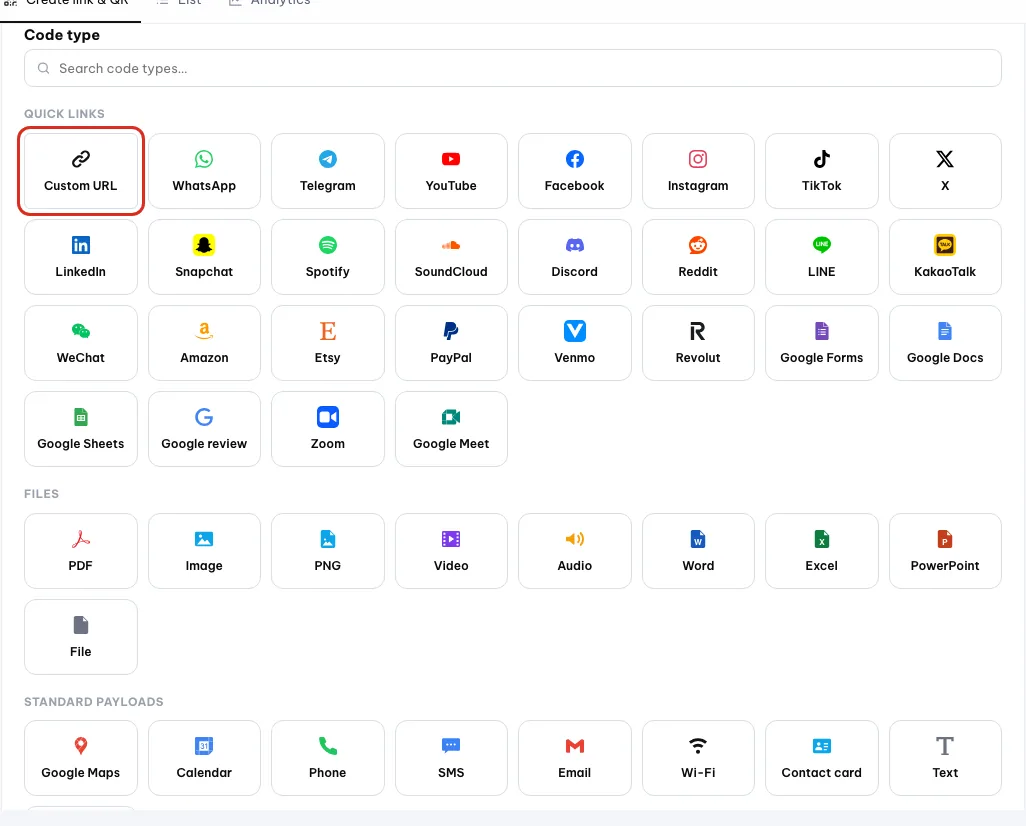
Code type grid with the Custom URL tile circled. - 3
Picked the wrong one? Click
Change code type. The button sits next to the name of the current type. Click it to go back to the grid and pick another. Anything you typed for the old type is dropped.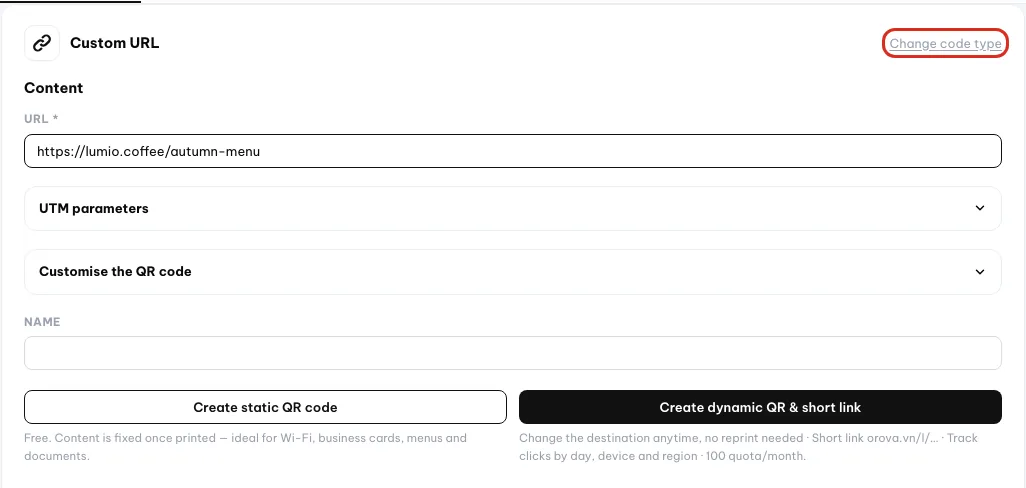
Change code type button above the content form.
- Online menu, promotion page, article: pick
Link. - Let guests join the café Wi-Fi without reading out the password: pick
Wi-Fi. - A staff business card so customers can save the number in one tap: pick
Contact card. - A short notice taped to the counter: pick
Text. - A quick call or email: pick
PhoneorEmail. - Receiving a bank transfer: pick the
Paymentsgroup, for exampleVietQRwith the bank, account number, amount and transfer message.
Note
The code type decides whether you can upgrade
Only code types with a URL can be upgraded to a dynamic QR.03 · First static QR
Make your first static QR code, free
A static code is the fastest way to get a usable QR image. It costs no quota, so make as many as you like.
Static QR code
The content is baked into the image. Wherever the image goes, the content goes with it, with no need for Orova in between. The trade-off: you cannot edit the content and you cannot count scans.
Preview
The code image in the right-hand panel, redrawn every time you type or change the styling. It is exactly the image you will download.
The example below makes a Wi-Fi code for a coffee shop. A guest scans it and the phone joins the network without anyone typing a password.
Create a Wi-Fi code
- 1
Pick the
Wi-Fitype. On theCreate link & QRtab, typewifiin the search box and click theWi-Fitile. TheContentstep opens with four fields.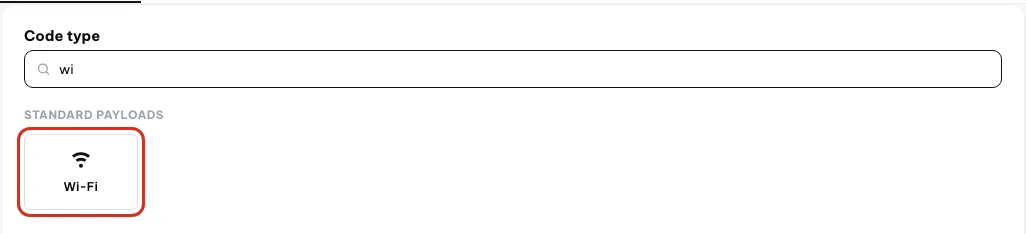
Wi-Fi tile circled after searching the code types. - 2
Fill in the network name and password.
SSIDis the network name as it appears on a phone.Wi-Fi passwordis the real password. UnderSecurity, pickWPA/WPA2if the network has a password, orNo passwordif it is open. Only tickHidden networkif your network does not broadcast its name.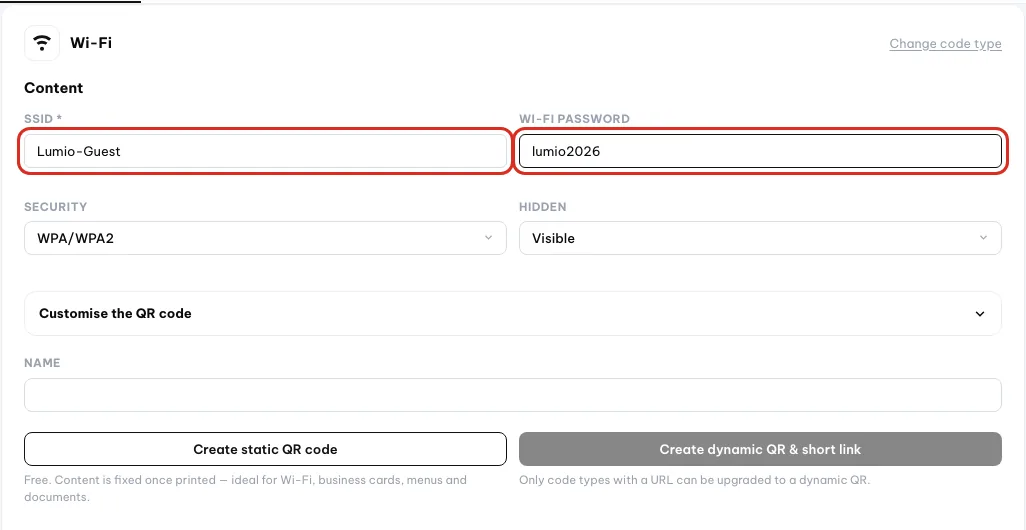
Wi-Fi form with network name Lumio-Guest and password filled in. - 3
Check the preview on the right. The code appears as soon as you type. If the right-hand panel still shows the sample image with the line
Enter content to see a preview, a required field is still empty. - 4
Click
Create static QR code. The main button sits below the content block with the noteFree. Content is fixed once printed — ideal for Wi-Fi, business cards, menus and documents.After the click a saved banner appears and the code image moves into the right-hand panel with a download button. No quota is charged and nothing asks you to confirm.
Create static QR code button circled. - 5
Test it with your own phone. Open the camera and point it at the image on screen. The phone should offer to join the Wi-Fi network you just typed. Testing now is far cheaper than testing after printing.
Warning
The content of a static code cannot be changed
Tip
List tab grows long, you will find things far faster.04 · Customise
Customise the look: four sub-tabs
The Customise the QR code block has four sub-tabs: Logo, Colours, Shape and Frame. Change anything and the image on the right is redrawn immediately.
Contrast
The difference in lightness between the cells of the code and the background. A dark code on a light background is easy for machines to read. Two colours too close together and the camera cannot tell them apart, which makes the code useless.
Eyes of the code
The three large squares in three corners. Scanners use them to work out where the code is and which way round it is. You can change their shape, but do not make them too exotic.
This part is optional. A plain black and white code works perfectly well. Customising is about matching the code to your brand.
The Logo tab
- 1
Pick one of the four logo styles.
Orova logouses the Orova mark.Image logolets you upload your own picture.Text logoputs a short word in the middle.No logokeeps the code cleanest and easiest to scan.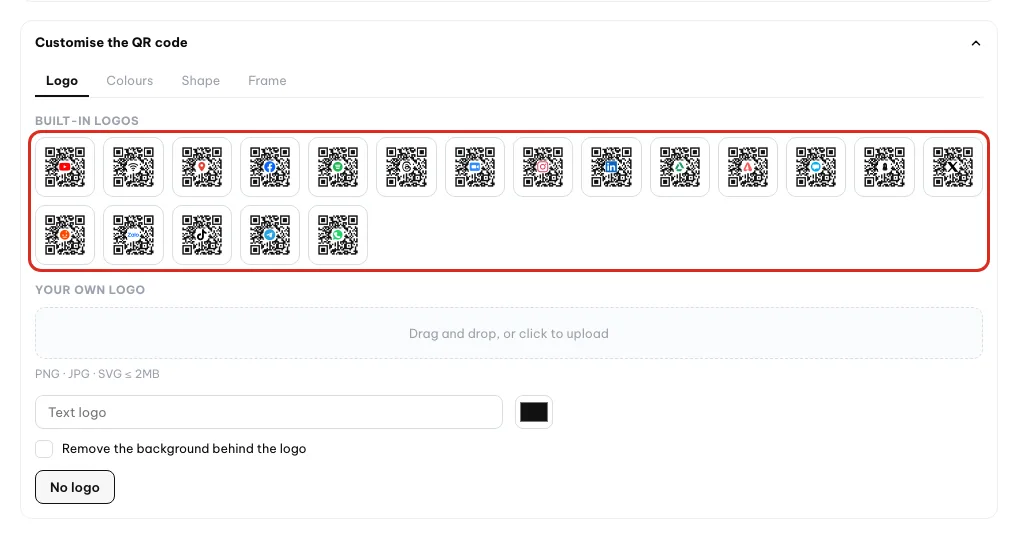
Logo sub-tab with the four logo styles. - 2
Upload your own logo. Pick
Image logo, then choose a file underYour own logo. An image with a transparent background gives the best result. If the logo has an awkward square background, tickRemove the background behind the logo.
Drag-and-drop box for uploading your own logo. - 3
Test the scan again after adding a logo. A logo covers part of the code. The bigger the logo, the more likely it breaks. If a phone scans slowly or not at all, pick a smaller logo or drop it.
The Colours tab
- 1
Change
QR colourandBackground colour. Pick from the ready-made palette or clickCustom colourto enter your own hex value. The default is a black code on a white background — also the easiest pair to scan.
QR colour and background colour pickers circled. - 2
Use
Gradientif you want two colours blending. Pick two colours and the code fades from one into the other. Keep both dark enough against the background — never blend a light colour into a light background.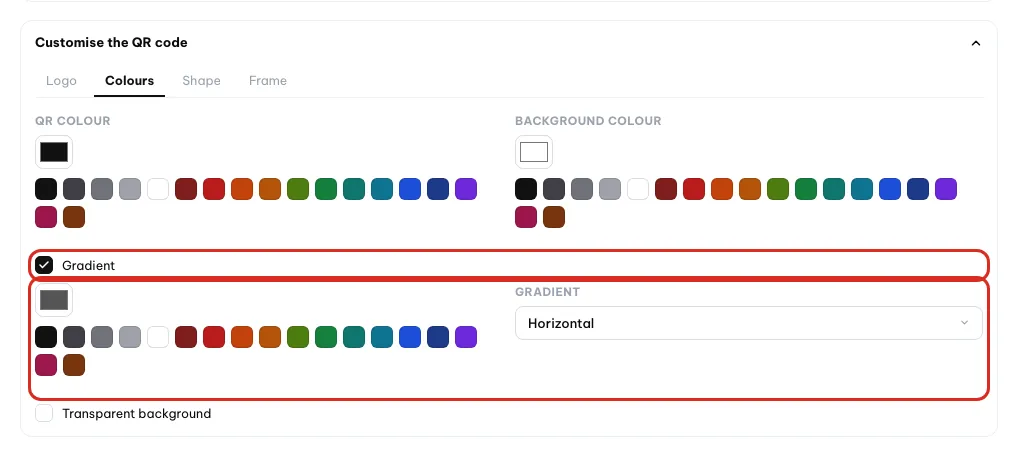
Gradient ticked, second colour and direction appear. - 3
Tick
Transparent backgroundwhen the code goes on top of an existing image. The code comes without a white backing square, so it takes on whatever design sits behind it. Remember that the surface behind still has to be lighter than the code colour.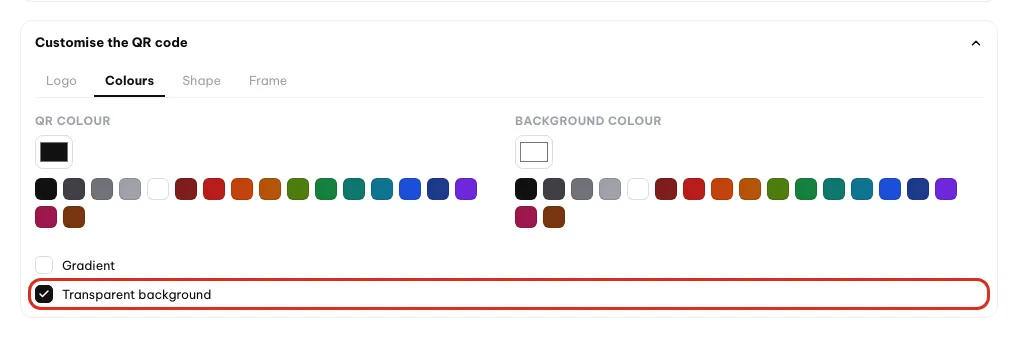
Transparent background ticked.
Warning
Pale colours are the most common mistake
The Shape tab
- 1
Change the
Cellsshape. Cells are the small dots the code is built from. There are plenty of shapes: square, rounded, round, spaced, bars, diamond and a few decorative ones. Spaced or round cells make the code look softer but need to be printed slightly larger.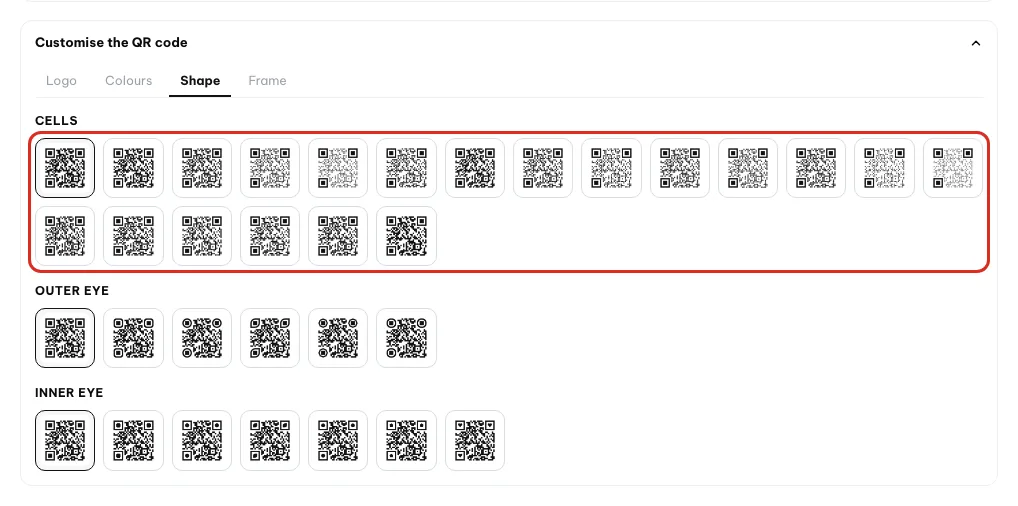
Shape sub-tab with the cell shape choices. - 2
Change
Outer eyeandInner eye. Two separate pickers for the outer ring and the inner core of the three corner eyes. Push both in the same direction and the code looks tidy; leave them too far apart and it looks messy.
Outer eye and inner eye choices circled.
The Frame tab
- 1
Pick a
Frame shape. A frame is the border around the code plus a strip of text inviting people to scan. There are many styles such as label below, ribbon, speech bubble or corner brackets.Label belowis the safest choice for a flyer.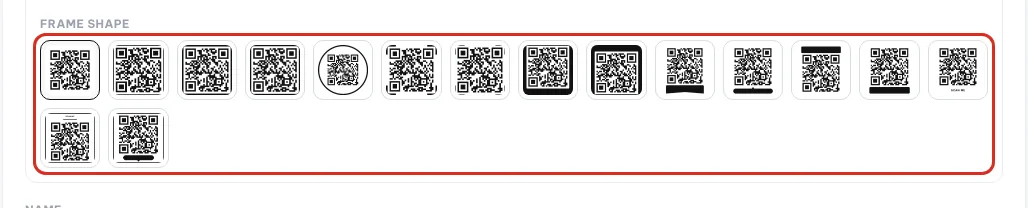
Frame shape choices circled in the Frame sub-tab. - 2
Edit the
Frame text. The default isSCAN ME. Replace it with any shorter or longer sentence you like, for example an invitation to view the menu. The shorter the text, the easier it reads from a distance.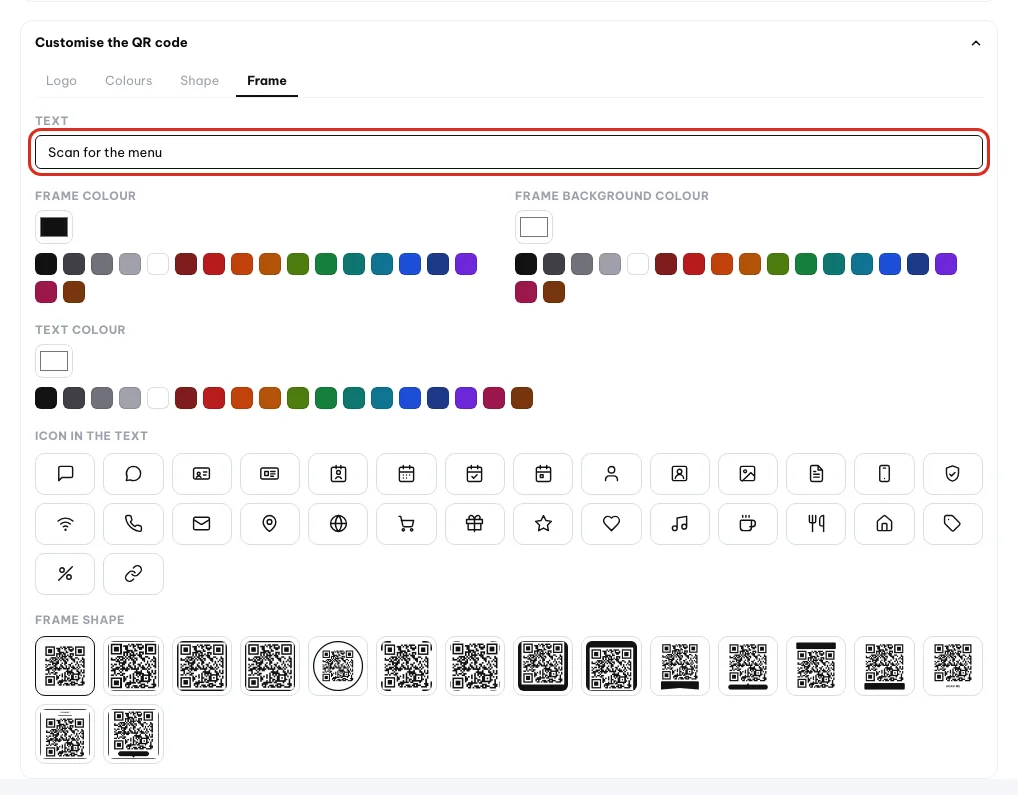
Frame text set to Scan for the menu. - 3
Change the frame and text colours. Three separate fields:
Frame colour,Frame background,Text colour. There is also anIcon in the textfield to place a small symbol before the words.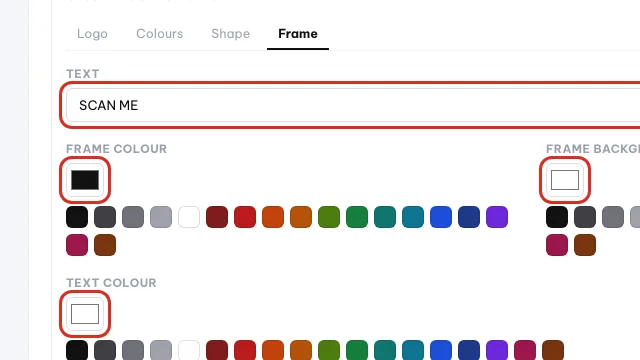
Frame colour, frame background and text colour fields.
Note
Restyling does not break codes already printed
05 · Size, format, download
Pick a size and format, download, embed on a website
An image for print and an image for the web need two different file types. Pick the wrong one and the code comes out blurred, or the background turns black.
Raster and vector images
Raster images such as PNG or JPEG are built from dots and go blurry when enlarged too far. Vector images such as SVG or EPS are written as geometry, so they stay sharp at any size.
Transparent background
An image with no coloured backing square, so whatever design sits behind shows through the empty parts. PNG, SVG and WEBP keep transparency; JPEG does not.
Pick a size and download
- 1
Pick a
Size. Click one of the ready-made sizes, measured in pixels. Need something else? ClickOther…and type the number yourself. The size only affects the file you download.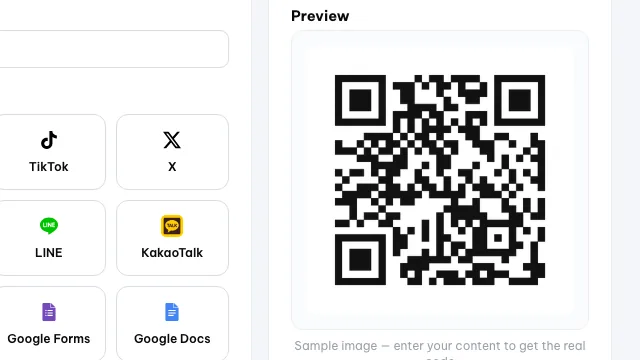
Size menu open under the QR preview. - 2
Pick a
Format. The list has three groups. Images holds PNG, JPEG, WEBP, TIFF and GIF. Vector holds SVG and EPS. The 3D group holds STL, OBJ and 3MF for printing models.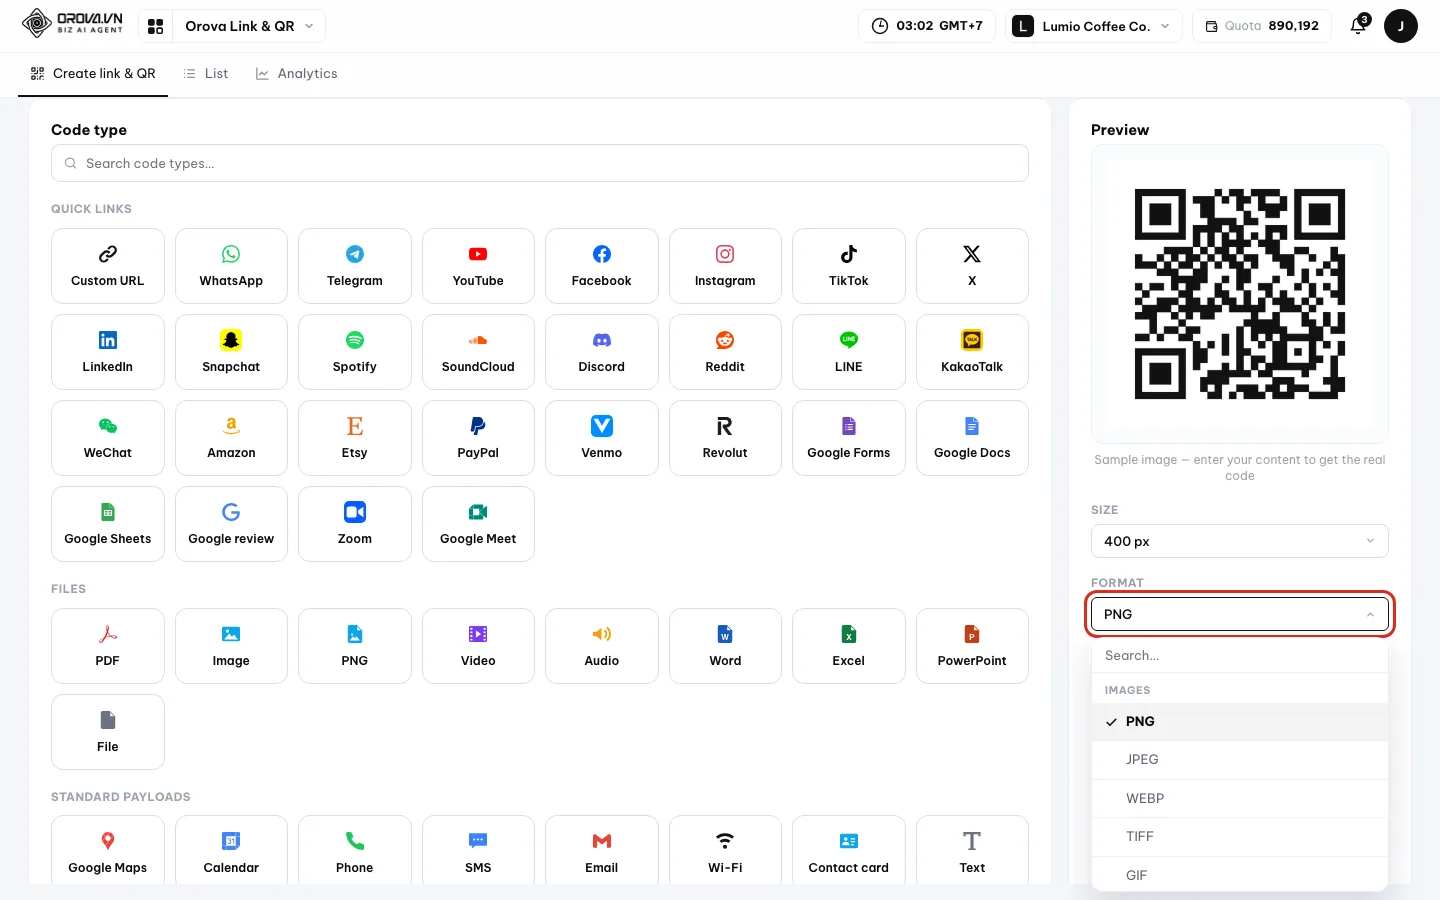
Format menu open with PNG, JPEG, WEBP and more. - 3
Click
Download. The file comes down in exactly the format and size currently selected. Change the size or format and click again for a different file — you do not have to create a new code.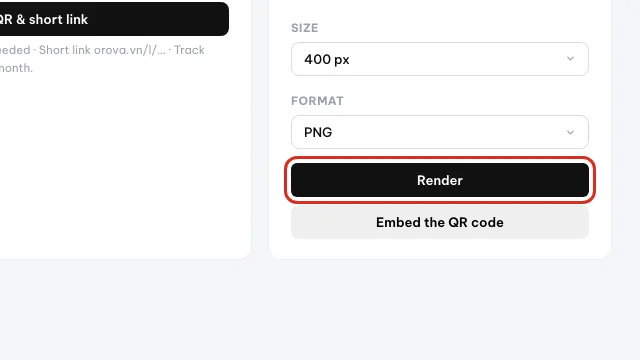
Render button circled under size and format.
| Button / field | What it does | Notes |
|---|---|---|
PNG | Raster image that keeps a transparent background | A good default for the web, documents and small prints |
SVG or EPS | Vector image that never blurs when enlarged | Send this to the printer for standees, signage and large banners |
JPEG | Raster image, light file size | Cannot keep a transparent background — the page says so explicitly |
WEBP | Raster image lighter than PNG | Good for embedding in a web page |
| The 3D group | Model files for printing in relief | Only useful if you really do have a 3D printer |
Embed the code on a website
- 1
Click
Embed the QR code. A small box opens with a ready-to-use snippet of HTML inside.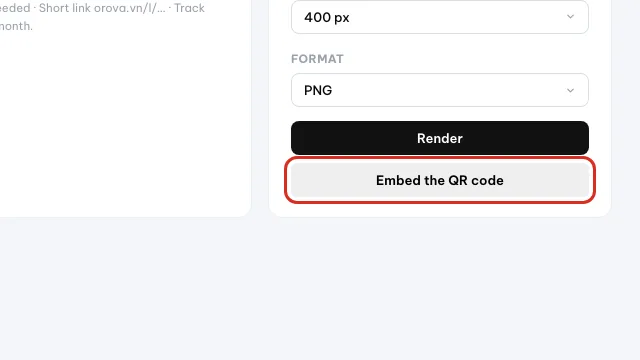
Embed the QR code button circled. - 2
Click the copy button and paste it into your page. Paste the snippet wherever you want the code to appear in your website. The page will render the code image right there.
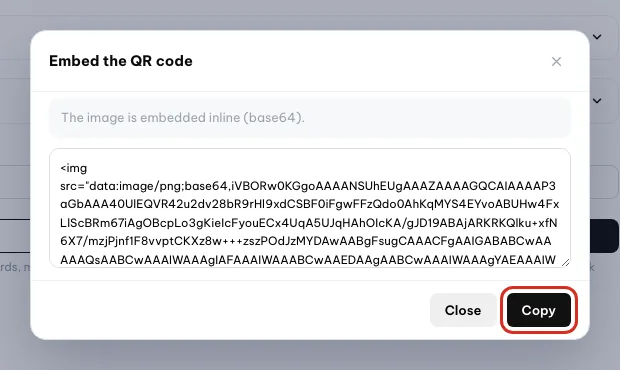
Embed dialog with the HTML code and the Copy button circled. - 3
Understand the difference between the two kinds when embedding. A dynamic code is embedded as an image address, so if you restyle it later the website follows. A static code is embedded as an image baked straight into the snippet, so restyling means pasting a fresh snippet.
Tip
06 · UTM tags
Add UTM tags before the code goes out
UTM tags are labels stuck on the end of a link so analytics tools know where visitors came from. Set them once while creating the code and they keep working.
UTM
Five labels added to the end of the destination URL. The destination page opens as usual, but Google Analytics can tell whether this visitor came from a flyer or from a standee. Like marking each door so you know which one people walked through.
The UTM parameters block sits just below the URL field with the hint Added to the destination URL to track campaigns in Google Analytics. Leave blank if unused. It is optional, but if you stick the same code in several places without UTM tags, you will never know which place worked.
| Button / field | What it does | Notes |
|---|---|---|
Source (utm_source) | Where the code is placed or where the link is posted | For example, name it after the standee, the flyer, the receipt or the social account |
Medium (utm_medium) | How the visitor arrived: a scan, printed material, social media | Reuse a small set of fixed values so the numbers stay comparable |
Campaign (utm_campaign) | The name of the campaign | For example a new menu launch or a quarterly promotion |
Term (utm_term) | Advertising keyword, usually left blank | Mostly used for search advertising |
Content (utm_content) | Tells apart two versions inside one campaign | For example the front and the back of the same flyer |
Fill in the UTM tags
- 1
Open the
UTM parametersblock. The block sits under the URL field in theContentstep. Click the heading to open the five fields.
UTM parameters block, still closed, circled. - 2
Fill in at least the first three. Fill in
Source,MediumandCampaign. Use lower case, no accents, words joined by underscores. Leave the other two blank if you do not need them yet.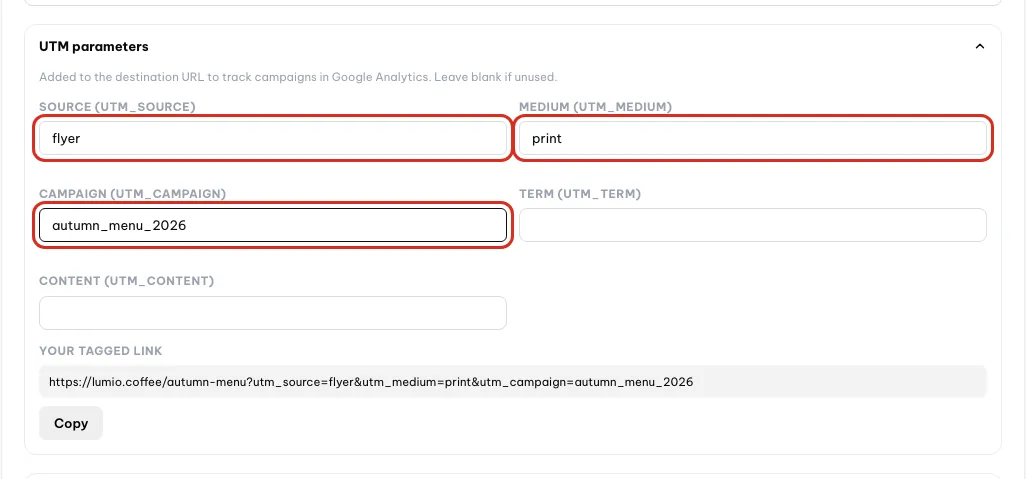
UTM source, medium and campaign filled in. - 3
Check the
Your tagged linkline. This line shows the final URL after the labels are attached. Read it through: is it the right destination page, and are there any stray question marks?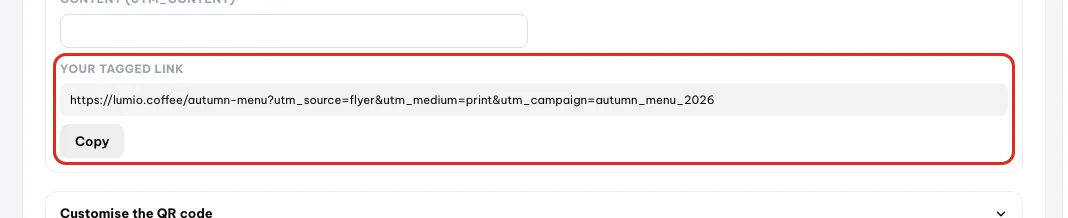
Tagged link line showing utm_source=flyer. - 4
Save the code as usual. UTM tags travel with the destination URL, so they are inside the code the moment you save. With a dynamic code you can still edit the UTM tags later on the edit destination screen.

Both save buttons circled: static and dynamic.
Note
Agree on naming from day one
Tip
07 · Dynamic QR
Upgrade to a dynamic QR and a short link
At the bottom of the left column of the Create link & QR tab sit two buttons side by side. The second one builds a short link together with a dynamic QR code. This option spends quota, but in exchange you can change the destination and count every scan.
Dynamic QR code
The image holds no destination address. It only holds an Orova short link. The real destination lives on the server, so you can change it at any time, even once the flyers have been printed.
Short link
A short address shaped like orova.vn/l/<code>. Anyone who opens it is forwarded to the destination you set. Every open is recorded so you can read it in the Analytics tab.
Link + QR pair
Since Orova merged the two features, a dynamic code always comes with exactly one short link. You pay quota once for both. Pause or delete it and both go together.
Pick a dynamic QR when the destination may still change: a seasonal menu, a promotion page, an event signup link. Pick a static QR when the content is certainly fixed, for example a Wi-Fi password or a contact card.
Note
Only code types with a link can be upgraded
Create a Link + QR pair
- 1
Make sure the content is a link. In the
Create link & QRtab, pick theLinktype in theQuick linksgroup. Fill theURLfield with the full address, starting withhttps://. Without that prefix the app returns an error at the save step.
Destination link field of a Custom URL code. - 2
Fill in UTM parameters if you need campaign tracking. Open the
UTM parametersblock, then fillSource (utm_source),Medium (utm_medium)andCampaign (utm_campaign). TheYour tagged linkline below changes with every character you type. These three fields come back in theAnalyticstab as three separate tables. - 3
Press
Create dynamic QR & short link. The button sits at the bottom of the left column, right next to the static code button. Nothing is charged yet: the app opens a confirmation dialog. The hint under the button spells out what a dynamic code gives you.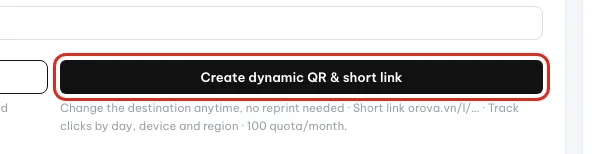
Create dynamic QR & short link button circled. - 4
Read the
Confirm dynamic QRdialog. The dialog tells you how much quota is charged now, how much quota per month keeps it alive, and your current wallet balance. The numbers appear before you press. PressConfirm and createto create it, or click outside to cancel.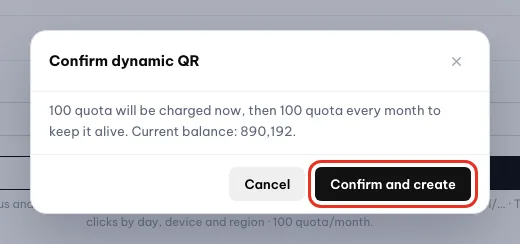
Confirm dynamic QR dialog before spending quota. - 5
Copy the link you just created. The page reloads after a second or two. The
Your short linkblock appears in the right column with aCopybutton. Press it and the button changes toCopied. This is the address you take away and paste.
Copy button next to the short link orova.vn/l/…. - 6
Download the image or embed it on your website. The
Downloadbutton takes the image at the size and format you have selected. TheEmbed the QR codebutton gives you an HTML snippet to paste into a web page. With a dynamic code the image follows the code, so changing the destination never means changing the image.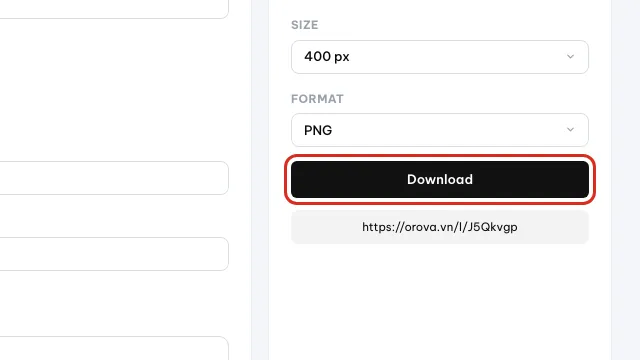
Download button on the dynamic code edit page.
Warning
Creating a dynamic code spends quota
Confirm and create, then charged again every month to keep the code alive. Deleting a code does not refund quota already charged. Think it through; do not create a batch just to try it out.Tip
Give it a memorable name as you create it
Name field only shows in your List tab; it is never printed into the image. Name it after the place it goes, for example the counter standee or the flyer, so you can find it again in a minute.08 · List
The List tab — every code in one table
The List tab gathers every code in the workspace into a single table. This is where you change destinations, download images again, pause or delete.
One table, three row types
A single table holds three different things. Link + QR is the dynamic pair you just created. Static QR is the free code with its content baked in. Legacy /s/ is a first generation dynamic code. The Type column tells you which row is which.
Legacy /s/ codes
Codes created before Orova merged Link and QR, with an address shaped like orova.vn/s/<code>. They still run and still record scans. You simply cannot create new ones of this kind.
Open the tab at /u/workspaces/<workspace>/qr/list, or press List on the module tab bar. A workspace with no codes yet shows the line Nothing here yet. Create one in the Create link & QR tab.
| Button / field | What it means | Notes |
|---|---|---|
QR code | The thumbnail image of that row | Click the image to enlarge it and look closely |
Name | The memorable name you set when creating it | Only shows in this table, never printed into the image |
Type | Tells you which kind of row this is | Three values: Link + QR, Static QR, Legacy /s/ |
Short link | The shortened address of a dynamic code | For a static code this column is the content printed in the image |
Destination | Where the person scanning is taken | Only dynamic codes can change destination |
Scans | How many times the code was scanned or the link clicked | Static codes cannot be measured, so there is no number |
Status | Active or Paused | Paused means the scanner reaches a notice page, not the destination |
Renews on | The day next month's quota is charged to keep the code alive | Dynamic codes only |
Created | When you created the code | Useful for telling apart codes with the same name |
Search by name, code or destination… | The quick filter above the table | Filters right in the browser; the table shrinks as you type |
Edit destination | Opens the form for the destination URL and the UTM | Only on dynamic rows |
Copy link | Copies the short link to the clipboard | Paste it straight into a post or a message |
Download QR | Downloads the code image to your machine | Change the styling and you have to download the image again |
Pause / Activate | Cuts or restores the path to the destination | The QR image is not broken, only the destination is blocked for now |
Delete | Removes the code from the list for good | Cannot be undone; see the warning in the section below |
What you usually do in this tab
- 1
Find one code in a long list. Type into
Search by name, code or destination…above the table. The table filters immediately; there is no search button to press. Clear the field and the whole table comes back.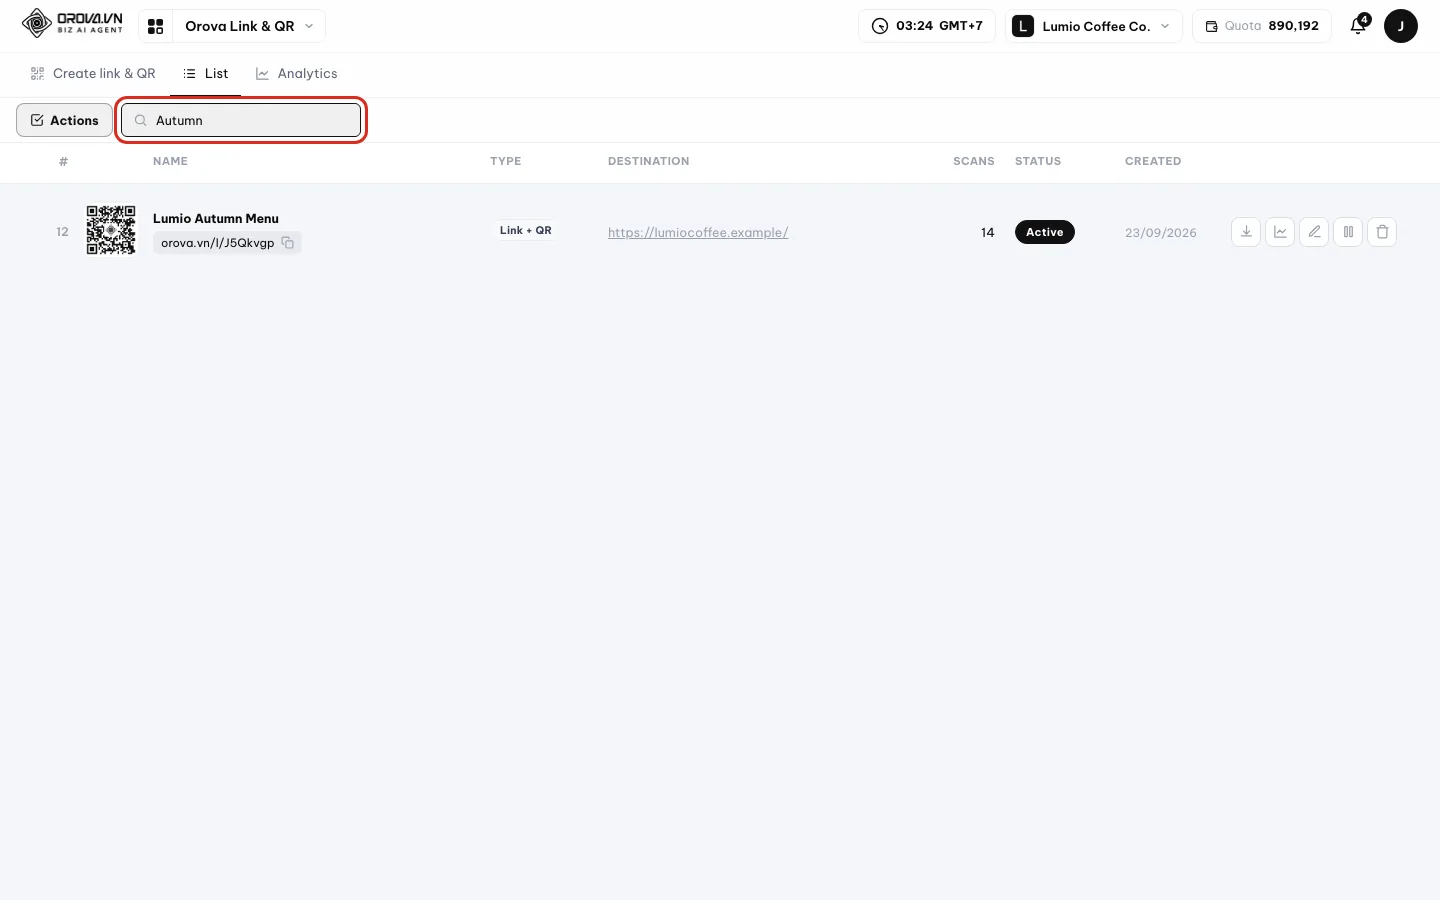
List tab filtered by typing Autumn in the search box. - 2
Inspect a code before you send it to print. Click the thumbnail in the
QR codecolumn to enlarge it. Check whether the logo covers any cells and whether the colours contrast enough. Click the backdrop or press Esc to close.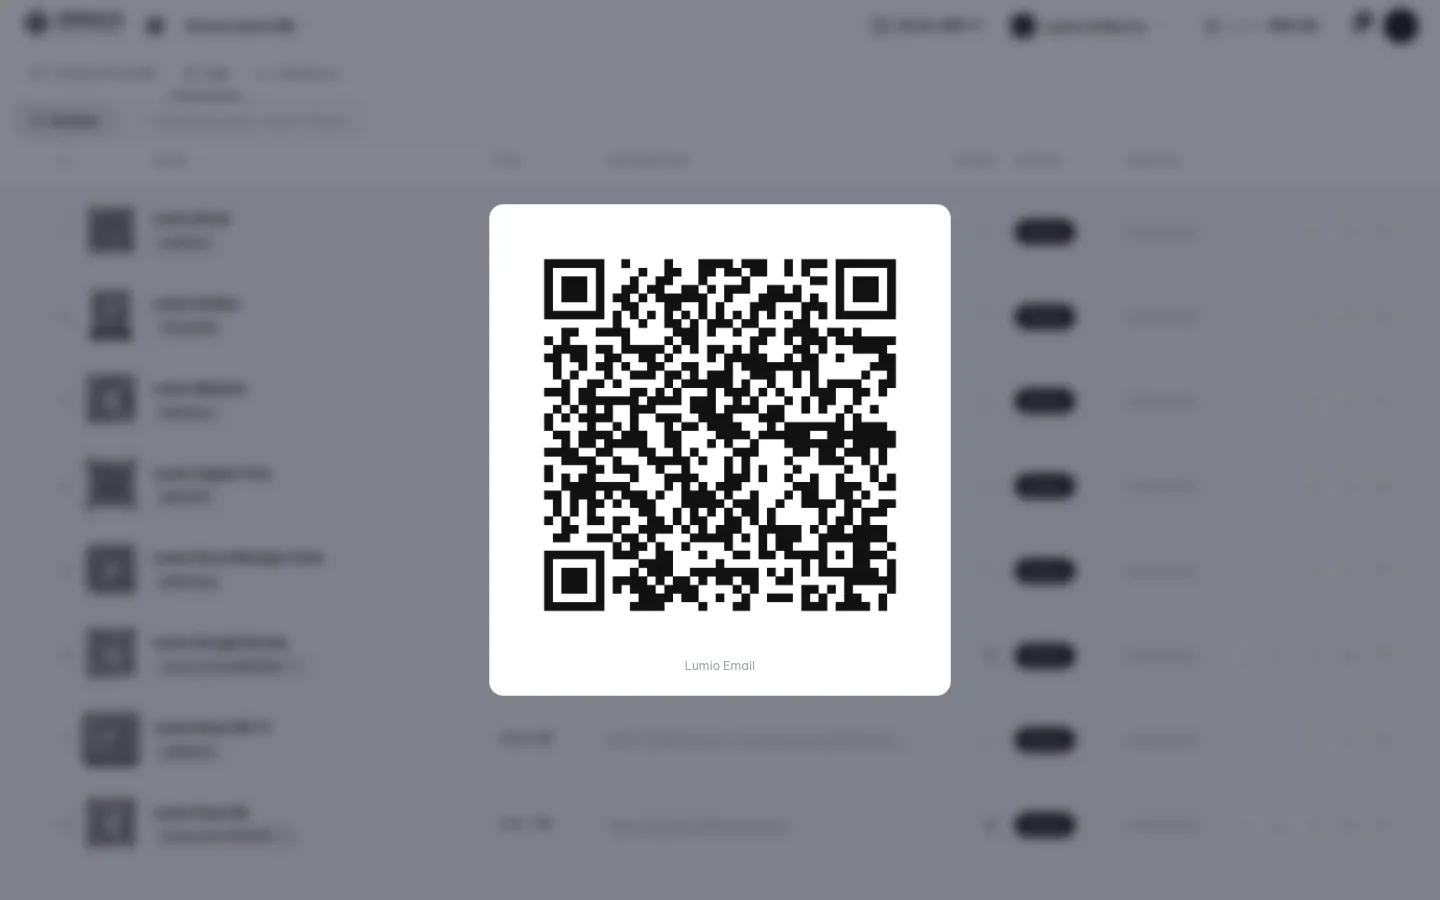
Enlarged QR code opened from the List tab. - 3
Use the action buttons on each row. Every row has its own cluster:
Edit destination,Copy link,Download QR,PauseorActivate, andDelete. Static rows have noEdit destinationbutton, because the content is baked into the image.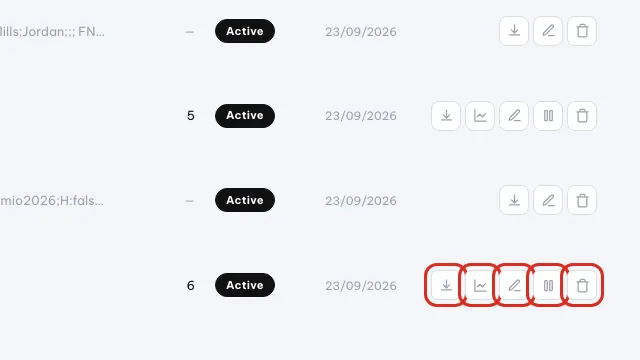
Row action buttons: download, analytics, edit, pause, delete. - 4
Act on many codes at once. Tick the box at the start of every row you want, or tick the box in the header to
Select all. A floating bar appears with the number of items selected, plusPause,Activate,Deleteand aClearbutton.
Bulk action bar after ticking several codes. - 5
Confirm before applying in bulk. The app asks once more before it pauses or deletes several codes. Read the number of items in the question carefully. Press
Deleteon the wrong group and there is no way back.
Note
Static codes can change name and styling, not content
Pause for a static code has no effect either, because the image is already out in the world.09 · Change destination
Change the destination after printing
This is the main reason to pay quota for a dynamic code. The flyers are printed by the thousand, the standee is already up outside the shop, and you can still change where the code leads in under a minute.
Changing the destination
The QR image stays as it is; only the address behind the short link changes. The next person to scan lands on the new page. You do not reprint anything.
Use it when a campaign ends, when the landing page moves to a new address, or when you want the same flyer to lead to different content each month.
Four steps to change a destination
- 1
Open the
Listtab. PressListon the module tab bar. Find the row of the code you need withSearch by name, code or destination…if the table is long.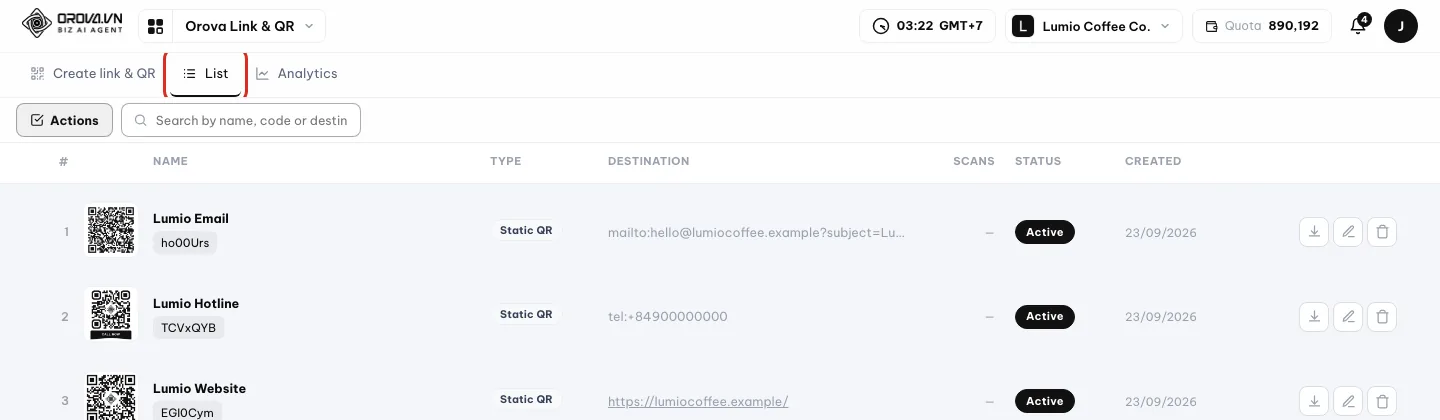
List tab circled at the top of the code list. - 2
Press
Edit destinationon that row. The button sits in the action cluster at the end of the row. Press it and the app opens a separate form. Static rows have no such button, because the content is baked into the image.
Edit destination button on the Lumio Autumn Menu row. - 3
Paste the new link and adjust the UTM. Fill the destination field with the full address, starting with
https://. Update the five UTM fields for the new campaign if you use them. Leave blank any field you do not need.
Destination URL field on the edit page. - 4
Press
Save changes. The change takes effect immediately and costs no extra quota. Open the short link on your phone to check. Scan the printed QR image as well, to be sure it leads to the right new place.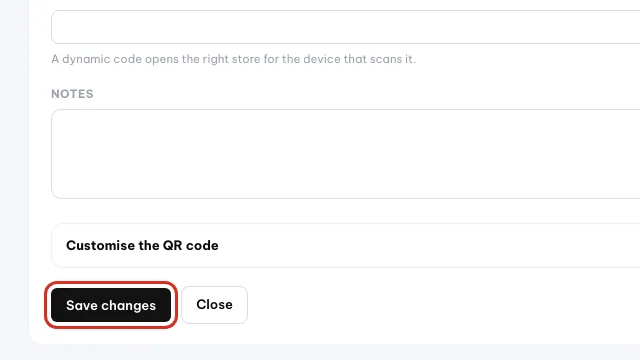
Save changes button circled on the edit page.
Warning
Changing the destination changes it for everyone
Tip
Print one code, use it for many rounds
10 · Analytics
The Analytics tab — reading the scan numbers
The Analytics tab answers three questions: how many people scanned, when they scanned, and where they came from. The numbers already exclude automated scanners and are shown in Vietnam time.
Unique scans
The same person clicking ten times in one day counts as a single unique scan. Orova recognises them by a hashed fingerprint of the network address, and never stores the identity of the person scanning.
Bots filtered out
Scans created by machines, for example when you paste the link into Facebook or Zalo and the platform opens it to preview. Orova still records them but leaves them out of the marketing numbers.
Referrer
The page someone was on before they clicked your link. A scan taken with a phone camera has no referrer, because the scan does not come out of any page.
Open the tab at /u/workspaces/<workspace>/qr/analytics, or press Analytics on the tab bar. With no scans in the selected range, the page shows the line No scans in this period yet.
Read the analytics page from top to bottom
- 1
Pick the code you want to see. The code picker in the top bar has a search field; a name or a code both work. It only lists dynamic codes, because static ones cannot be measured. Pressing
Analyticson a row inListbrings you straight here too.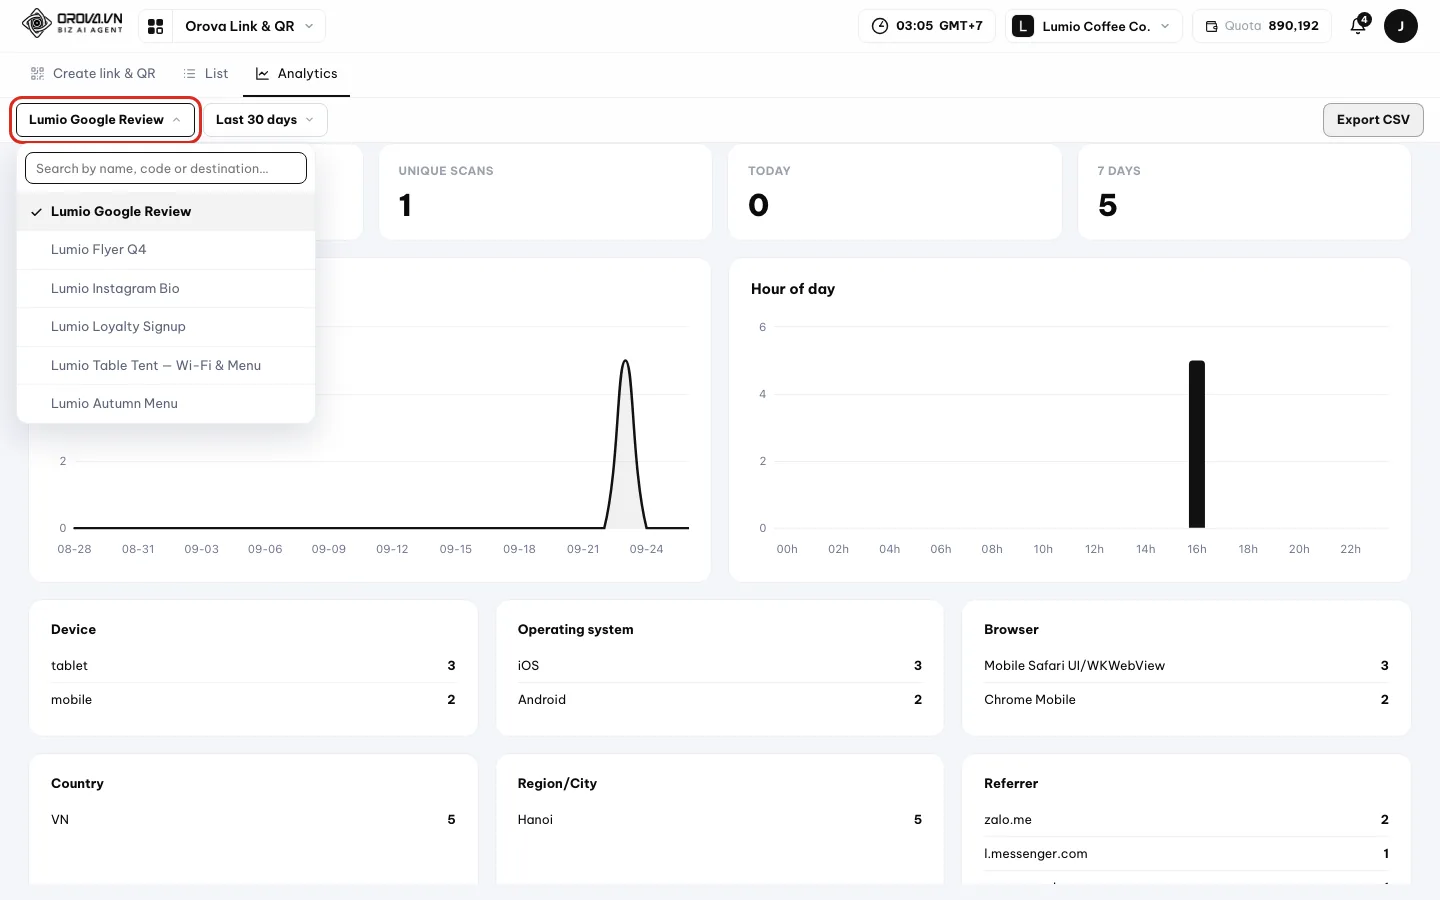
Code picker open at the top of Analytics. - 2
Pick a date range.
Today,Yesterday,Last 7 days,Last 30 daysandLast 90 daysare ready to use. PickCustomand fill inFromandTo. Every number, chart and table below follows this range.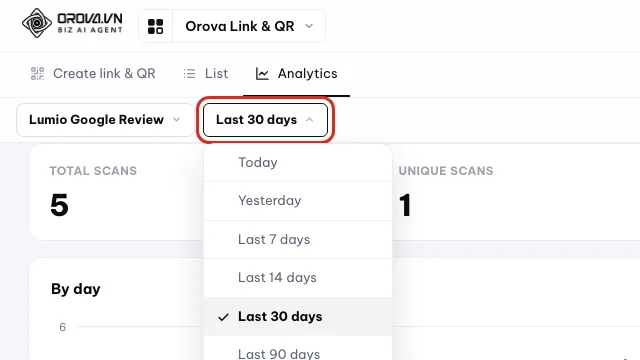
Date range menu open, Last 30 days selected. - 3
Read the four numbers at the top.
Total scansis every scan.Unique scanscounts people.Todayand7 daysare two quick slices. A high total with a low unique count means few people scanning many times.
The four numbers at the top of Analytics. - 4
Look at the two charts.
By dayshows the ups and downs across the selected range.Hour of dayshows the hours when people scan most. The charts take a second or two to draw, so wait a moment.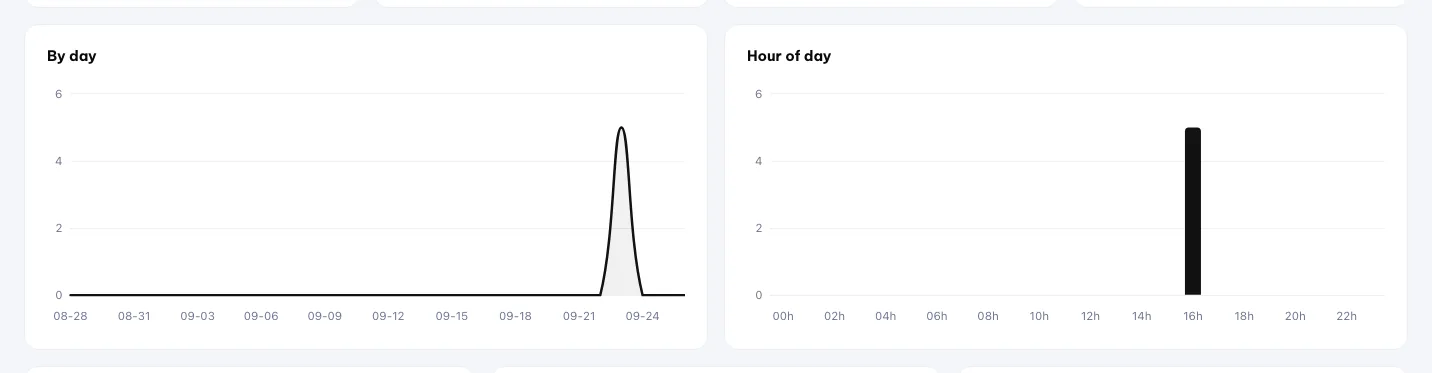
By-day and by-hour scan charts. - 5
Read the nine ranking tables. In order:
Device,Operating system,Browser,Country,Region/City,Referrer, then three UTM tables. Each table takes its top eight rows. The three UTM tables only have numbers once you have filled in the UTM.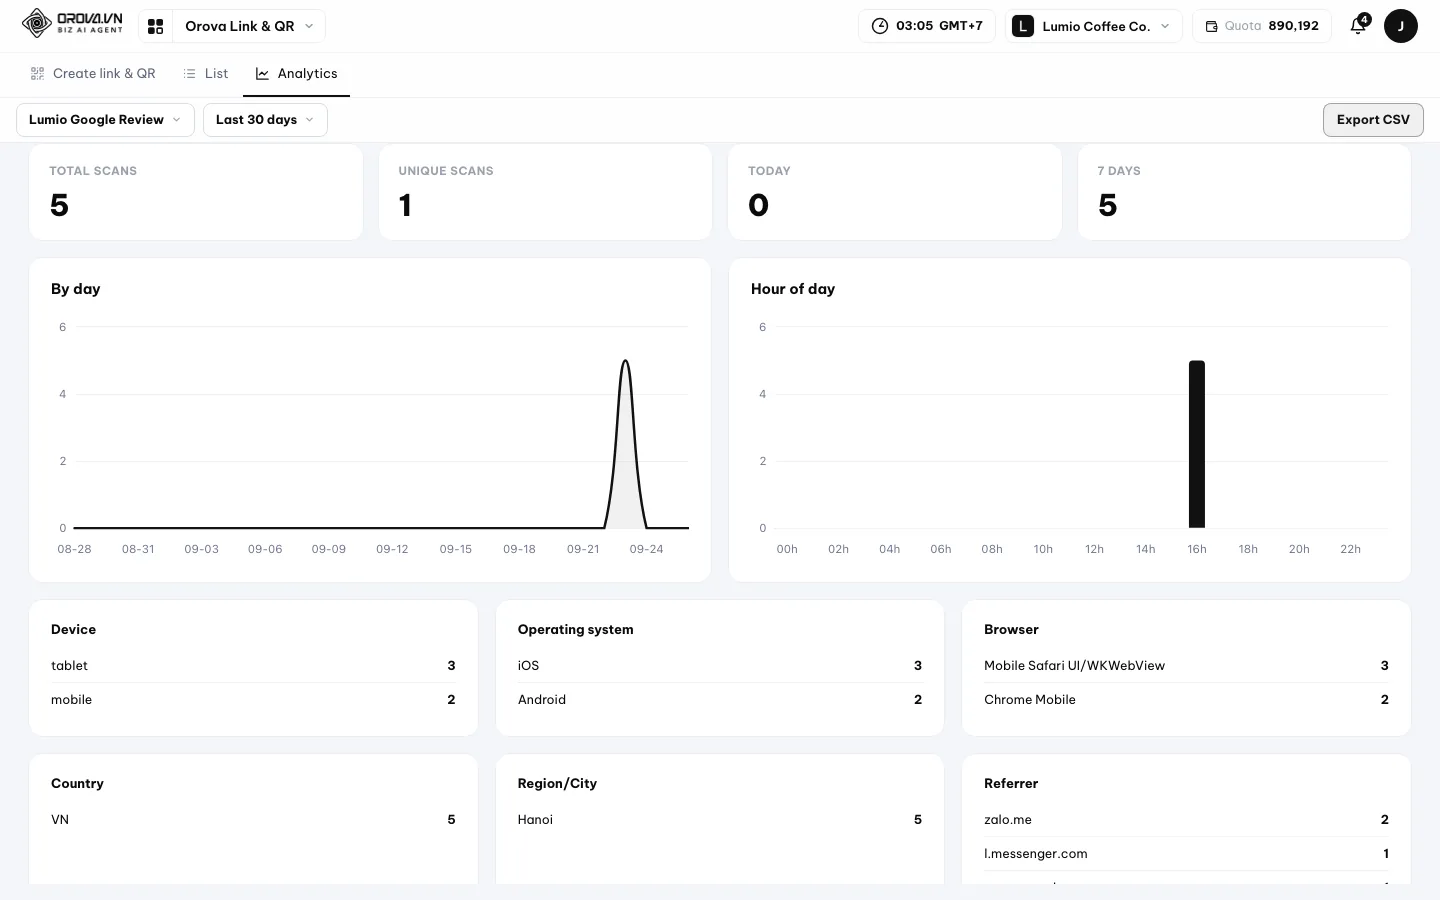
Ranking tables further down the Analytics page. - 6
Scan the
Recent scanstable. The table lists scans one by one withTime,IP,Device,LocationandReferrer. Any row created by a machine is marked Bots filtered out. This is the quickest way to check whether a code is working.
Recent scans table with time, IP, device, location. - 7
Compare codes in the table at the bottom of the page. Scroll to the end of the page for a table covering every code in the workspace, with
Type,Clicks / scans,7 days,30 daysand the most recent scan. Use it to see which codes are worth keeping and which to drop.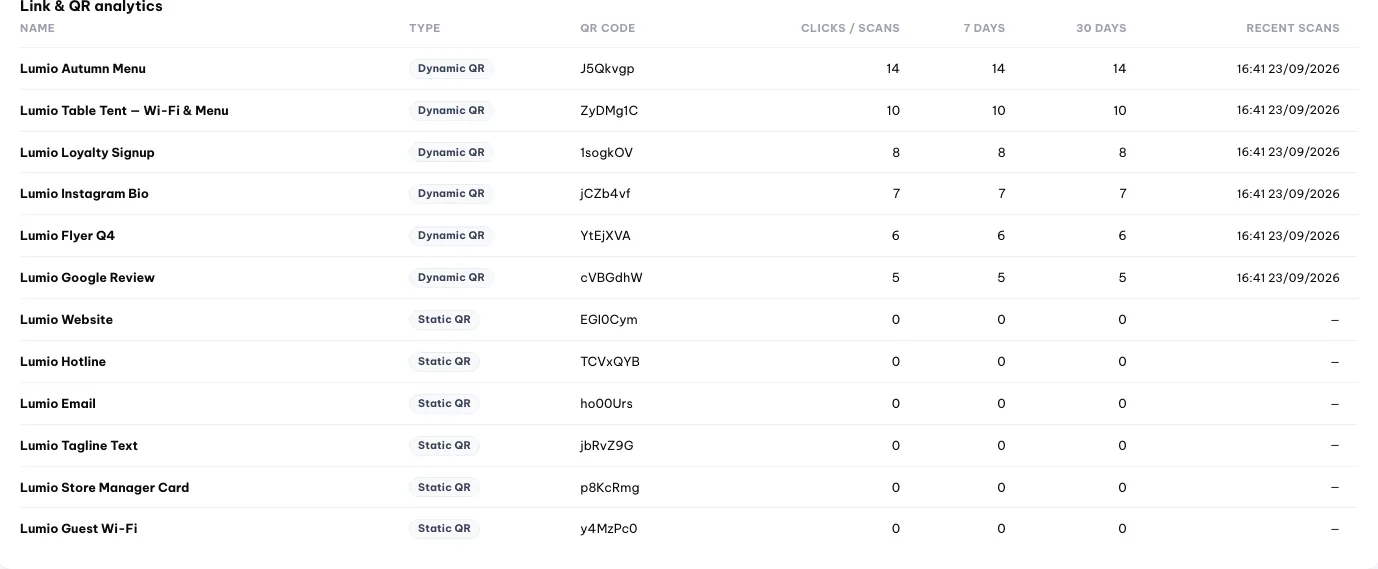
Summary table comparing every code at the bottom. - 8
Export CSV when you need a report. The
Export CSVbutton downloads exactly the code and the date range you have filtered. Open it in Excel or Google Sheets to build your own charts.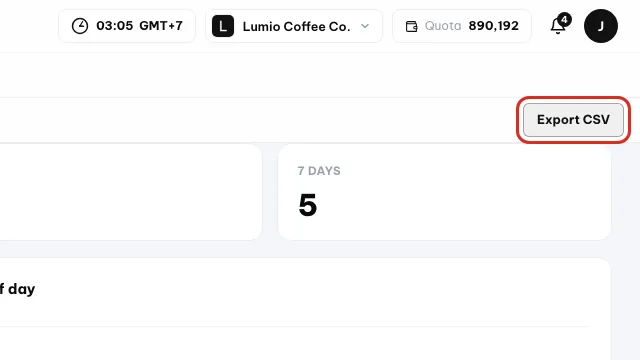
Export CSV button circled.
Note
Scans and link clicks are the same number
Note
Why the by-day chart has only one bar
11 · Pause & delete
Pause, reactivate and delete
When a campaign ends you do not have to delete the code. Pausing is enough, and you can bring it back any time. Deleting is different: deleted is gone.
Pause
The path to the destination is cut for now. The QR image still scans as normal, but the person scanning reaches a text page saying the link is paused instead of the destination.
Delete
The link is kept in the books so the click history is not lost, but the attached QR code is deleted for good. The code disappears from the list and cannot be rebuilt.
Three actions and what each one costs
- 1
Pause a code. Go to the
Listtab and pressPauseon the row of that code. TheStatuscolumn switches fromActivetoPausedstraight away. Monthly quota is still charged, because the code is still being held for you.
Pause button circled on a dynamic code row. - 2
See what the person scanning gets. Open the short link on your phone. You see a text page reading This link is paused right now. The page leads nowhere. It is the polite way to end a campaign that has run its course.

What people see when they scan a paused code. - 3
Bring it back when you need it. Press
Activateon the same row. The code runs again at once and printed images need no replacing. Let a code lapse before you reactivate it and quota for a new period is charged the moment you switch it back on.
Paused row in the List tab with the Activate button circled. - 4
Delete when you are sure you are done. Press
Deleteon the row, or tick several rows and use theDeletebutton on the floating bar. The app asks once. Confirm and the code is gone from the list.
Delete button circled on a static code row.
Warning
Deleting cannot be undone
Pause first and delete later.Note
Pause and delete apply to the whole pair
Pause for a static code and the app skips it, because the image is already out in the world.12 · FAQ
Frequently asked questions and common errors
The questions new users ask most, with the cause and the fix. Read them first and you save yourself a reprint.
Test scan
The one step you must take before sending a code to print: open your phone camera, scan the image right off the screen, and check that it leads to the right place. It takes ten seconds and saves a thousand misprinted sheets.
If the numbers are not what you expected, open the summary table at the bottom of the Analytics tab first. It tells you which codes have scans, which do not, and which are static and therefore never measured.
The app says That link isn't valid — what do I fix?
The destination you entered is missing its prefix. The app only accepts addresses starting with http:// or https://. Typing vwealth.vn is not enough; type https://vwealth.vn/. Fix the destination field and save again.
The app says the wallet is out of quota — how do I keep creating?
Your workspace wallet no longer has enough for a dynamic code. The wallet is shared with the other modules, so it may have been spent elsewhere. Top up quota for the workspace and try again. Static QR codes are still free to create.
The Create dynamic QR & short link button does not respond?
The code type you have picked has no link, for example Wi-Fi, Contact card or Text. Only code types with a URL can be upgraded to dynamic. Press Change code type, pick the Link type, then fill the URL field.
I test-scanned it but Analytics still reads zero?
There are three causes. One, the code you scanned is static, and static codes are never measured. Two, that scan was mistaken for a machine and not counted. Three, you are looking at the wrong date range — try picking Today again.
My phone will not read the code at all?
Usually the image is hard to read. Three common faults: the code colour and the background colour are too close, the logo in the middle is too big and covers data, or the printed image is too small. Go back to Customise the QR code, use a dark code on a light background, shrink the logo and download a fresh image.
Where do I edit the content of a static code?
You cannot. A static code's content was baked into the image the moment it was created. You can only change the Name and the styling. To change the content, create a new code — and this time consider a dynamic one.
If I change the styling, do the printed codes break?
No. Printed images still scan as before. But the new styling only lives in the new image, so you have to press Download QR for a fresh image and reprint it if you want the new look.
The image I downloaded still has the old styling?
Your browser is holding the old image in its cache. Reload the page and press Download QR once more. This is not an interface fault, only an old image that has not been replaced yet.
The Country and Region/City tables only have one row?
Orova infers the location from the network address of the person scanning. Every scan from the same network lands on the same row. The tables get more varied once the code is scanned in more real places.
Unique scans reads one while Total scans is very high?
That is by design. The same person on the same day counts as a single unique scan. Test-scan it fifty times yourself and Total scans reaches fifty while Unique scans stays at one.
I deleted a code by mistake — can I get it back?
The QR code cannot be recovered. The link's click history is still in the system, but the code has to be created again and costs quota a second time. Next time use Pause instead of Delete.
Will my legacy /s/ codes stop working?
No. Old codes still forward and still count scans as normal, and they stay in the List tab with the Legacy /s/ label. You just cannot create new ones of that kind; new codes use the orova.vn/l/<code> form.
/ Need help?
Can't find what you need? Open the Support section in your workspace, or send us a message.