
Orova Training is where you teach the people in your company. You upload a document, AI turns it into a course, and your learners study and take the tests.
This guide is written for someone who has never opened Orova. Every section starts by explaining the idea, then walks you through the clicks.
The steps follow the real order of work: add learners first, build documents, create the course, write the quiz, grade the answers, award the certificate.
01 · Overview
What Orova Training is and what you can do with it
Read this section first. It tells you what the module contains, which role you are in, and why your screen may look different from a colleague's.
Workspace
A workspace is your company's shared space inside Orova. Every document, course, quiz and certificate lives inside one workspace. Think of it as one filing cabinet the whole team opens.
Training edit permission
This is the permission that lets you create and edit training content. Someone who has it is a training manager. Someone who doesn't can only take courses.
Note
How many tabs do you see?
Documents, Quizzes, Certificates, Learners — only appear for people with the Training edit permission. If you see just one tab, Courses, you are in the learner role, not the manager role. The other four are hidden entirely, not locked.Training has two kinds of people and they are not the same. A workspace member is someone with an account in your company. A learner is a separate Training enrolment record. Someone can be a workspace member and still not be a learner.
You will build four things, in this order: documents → courses → quizzes → certificates. Each one has its own tab on the bar across the top of the module.
| Tab | What it is for | Who sees it |
|---|---|---|
Courses | The course list, creating a new course from a document, opening a course to build and assign it. | Everyone who can open the module, including plain learners. |
Documents | The shared content library: text, slides, podcasts, flashcards. | Only people with the Training edit permission. |
Quizzes | Writing tests, generating questions with AI, playing a live ranked game. | Only people with the Training edit permission. |
Certificates | Designing certificate templates and awarding them to individuals. | Only people with the Training edit permission. |
Learners | The list of people allowed to study, and learner groups. | Only people with the Training edit permission. |
Quota
Quota is the number of AI runs your workspace has left. Every button with AI on it spends quota. The balance is always shown before you click, so you never get charged by surprise.
Background job
Some AI work takes a while, such as building a course or making a podcast. Those run behind the scenes. You can close the page and do something else; when you come back the result is there.
Tip
Read in order
Learners section is the most common mistake — your people will not see any course at all.02 · Learners
First time in: build the learner list
This is the very first job. Until someone's name is on the learner list, they open Training and see nothing, even if they are already a member of your company.
Learner
A learner is an enrolment record inside Training. It is separate from your company's member list. It is like having a staff badge and still needing to put your name down for a class before you can attend.
Learner group
A group is a bag that holds several people. Once you have a group, you assign a course to the whole group at once instead of ticking each name.
Open the Learners tab. The first time, the table is empty and carries a reminder: anyone who has not been added will not see any course. That is exactly why you do this section first.
Add learners to the list
- 1
Open the Learners tab. On the tab bar at the top of the module, click
Learners. You get a table with four columns:Learner,Email,Role,Groups. There is a search box above the table.
Open the Learners tab from the Training top bar - 2
Click Add learners. The
Add learnersbutton sits in the top right corner. Clicking it opens the Add learners from the workspace dialog with the list of people in your company.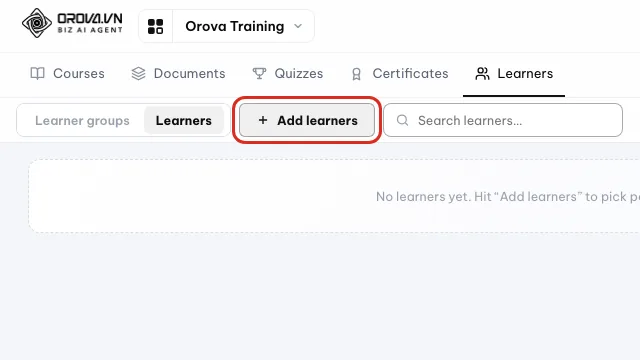
Click Add learners to pick people from your workspace - 3
Tick the people you want to teach. Tick the box on the left of each row. If the dialog says there is nobody left, it means every member has already been added, or your company has not invited anyone yet. Invite more people in workspace settings, then come back here.
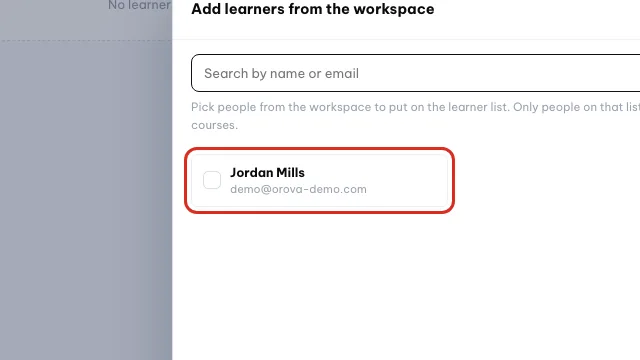
Tick the people you want to teach - 4
Confirm. Click the confirm button in the dialog. It closes and the names you picked show up in the table immediately. There is no background job and it costs no quota.
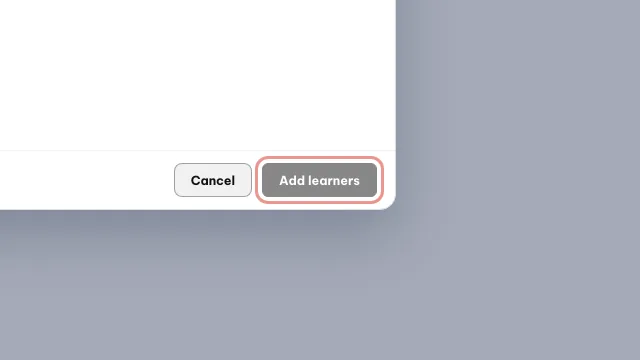
Click Add learners to confirm - 5
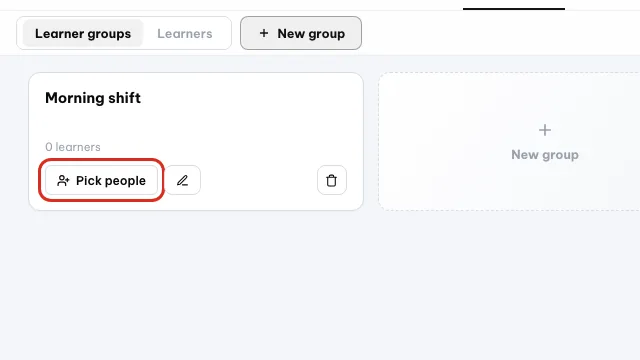
Create a group if you have a lot of people. In the
Learnerstab, find theLearner groupsblock. ClickNew group, name it, then clickPick peopleto tick its members. Group names must be unique. A workspace can have up to 200 groups.
Create a group when you have many people to teach
| Button / field | What it does | Notes |
|---|---|---|
Add learners | Opens the dialog for picking people from the workspace. | You can only pick existing members. Outsiders have to be invited into the company first. |
| Search box | Filters the table by name or email. | It filters as you type, no need to press Enter. |
Learner groups | The block for creating and editing groups. | New group · Rename · Pick people. Up to 200 groups per workspace. |
Remove from list | Takes someone off the learner list. | They immediately stop seeing the courses that were assigned to them. |
Warning
Adding a learner is not the same as inviting someone to the company
Add learners dialog only lets you pick people who are already workspace members. To teach someone new, you first invite them into the workspace, in workspace settings. After that they appear here.03 · Documents
Build your learning documents
The Documents tab is your shared content library. Courses pull their content from here, and one document can serve several courses. Build the library before you build the course.
Document
A document is one unit of content: an article, a slide deck, an audio piece or a set of flashcards. A document stands on its own and does not belong to any single course.
Open the Documents tab and click New. A dialog appears where you choose the document type. This is where beginners hesitate most, so read the table below before you pick.
| Type | Use it when | Notes |
|---|---|---|
Document | You write the content yourself, laid out like Word. | It has a button to ask AI to write. The AI button spends quota; typing it yourself does not. |
Slides | You already have a PDF or PowerPoint file. | Upload the file, up to 40MB. There is also a button for AI to build its own slide version. |
AI Slides | You only have text and want AI to build the deck. | Spends quota. |
AI Podcast | You want to turn a document into something people listen to. | Spends quota. You can choose one narrator or two hosts. |
AI Flashcards | You want learners to drill terms with flip cards. | Spends quota. AI condenses the content into a card set. |
Note
The Source content field
Source content. You paste text in — at least 200 characters — or upload a text file. With too little text, AI has nothing to work with.Create a Document
- 1
Pick the Document type. In the
Newdialog, click theDocumentcard. You land in a Word-like editor: bold, italic, headings, lists, images.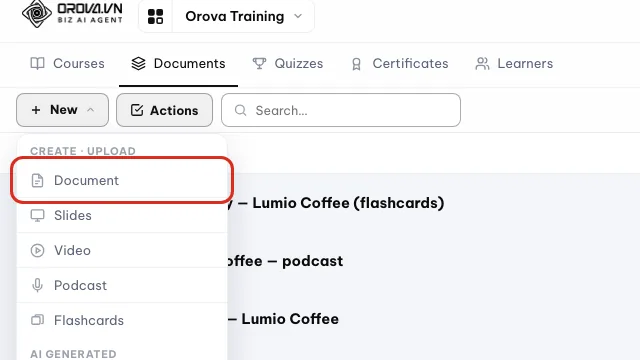
Click New and pick Document - 2
Name it and write the content. Type the document name in the field at the top, then type or paste the content into the large area. It saves itself as you type, you never press Save.
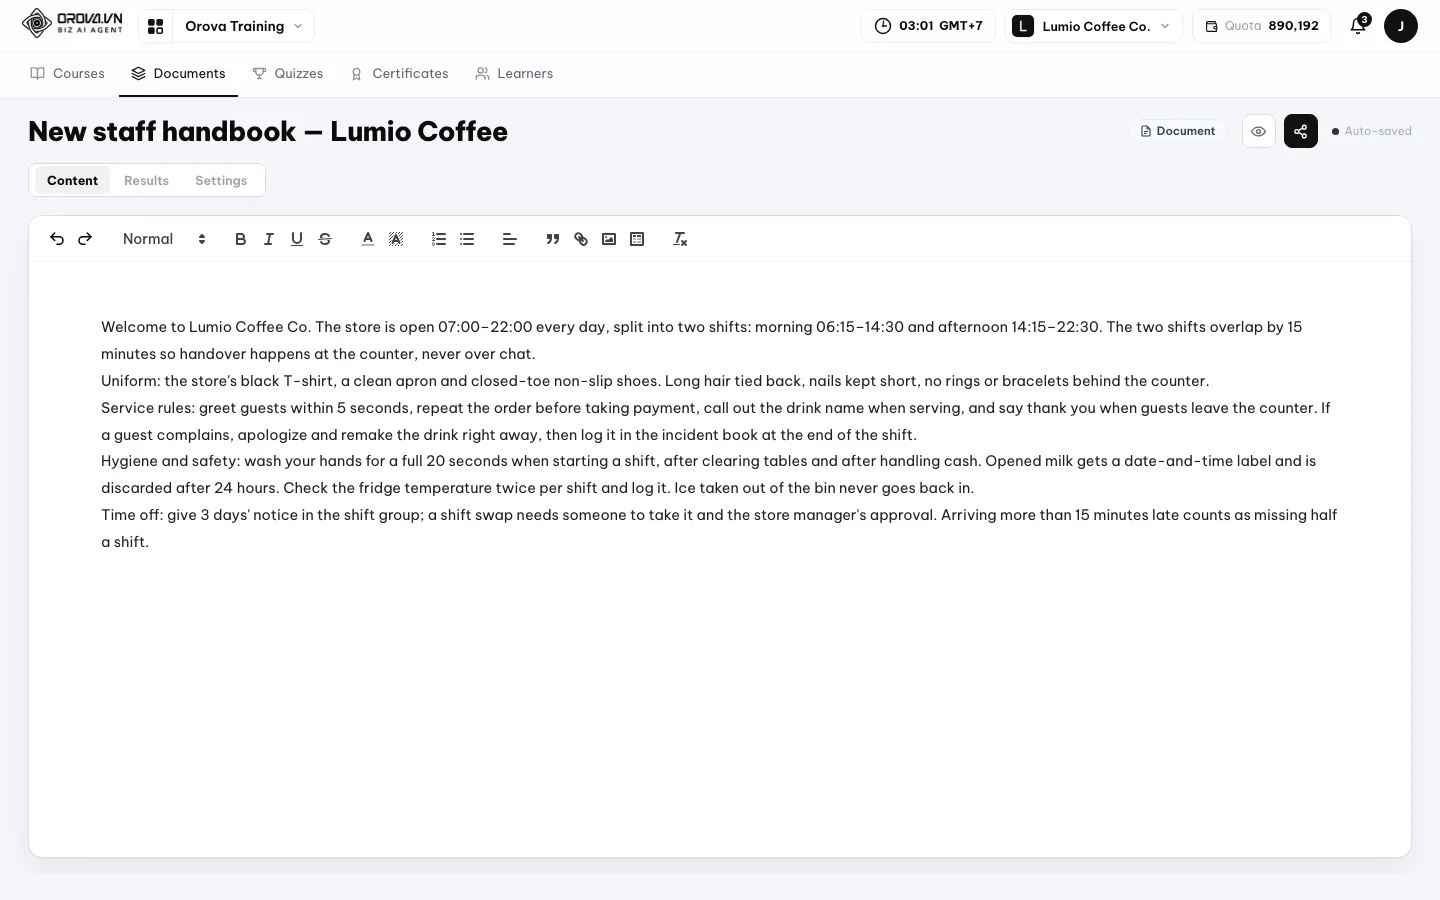
Name the document and write the content in the editor - 3
Ask AI to write if you are stuck. Click the AI button in the toolbar and describe what you want. When AI is done the text lands straight in the editor and you can edit it. This step spends quota, and the number is shown before you click.
Upload a slide file
- 1
Pick the Slides type. In the
Newdialog, click theSlidescard, then pick a PDF or PowerPoint file from your computer. The limit is 40MB.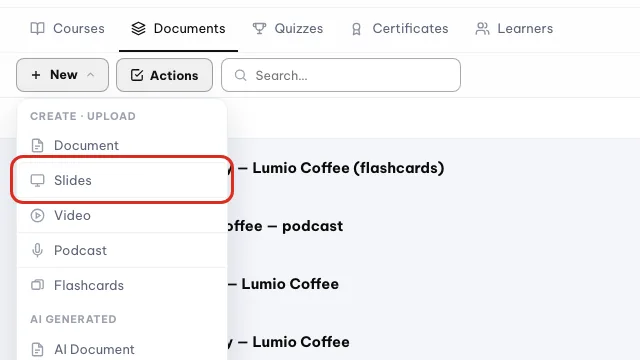
Click New and pick Slides - 2
Wait for the viewable version. The file is converted into something the browser can display. This runs in the background and is usually quick. When it is done the slides appear in a 16:9 frame.

The slides document opens once the viewable version is ready - 3
If the conversion fails. Complicated PowerPoint files sometimes refuse to convert. Open the file in PowerPoint, export it to PDF, and upload the PDF instead. That route always works.
Create an AI Podcast
- 1
Pick AI Podcast and paste the source. Paste the content into the
Source contentfield, at least 200 characters. Pasting the content of a document you already have is perfectly fine.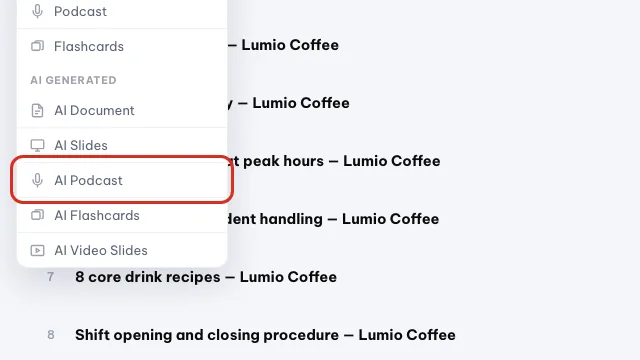
Click New and pick AI Podcast - 2
Choose the voices. Choose
Two hostsfor a conversation, orOne narratorfor a single reader. With two hosts you pick theHost voiceand theGuest voiceseparately. Each voice has a name that hints at its feel, for example Bright or Informative. - 3
Click create and wait. This step spends quota. The screen shows a generating message, and it usually takes 2 to 5 minutes. The page refreshes itself, so you can leave and come back.
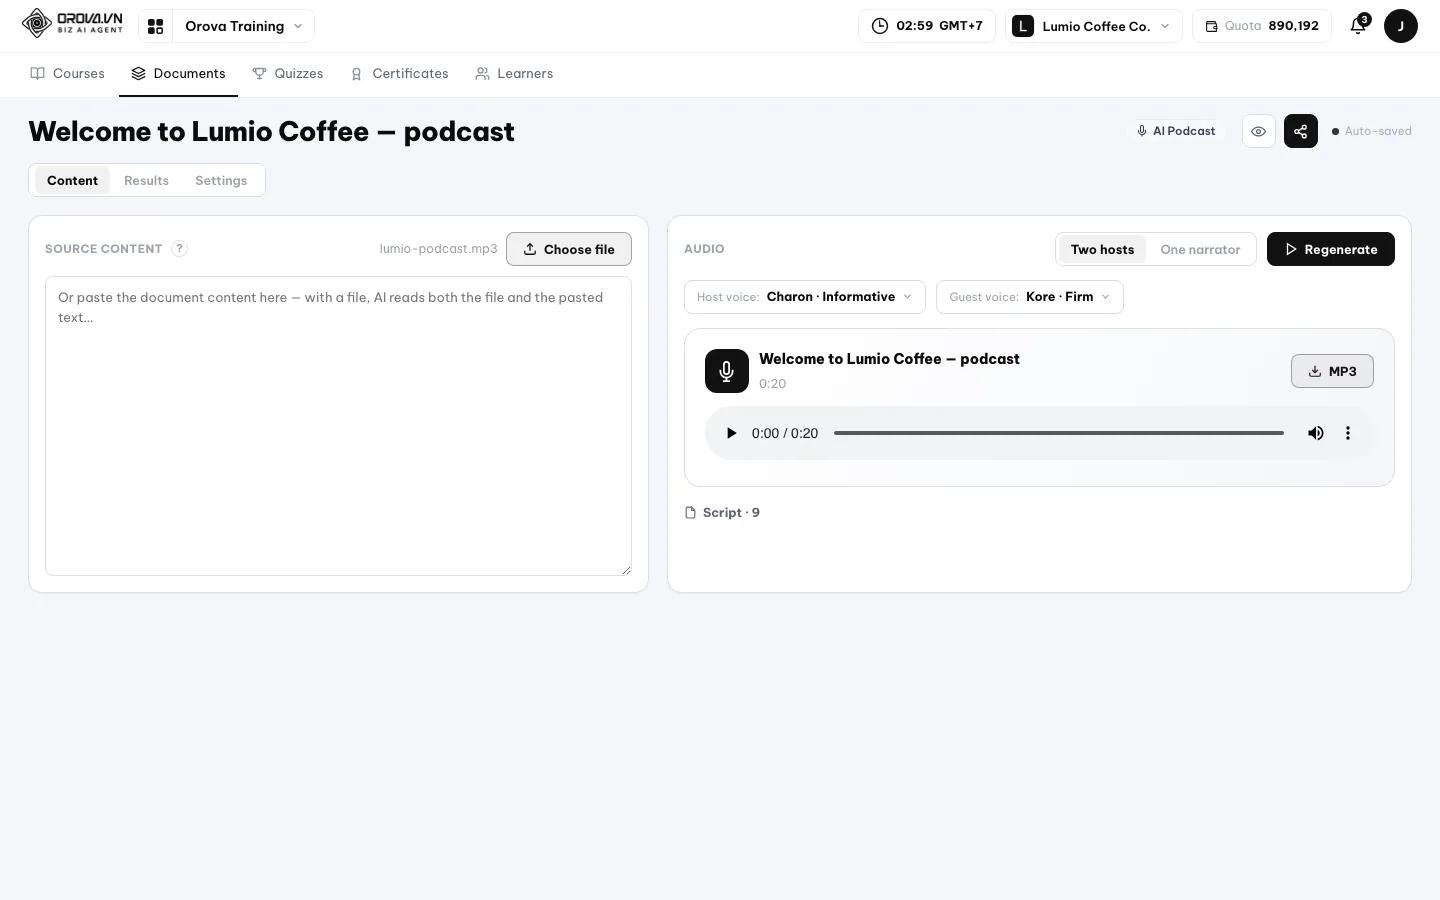
A finished podcast shows the player and the host/guest script
Warning
Daily text-to-speech limit reached
Create AI Flashcards
- 1
Pick AI Flashcards and paste the source. Paste the material to be revised into the
Source contentfield. The clearer the terms in the content, the tidier the cards.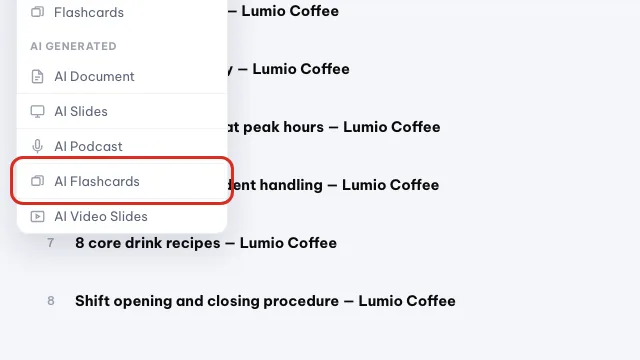
Click New and pick AI Flashcards - 2
Click create and wait under a minute. This step spends quota. The system shows a generating message, usually under a minute. When it finishes you get a grid of cards and a button to start flipping through them.
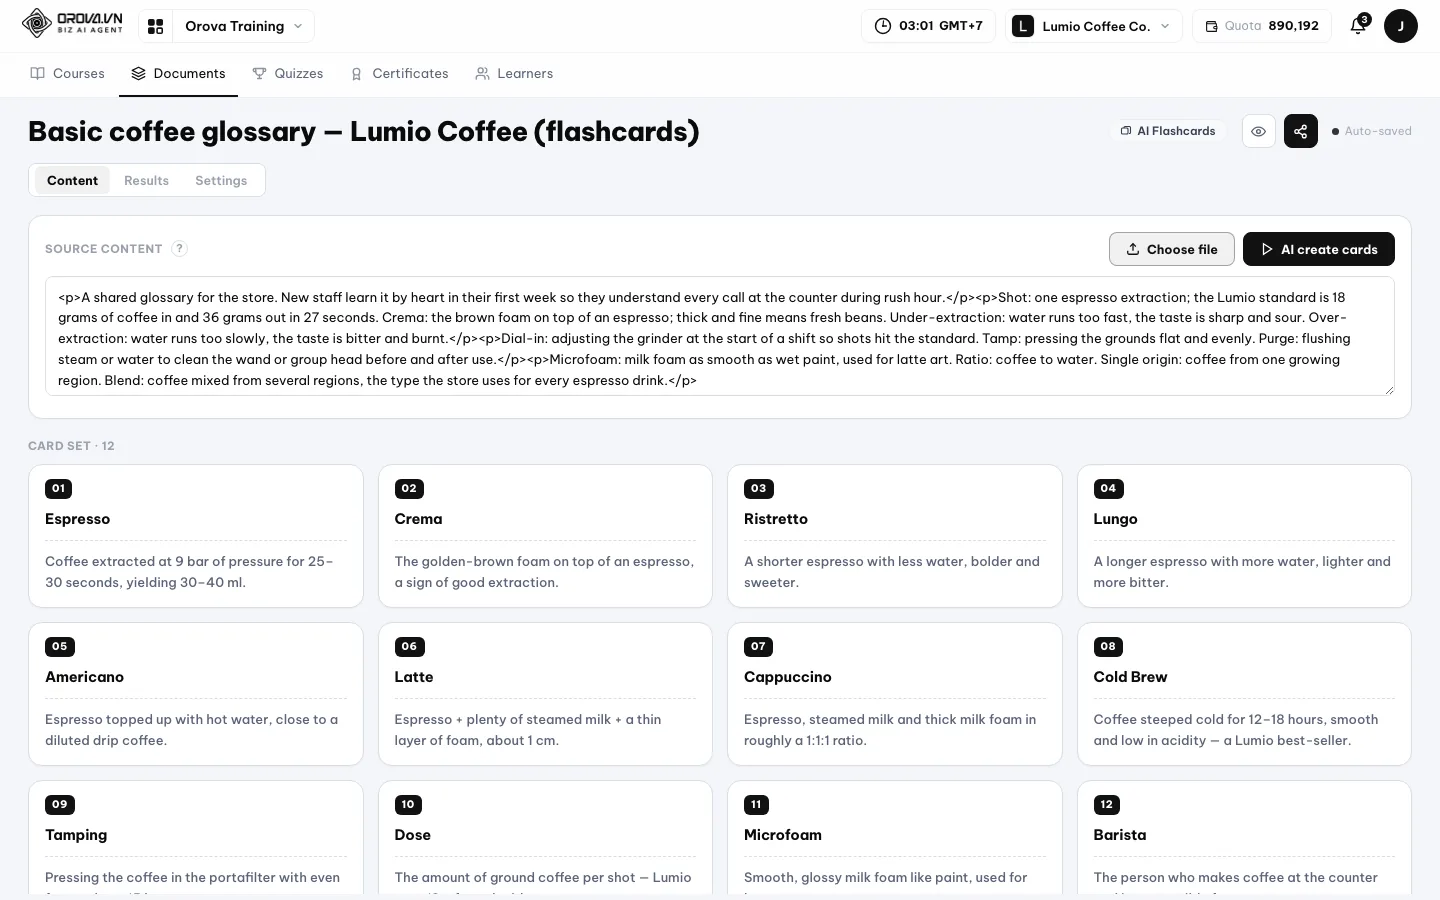
Edit any card in the grid if you need to - 3
Edit the cards if you need to. Click a card to edit its front and back. Editing by hand costs no quota.
Note
Set study rules on a document
No skipping ahead, One viewing only, Block copying, Minimum time. Turn them on when you need to be sure people really read the whole thing. The minimum-time clock only runs while the page is on screen.Tip
Don't click again while it is running
04 · Courses
Build a course and decide who takes it
A course is a series of items in order, with study rules and a passing score. You create it from one document, let AI draft the outline, then adjust it yourself.
Course
A course is a series of items in order, made of lessons and quizzes. It has study rules, a passing score, and can have a certificate attached.
Item
An item is one row in a course — a lesson or a quiz. Study rules are set per item and only apply inside that course; other courses are untouched.
Create a new course
- 1
Open the Courses tab and click New course. The
New coursebutton is in the top right corner. Clicking it opens a form with a document upload field and a course title field.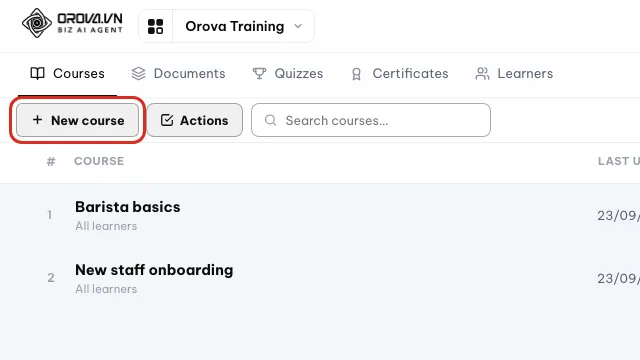
Open the Courses tab and click New course - 2
Pick the source document. In the
Source documentfield, clickChoose fileand pick a file from your computer. It accepts PDF, DOCX, DOC, TXT, MD, RTF, ODT. It must be a text file, up to 10MB. Scanned images do not work.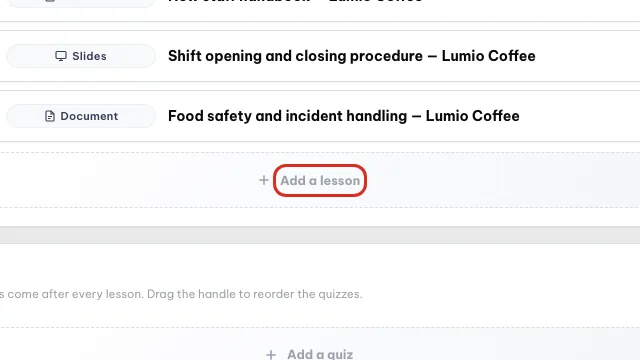
Add the source document as a lesson - 3
Name the course, or leave it blank. The
Course titlefield carries a note: leave it blank and AI names the course after the content of the document. You can rename it later at any time.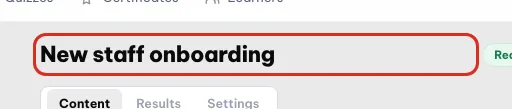
Name the course in the title field - 4
Choose Who can learn. The
Who can learnfield has three options:All learnersfor everyone on the learner list;Assigned onlyfor the people whose names you tick;By groupfor the groups you select. You can change this later.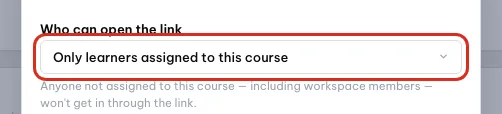
Choose who can learn this course - 5
Click Create. This step spends quota. The course goes into the
Generatingstatus and AI runs in the background. The screen spells it out: it usually takes a few minutes, and the job keeps running if you leave the page.
| Column / status | What it means | Notes |
|---|---|---|
Course | The course name. Click it to open the builder. | There is a search box above the table. |
Status | Which stage the course is at. | Generating · Ready · Draft · Failed. |
Learners | How many people this course is assigned to. | Zero means nobody can take it yet. |
Created by · Created · Last update | Who set the course up and when it was last edited. | Useful for telling which version is newer when several people are building together. |
When the status turns to Ready, click the course name to open the builder. That page has several sub-tabs: Info, Course parts, Generate, the item list, Certificate, Learners and Share.
Arrange the content inside a course
- 1
Look at the item list. Scroll to the item list. Every row is a lesson or a quiz. A course holds up to 200 items.
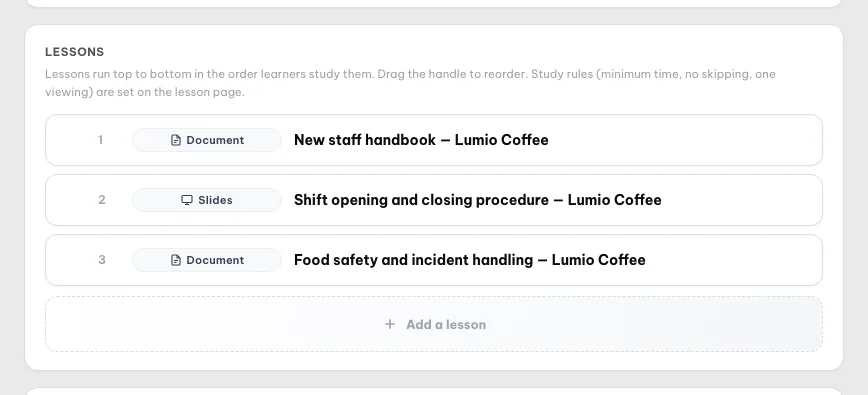
Look at the item list of the course - 2
Add items to the course. Click
Add item. You pick from theLessonsgroup or theQuizzesgroup — these are exactly the documents and quizzes you created in the other two tabs.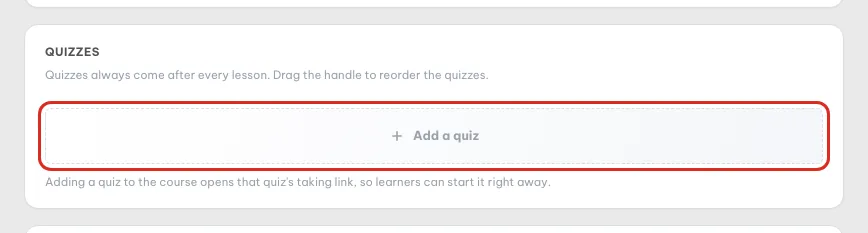
Search by name and add items to the course - 3
Reorder. Hold the handle on the left of a row and drag it up or down. This order is the order your learners will follow.
- 4
Set the rules for each item. Open
Item settingson a row. There are five switches:Must be completed,Minimum timein minutes,No skipping ahead,One viewing only,Block copying. What you set here only applies inside this course; the original document is untouched.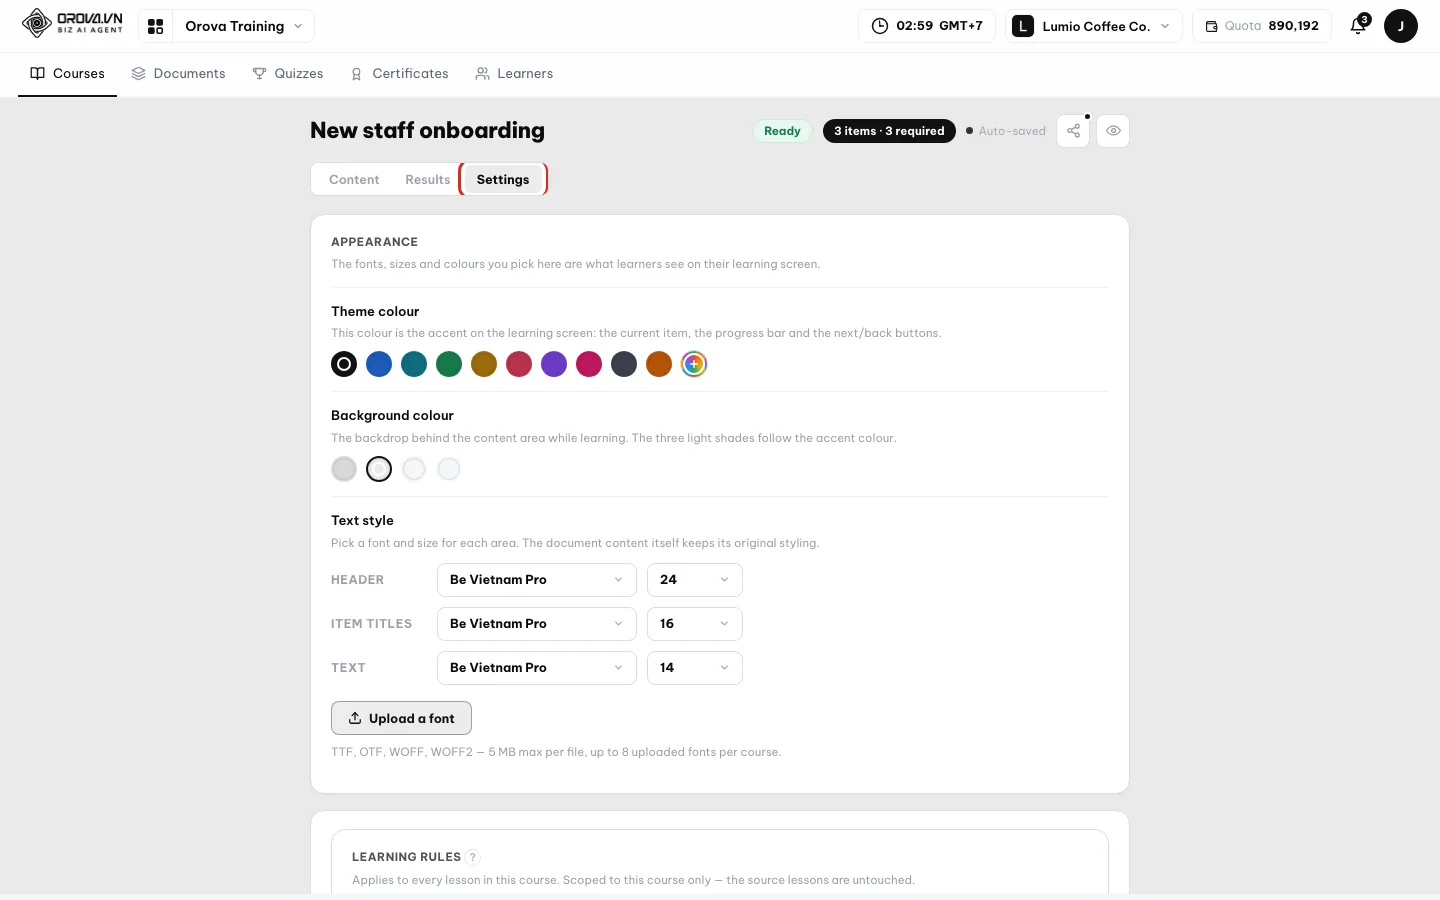
Set item rules and the passing score in Settings - 5
Set the passing score. Find the
Certificateblock. ThePassing scorefield is the minimum score that counts as a pass. Setting it to 0 means finishing the course is enough, no score needed. Right below it you pick the certificateTemplate, or choose no certificate at all. - 6
Assign the course to people. Find the
Learnersblock. ClickAssign a learnerto tick individuals, or use theLearner groupsblock to assign a whole group at once. People who are not assigned will not see this course.
Tip
The builder saves itself
Saving… then Auto-saved after every change. Wait until you see Auto-saved before you close the tab.Note
The course banner
Info tab has a Course banner field with two buttons: Upload to use your own image — no quota; Generate to have AI draw one — that spends quota. The image should be at least 1600×400, JPG or PNG, up to 4MB.Warning
The Generate button in the course builder
Generate tab lets you ask AI to rewrite the whole course, or just to produce the quiz, or just the flashcards. Every click opens a confirmation box that states the quota cost. Regenerating overwrites the content you already have — read the confirmation box carefully before you agree.05 · Quiz
Write a test
A quiz is how you check what people learned. There are two very different kinds: one is taken through a link, the other is played live by the whole group at the same time.
Exam Quiz
A test taken through a link. People open it whenever they like, it is scored, and every submission is kept for you to read.
Ranked Quiz
A live game. The whole group plays at once, with a countdown clock and a leaderboard on the screen. Like a quiz show in front of the class.
Open the Quizzes tab and click New. You have to choose the kind at creation time, so think it through: pick Exam when you need submissions and scores kept, pick Ranked when you want energy in the room.
Let AI write questions from a document
- 1
Open the quiz you just created. The quiz builder has three tabs:
Questions,Responses,Settings. You start onQuestions.
Open the quiz you just created - 2
Paste content into the Source content field. Paste the text of the lesson you want to test into the
Source contentfield. The clearer the content, the closer the questions stay to the material.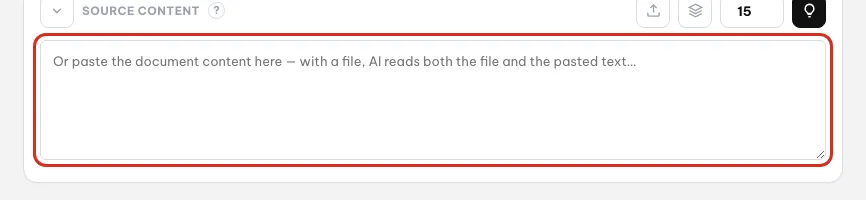
Paste content into the Source content field - 3
Click Generate questions. This step spends quota; the system estimates the cost and shows it before you click. Questions appear in the list as they come. A quiz holds up to 100 questions; once it is full the button says so.
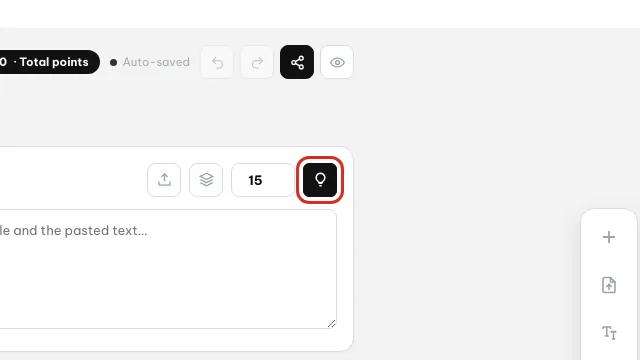
Click Generate questions (this uses quota) - 4
Edit each question. Click a question to change its wording, change the correct answer, or add and remove options. Editing by hand costs no quota. You can also add your own questions.
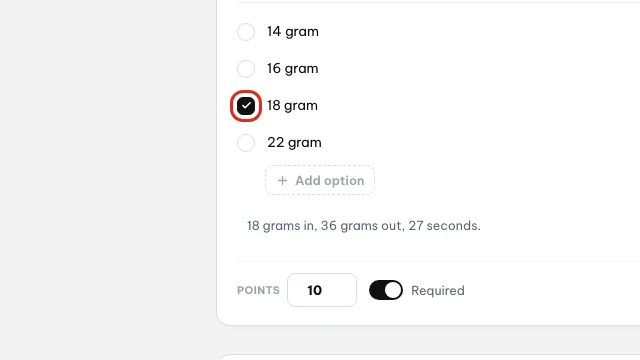
Edit each question, its options and the right answer
| Button / field | What it does | Notes |
|---|---|---|
Shuffle question order | Everyone gets a different order. | Makes it harder to copy from the person next to you. |
Show score and correct answers | The person sees right away which ones they got wrong. | Turn it off if you plan to let people retake it several times. |
Allow retaking | Lets people submit more than once. | Good for revision, not for a real exam. |
Release grades | When the person learns their score. | Immediately or Later, after manual review. |
Theme colour · Header image | Decoration for the page people take the test on. | The image should be 1600×400, up to 4MB. |
Share | Turns on the link other people use to take the quiz. | Once on, you get a link and a QR code. Turn it off and the link stops; turn it back on and it is the same link. |
Play a Ranked Quiz live
- 1
Check the three conditions first. To play live, the quiz must be the Ranked kind, it must already have Share on, and it must have at least one multiple-choice question. Miss one of these and the button reports an error instead of opening the room.
- 2
Turn on Share. Go to the
Settingstab and turn on theShareswitch. The screen shows the link people use and the matchingQR code.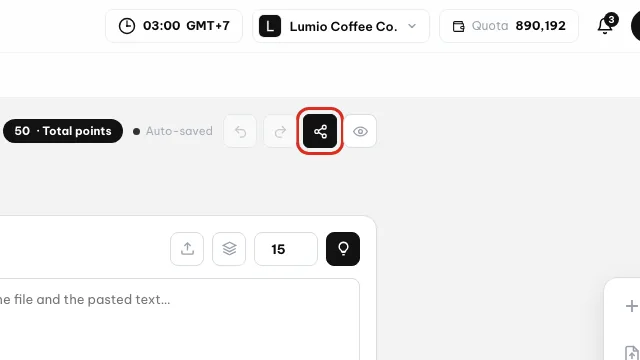
Turn on Share before playing live - 3
Click Play live. The
Play livebutton opens the host's waiting room. Put this screen on the projector or the TV.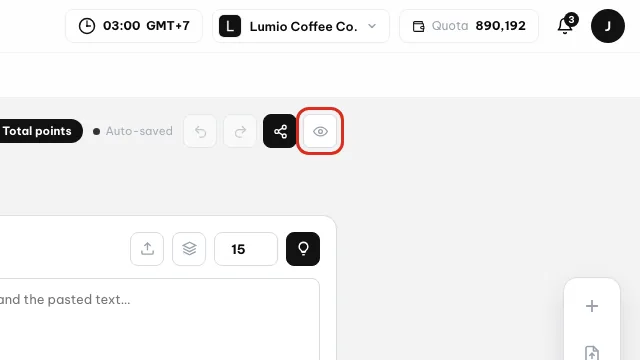
Click Play live to open the lobby - 4
Players scan the code and type a name. Players scan the QR code with their phone, or open the link. They only type a name, no Orova account needed. The player count climbs on your screen.
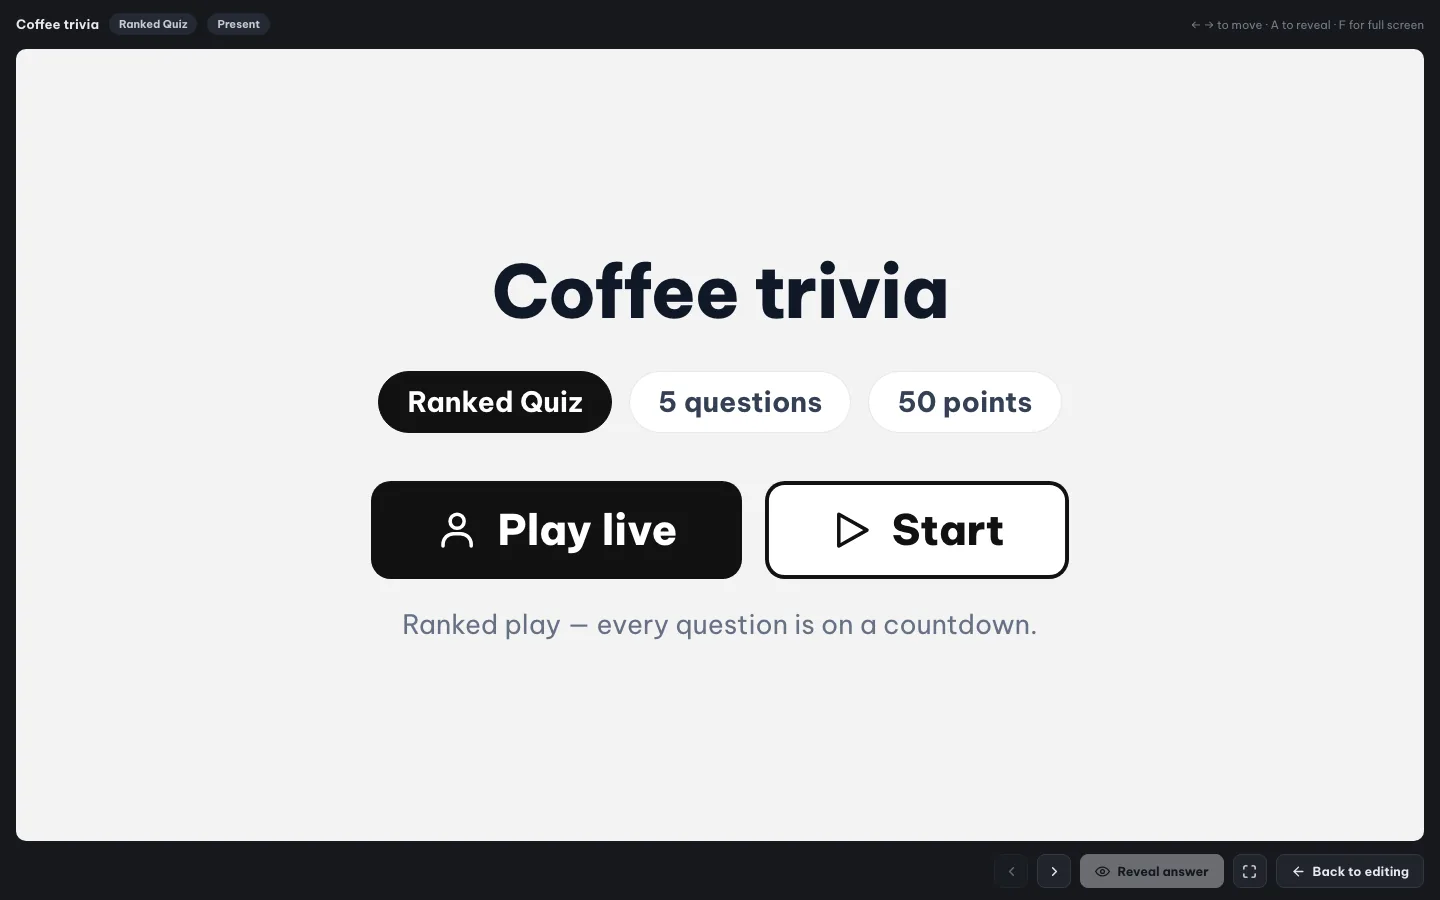
Players scan the code and type a name - 5
Click Start. Once enough people are in, click
Start. Questions come one at a time, with a clock and a leaderboard after each one. Free-text questions are skipped in live play.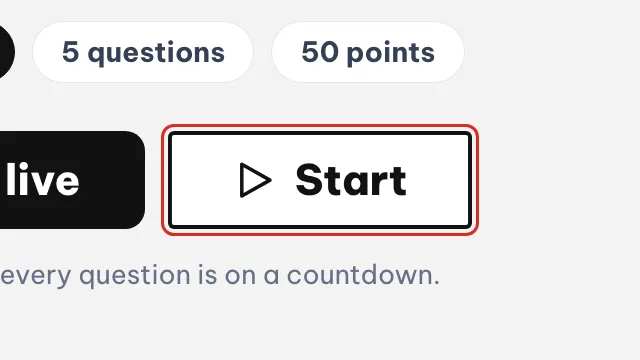
Click Start once everyone has joined
Warning
Live session results are not in the Responses tab
Responses tab does not store live session results. If you want to keep them, take a screenshot before you close it. The list of sessions you have run is in the Played sessions block.Note
Test takers do not need an account
06 · Grading
Grading and the passing score
Multiple-choice questions are graded by the machine instantly. For free-text questions you choose: let AI grade against the rubric you write, or read them and score by hand.
Grading rubric
A grading rubric describes what a good answer looks like. AI reads the rubric and grades against it. Think of it as the model answer you hand to a teaching assistant.
Passing score
The minimum score that counts as a pass and earns the certificate. You set it in the Certificate block of the course builder. Setting it to 0 means finishing the course is enough.
Prepare a free-text question
- 1
Open a free-text question in the Questions tab. A free-text question has two extra fields that multiple-choice questions do not:
Sample answerandGrading rubric. - 2
Fill in the Sample answer. Write out a correct answer the way you want it. It is the yardstick for comparison and is not shown to the taker before they submit.

Fill in the Sample answer - 3
Fill in the Grading rubric, or have AI write it. Type out the points that must be covered and how marks come off. Or click the button to have AI write the rubric for you — that button spends quota. You can still edit what AI wrote.
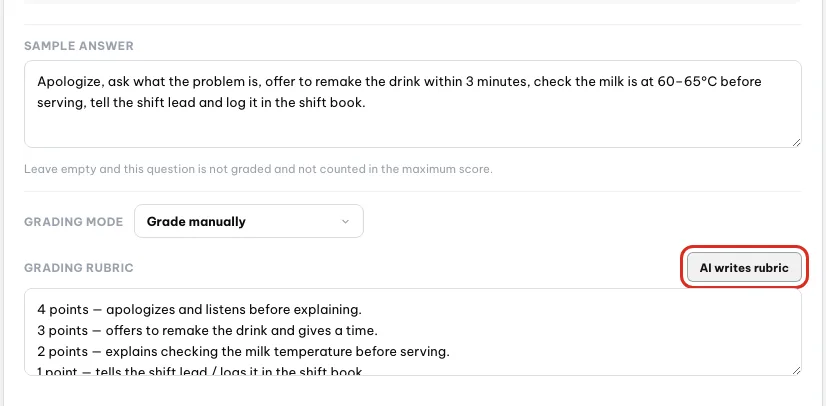
Fill in the Grading rubric, or have AI write it - 4
Choose the grading mode. Two options:
AI grades on submitscores automatically against the rubric — that spends quota on every graded submission;Grade manuallyleaves the submission waiting for you in theResponsestab.
Choose the grading mode
If you grade by hand, remember to set Release grades to Later, after manual review in the Settings tab. Otherwise people receive a score that is missing the free-text part.
Note
The score is in but the item is not marked complete
Minimum time and the learner did not stay long enough. Check these three before reporting a bug.Warning
The minimum-time clock only runs while the page is on screen
Tip
Where to read submissions
Responses tab in the quiz builder lists every Exam Quiz submission. Click a row to read the answers and score them by hand.07 · Certificates
Design and award certificates
The Certificates tab handles the paperwork. You design one template, award it to each person, then anyone can verify it later with a code.
Certificate template
The design of the certificate itself. Think of an award sheet with the name field left blank. One template gets reused for many people.
Awarded certificate
This is when you assign that template to a specific person. The system fills in their name and produces an individual copy.
Serial number
Every awarded copy carries its own serial number and its own QR code. Outsiders use that number to check the certificate is genuine.
You need this tab when you want learners to have proof they finished. Certificates can be awarded two ways: automatically when a learner reaches the passing score, or by hand.
| Button / field | What it does | Notes |
|---|---|---|
New certificate | Opens the panel for creating a new template | The first step in this tab |
AI made | You describe it in words and AI draws the template | Uses quota; the balance shows before you click |
Upload | Use a certificate you already have | Accepts PNG, JPG and WEBP images, or a PDF file |
Format | Pick Landscape, Portrait or Square | Chosen once, and cannot be changed afterwards |
| Description field | Spell out what text the certificate carries and how it is laid out | Whatever language you write in is the language you get back |
| Edit chat panel | Ask AI to adjust the template it already drew | Each edit also uses quota |
| Award block | Add recipients for this template | No AI call, so it uses no quota |
| Export PDF and print | Download the certificate or print it on paper | Available on the template page |
Do it in this order
- 1
Create the certificate template. Go to the
Certificatestab and clickNew certificate. ChooseAI madeorUpload. Pick the paper format. If you choseAI made, type a description in the field below: certificate name, company name, main colour, whose signature it carries. The description field already holds a long example you can edit. Click the create button and wait for AI to draw it.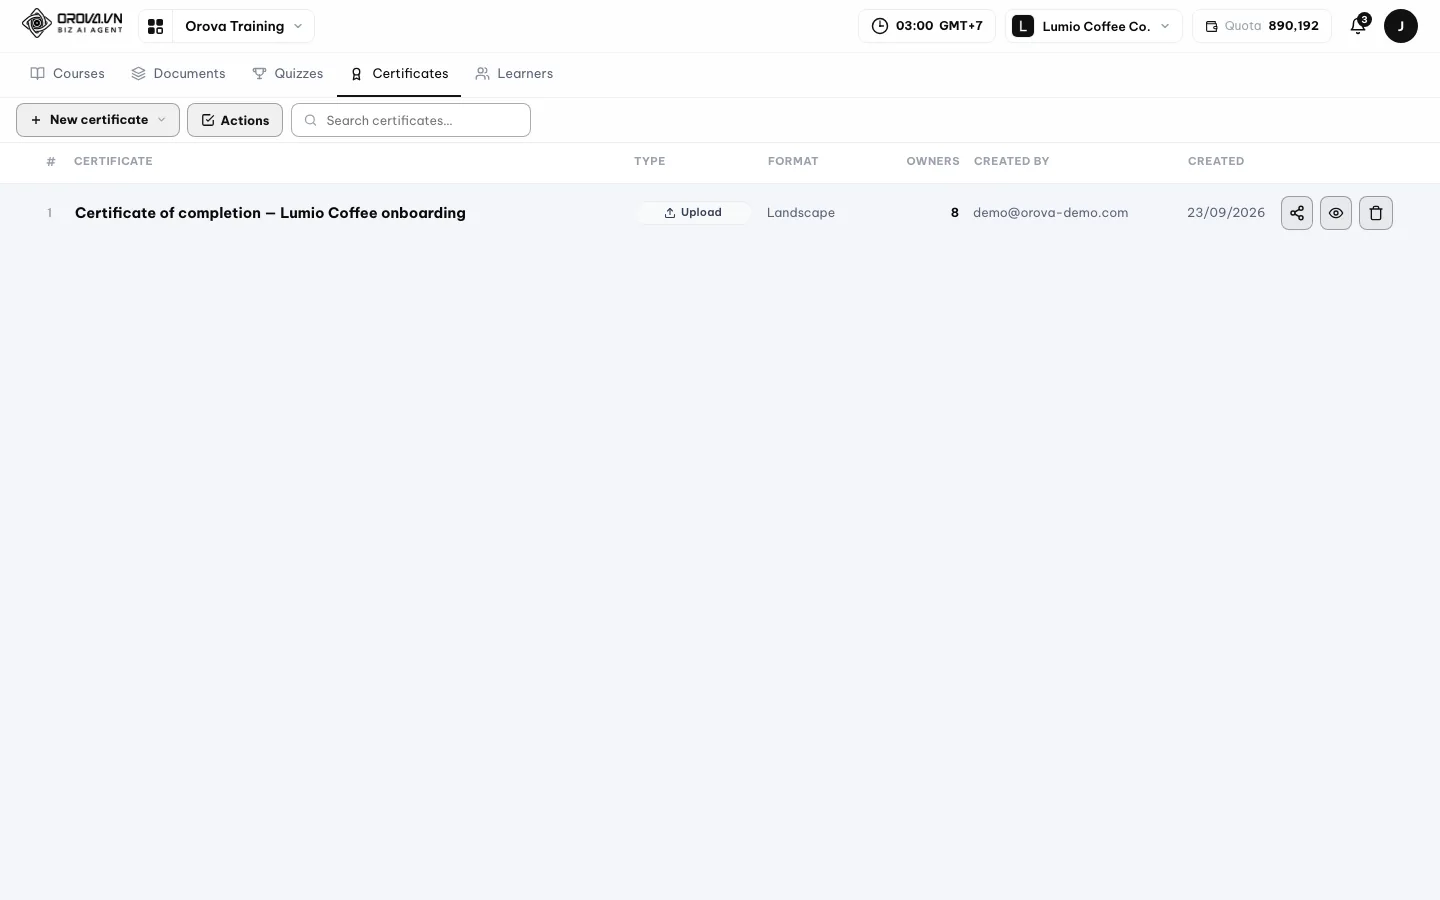
Create the certificate template from the Certificates tab - 2
Edit the template by talking to it. Once drawn, the template appears in the middle of the screen with a chat panel beside it. Type what you want in plain words, for example change the border colour, resize the recipient's name, add room for a logo, a signature or a stamp. AI redraws it and you see the result right away. Every edit round uses quota.
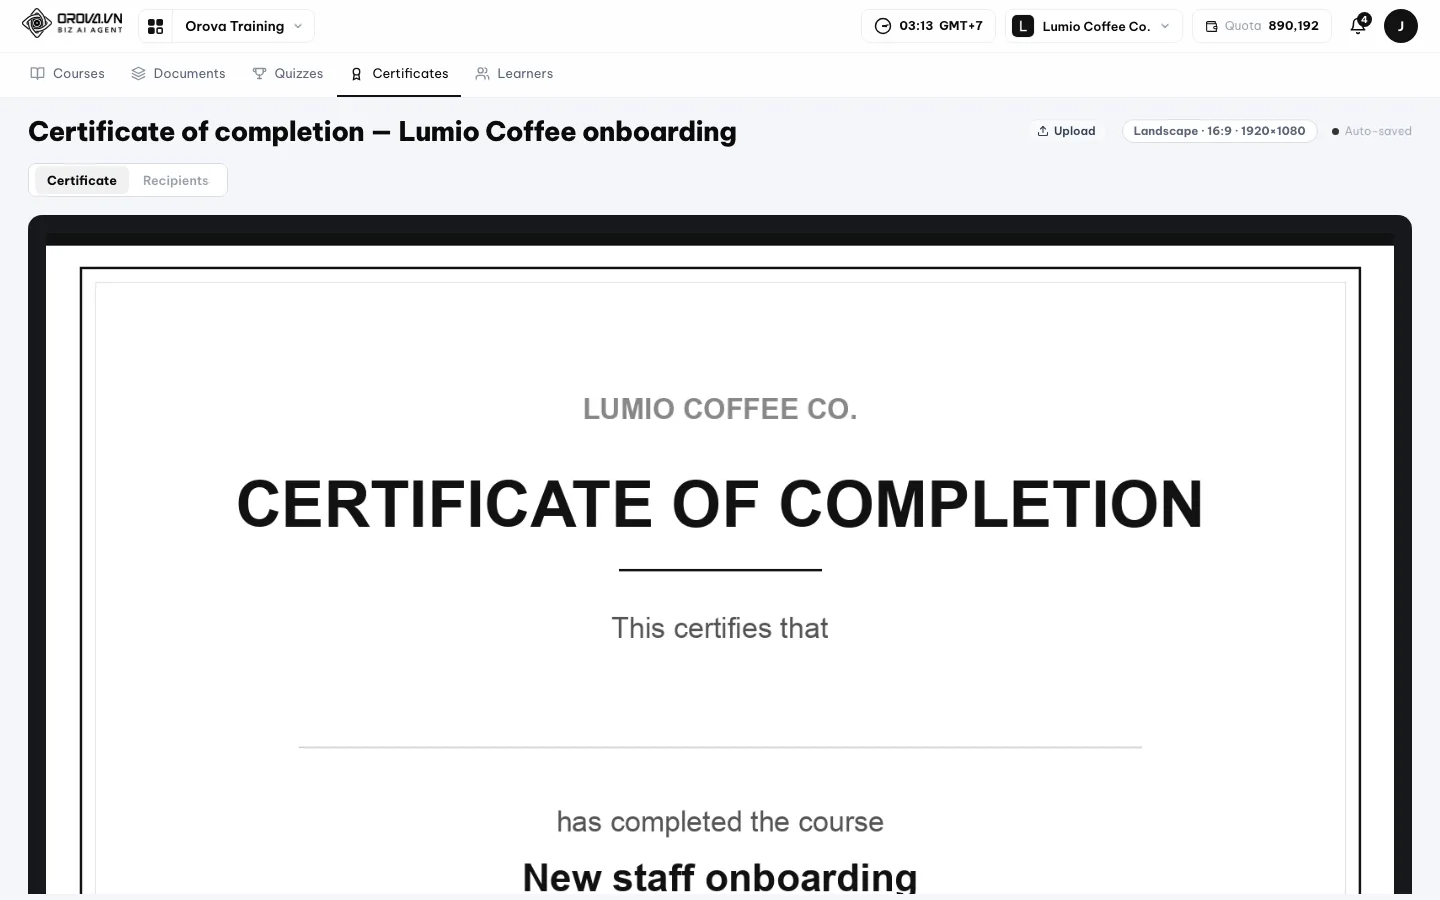
Edit the template in the certificate editor - 3
Award it to recipients. Scroll to the award block on the template page. There are two routes: tick learners who are already in the workspace, or type in a name and an email by hand for outsiders. The manual route does not require the person to have an Orova account. Every row you add produces its own serial number and its own verification link.
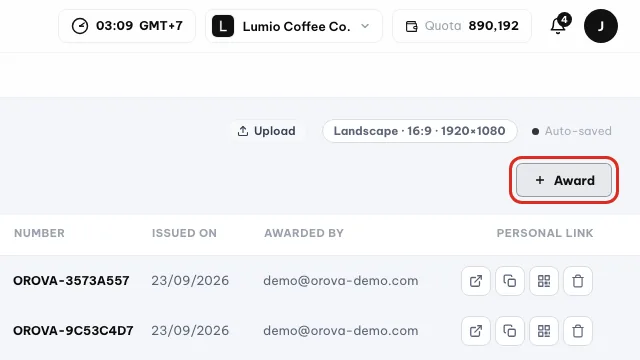
Open Recipients and click Award - 4
Let the course award it for you. Open the course editor and find the
Certificateblock. Pick a template in theTemplatefield, or leaveNo certificateif this course does not need one. Fill inPassing score. A learner who finishes and reaches the score is awarded the certificate immediately, with nothing more from you. A score of 0 means finishing the course is enough to pass. - 5
Recipients verify it later. Every copy has a public page at
/u/c/{code}and a verify-by-code page at/u/cert/{code}. Viewers do not need to sign in. If the code is right, the page showsValid certificatealong with the recipient's name, the course name and the award date. A wrong code returns a not-valid message.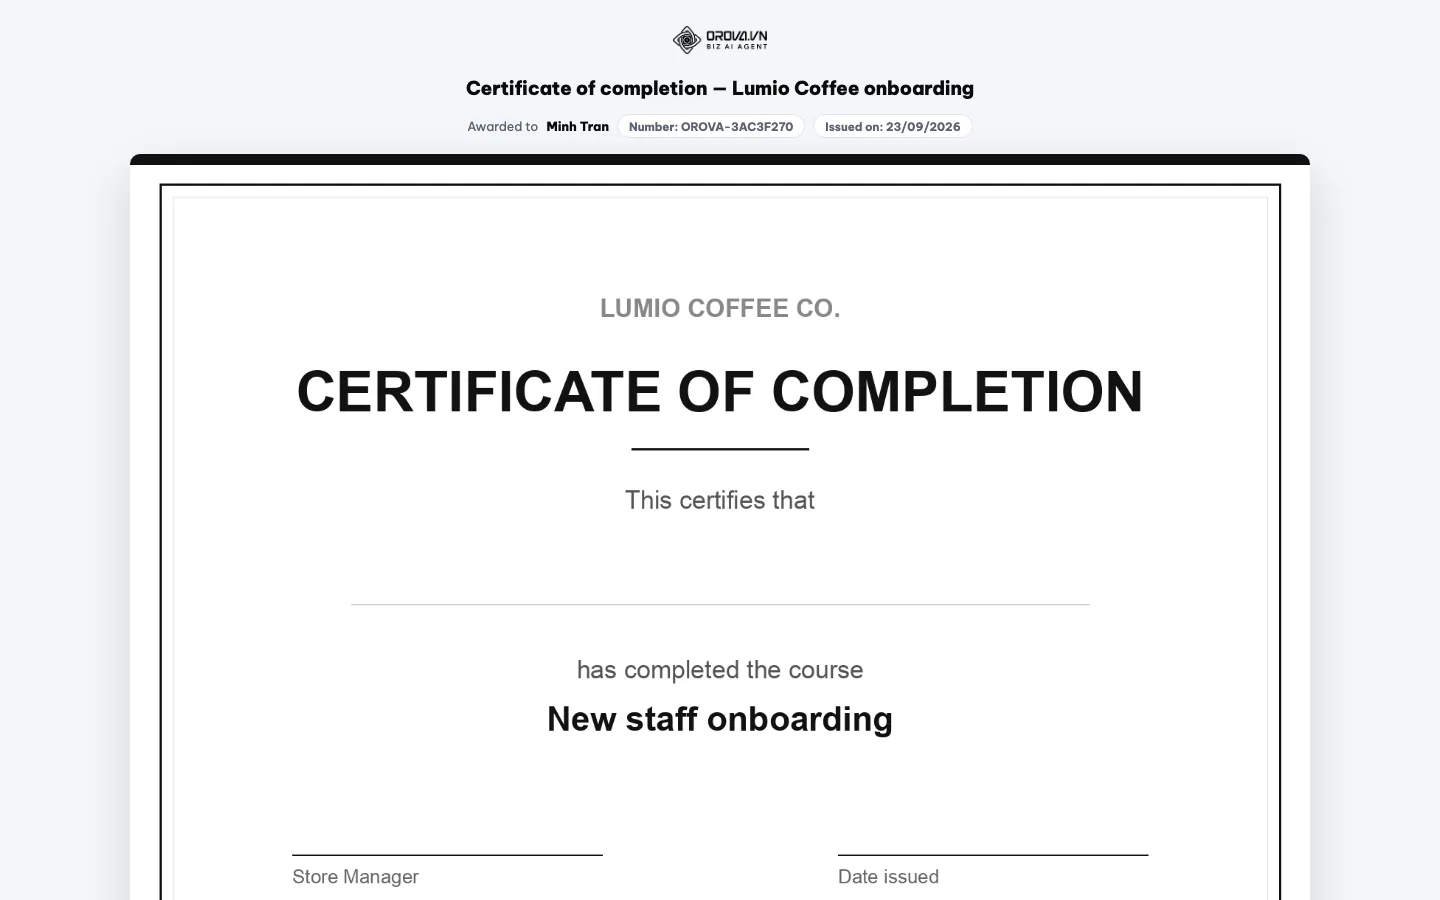
Anyone can check a certificate by its number
Warning
The paper format is a one-time choice
Landscape, Portrait or Square is locked in as you create the template and cannot be changed. Pick the wrong one and you have to create a new template, which costs another AI run.Tip
Awarding certificates is free
08 · Sharing
Share courses, documents and quizzes
Courses, lessons and quizzes can all go out through a link with a QR code attached. What matters is choosing exactly who may open it.
Share link
A short web address pointing straight at your course, lesson or quiz. You send that address by message or email to whoever needs to learn.
Share mode
The rule that decides who can open that link. Like the door of a house: wide open to everyone, or only open to people who live there.
QR code
A black-and-white square that already holds the link. Other people point a phone at it and go straight in, with no address to type.
Every course, every lesson and every quiz has its own share toggle. Until you turn the toggle on, the link does not exist and outsiders cannot get in.
| Button / field | What it does | Notes |
|---|---|---|
Share toggle | Turns the public link on or off | Turning it off stops the link immediately |
Who can open the link | Choose how far the door opens | Can be changed at any time |
| Link field | An address like /u/k/{code} for you to copy | {code} is the course's random code |
| QR code | The QR image at /u/k/{code}/qr | Put it on a screen so a whole room can scan it |
Turn on sharing for a course
- 1
Open the Share block. Go to the
Coursestab and click the course name to open its editor. Scroll to theShareblock and turn the toggle on. The link appears right below it, with a QR code.
Open the Share block of the course - 2
Choose how far the door opens. Click the
Who can open the linkfield and pick a level.Anyone with the linkis for sending outside the company.Only people in this workspaceis for internal material.Only learners assigned to this courseis the strictest: outsiders holding the link still cannot open it. The document library has one more level of its own, shown in that same field.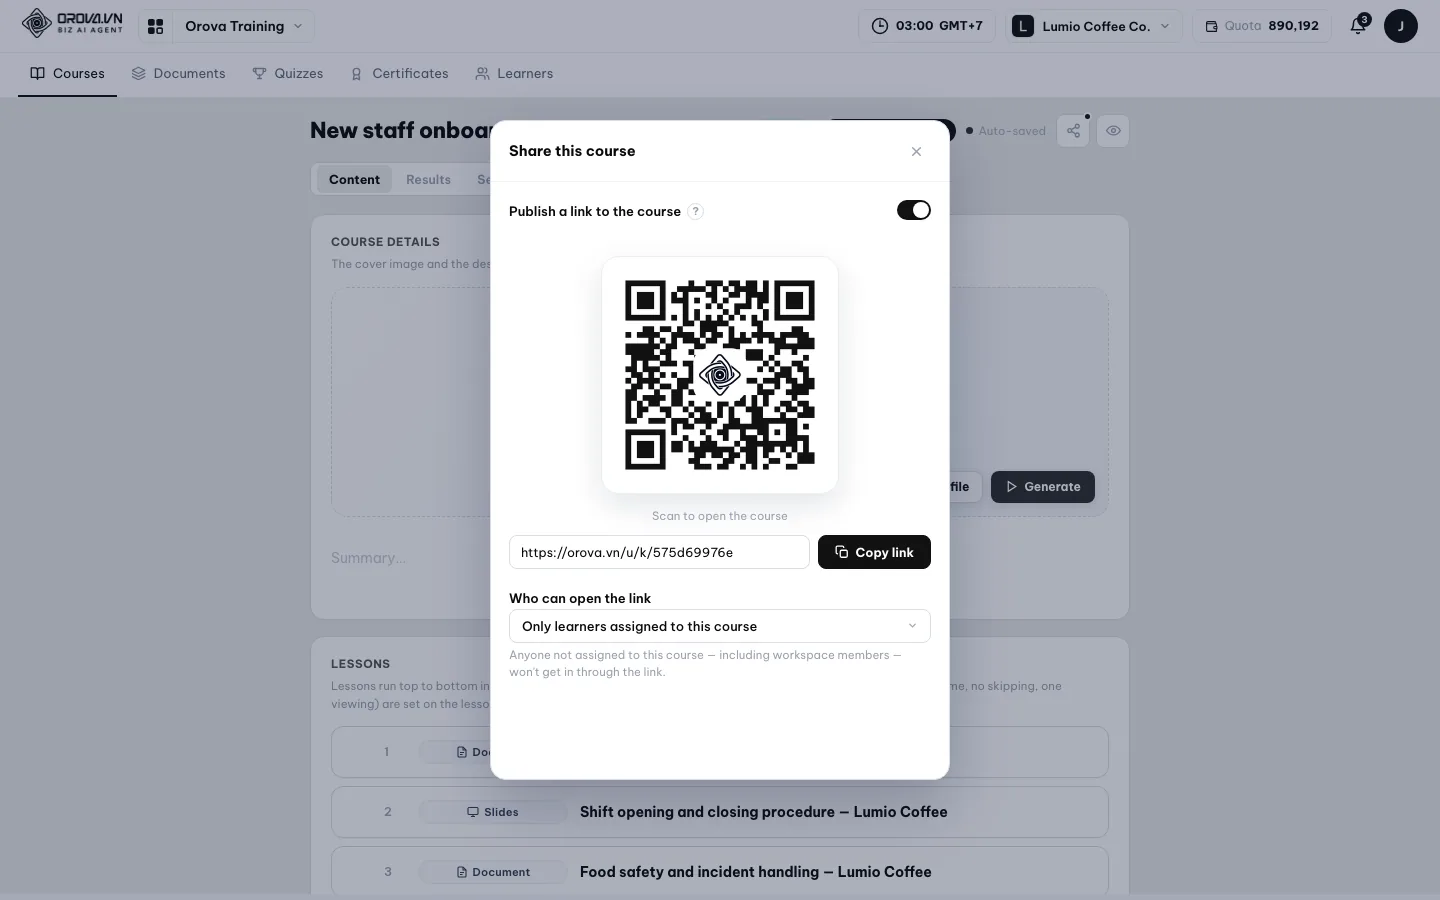
Choose how far the door opens, then send the link or QR - 3
Send the link or show the QR. Copy the link and paste it into the group chat. If everyone is in the same room, put the QR code on screen and let them scan. Standalone lessons use
/u/d/{code}, quizzes use/q/{code}, awarded certificates use/u/c/{code}; each type comes with its own QR image.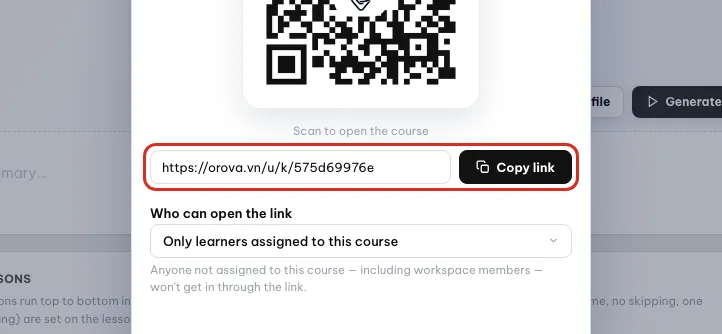
Copy the link or let people scan the QR - 4
Turn it off when you are done. Turning the
Sharetoggle off stops the link immediately, even for people already holding it. Turn it back on later and you get the same link as before, so you never have to send a new address.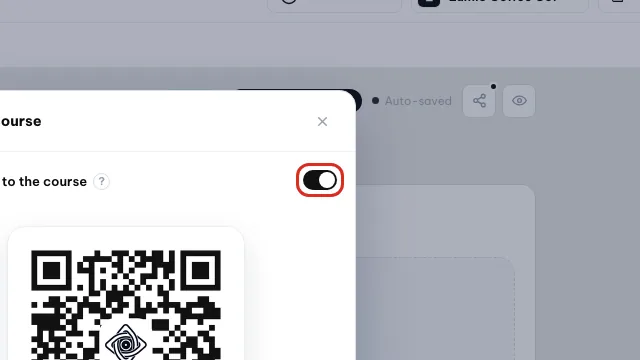
Switch Publish a link off when you are done
Warning
Courses always require a sign-in
Anyone with the link, whoever opens the course still has to sign in. The reason is built into how the system works: without an account there is nowhere to record progress, scores and certificates. Do not promise learners that a link alone is enough to start studying.Note
Standalone lessons and quizzes need no account
/u/d/{code} opens without signing in, but it records no course progress and issues no certificate. The same goes for a quiz at /q/{code}: the person taking it only types a name.Note
Two error messages you will see on links
This link isn't available means the share toggle is off or the code is wrong. This course isn't assigned to you means the mode is set to assigned learners only, and that person's name is not on the assignment list.Note
Move a course to another system with SCORM
09 · Tracking
Track how far everyone has got
Once a course is assigned, you need to know who has studied and who dropped off. The results table sits inside the course editor.
Progress
The number of items a learner has finished out of the course total. Like counting pages read against the total pages in a book.
Learner status
Three levels: Not started means they never opened the course, Learning means they opened it but have not finished, Completed means every required item is done.
This table updates as people actually study. Open it any time and you see the latest numbers, with no refresh button to press.
| Column / field | What it shows | Notes |
|---|---|---|
Learner | The learner's name with their email | Only shows people assigned the course or who joined through the link |
Progress | Items completed out of the total | Counts only items marked as required |
Score | The score on the quiz inside the course | Empty if the course has no quiz or the person has not submitted |
Certificate | Whether a certificate has been awarded | Only appears once the score reaches the threshold you set |
| Empty table | Nobody has started yet | Check the Learners tab and the course assignment mode first |
Read and understand the results table
- 1
Open the Results tab. Go to the
Coursestab, click a course name to open its editor, then select theResultstab. One row per learner. Read left to right: name, progress, score, certificate.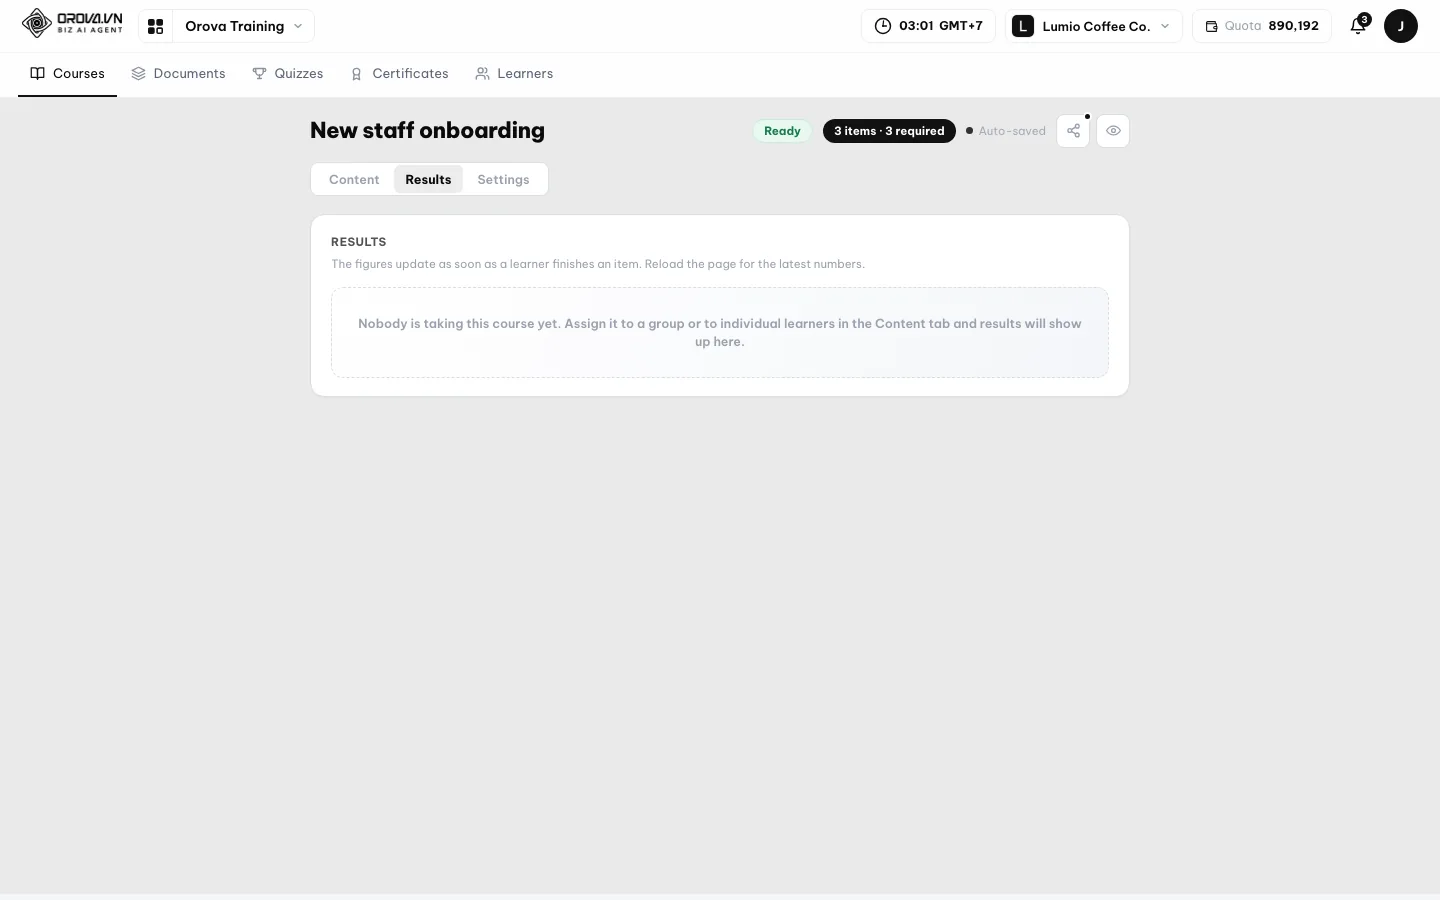
Open the Results tab to see each learner's progress - 2
Look at it from the learner's side. When a learner opens the course they see a start button; next time they come back the button becomes
Continueand jumps straight to where they stopped. They open each item in the order you arranged, and mark an item complete once they are through it.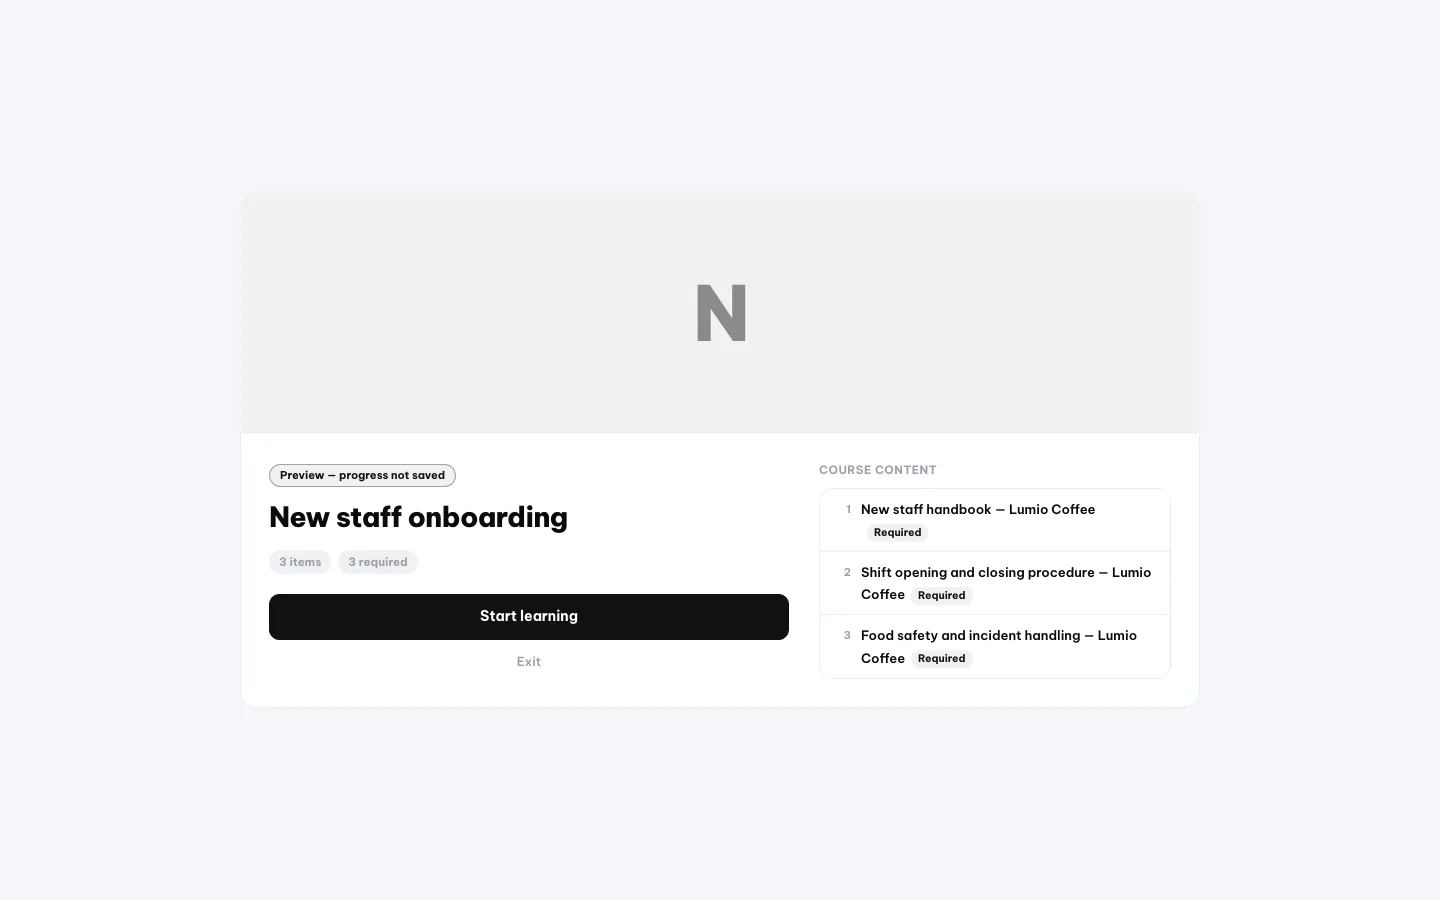
Look at the course from the learner's side - 3
The summary screen at the end. After the last item, the learner sees a summary screen: the quiz score, a
Passedline or a not-yet-passed message, and a link to download the certificate if the course has a template attached. The certificate column in your results table fills in at that same moment. - 4
When the numbers look wrong. Progress that will not move is usually an item with a
Minimum timeset. The clock only runs while the learner has that tab open. Open it and switch to something else and the time is not counted, so the item never reaches the minutes needed to count as done.
Note
Ranked quizzes are not in this table
Ranked Quiz session only appear on the presentation screen while you play; they are not saved to the `Responses` tab. If you want to keep the ranking, take a screenshot as the session ends. The list of sessions already played is still there to look up.Note
A learner says they cannot see any courses
Learners tab. Two: what level is the course's Who can learn field set to — if it is Assigned only or By group, they must be assigned by name.10 · Language & quota
Interface language and how quota works
No feature is locked behind a plan. Every account gets everything; plans differ only in how much quota you spend.
Quota
The number of AI runs the whole workspace has. Like money in a shared wallet: anyone in the workspace who spends draws it down.
Background job
Work AI does behind your back, for example building a course or recording a podcast. You can close the page and go do something else while it keeps running.
An easy rule: if a button says AI, it spends quota. The balance sits in the top bar and in the confirmation box, so you see it before you click.
| Button / field | What it does | Notes |
|---|---|---|
Create | AI reads the document and builds the course | Uses quota, runs in the background for a few minutes |
Generate on the course banner | AI draws a cover image for the course | Uses quota; use Upload instead to spend nothing |
Generate inside the course page | Rebuilds the whole course or just one part | Uses quota, stated plainly in the confirmation box |
| AI buttons on documents | AI writes text, builds slides, records a podcast, produces a flashcard set | One run for each type, all of them spend quota |
| AI Slides video | AI turns a slide deck into a narrated video | Spends more quota than the other types and runs longer in the background |
Generate questions | AI writes quiz questions from your source content | One run for the whole click |
AI writes rubric | AI writes the grading rubric for an open-ended question | Uses quota |
| AI grading of open answers | AI reads the answer and scores it | Uses quota on every grading pass |
AI made on certificates | AI draws the certificate template, and edits it through chat | One run to draw, one more run for every edit |
| Manual work | Uploading documents, typing questions, building groups, assigning courses, awarding certificates, reading results | Costs no quota |
Keep quota from running out mid-way
- 1
Check the balance before you click. The quota balance sits in the top bar. When it gets low a yellow banner appears at the top of the page; when it is gone the banner turns red. Pressing an AI button with no quota left opens a notice: the job does not run and nothing is wrongly deducted.

Check the balance before you click - 2
Do the heavy jobs first. Building a course with AI and recording a podcast are the two biggest spenders. Do those early in the session and save the manual work — building groups, assigning courses, awarding certificates — for later, since none of it costs anything.
- 3
Save a run where you can. Using
Uploadinstead ofGeneratefor the course cover saves one run. The same goes for certificate templates: if your company already has a design file, chooseUpload. - 4
Choose your interface language. The Orova interface comes in nine languages: Vietnamese, English, Japanese, Chinese, French, Spanish, Thai, Lao and Khmer. Each person picks their own, with no effect on anyone else in the workspace.
Tip
AI answers in whatever language you write
Note
Leaving the page does not stop the job
11 · FAQ
Frequently asked questions and common errors
The error messages you are most likely to hit in Orova Training, with the cause and the fix for each.
Most of the problems here are not broken software, they are a missing preparation step. Read the cause, follow the fix, and you are done.
I only see one tab, `Courses` — no `Documents`, `Quizzes`, `Certificates` or `Learners`.
The four management tabs only appear for people with permission to build training content. You are signed in as a learner, so they are hidden entirely. The fix: ask your workspace administrator to grant your account the Training editing permission.
A learner says they cannot see any courses at all.
Two causes, check them in order. One: that person is not yet listed in the Learners tab — being a workspace member is not enough. Two: the course's Who can learn field is set to Assigned only or By group and they were never assigned by name. Once you fix it, they reload the page and the course is there.
I get `Document too short or no extractable text`.
The file you uploaded has no real text layer, usually because it is a scan or a photo of a page. AI cannot read text from an image at this step. The fix: use a proper text file such as a DOCX or a PDF exported from a computer, or paste the content straight into the source field.
I get `Invalid file (format or size)`.
Wrong file type or the file is too heavy. A course source document only accepts text files and has a size limit; slides, cover images and certificate files each have their own limit, stated right under the upload field. The fix: read the hint under the field, change the format or compress the file, then upload again.
The podcast says the daily text-to-speech limit is used up.
That is the daily limit of the text-to-speech service, not a problem with your content and not your Orova quota running out. The fix: wait for the next day and press create again. If you are in a hurry, do the other parts first and leave the podcast for later.
I uploaded a PowerPoint and it says the conversion to the viewer failed.
The PowerPoint file contains something the system cannot read, for example an unusual font or a custom effect. The fix: open that file, export it as a PDF, then upload the PDF instead.
I click `Play live` and it blocks me.
Playing live needs all three conditions. One: the quiz must be a Ranked Quiz — an Exam Quiz cannot be played live. Two: the Share toggle must be on. Three: there must be at least one multiple-choice question. Whichever condition is missing, the system names it; fix it and click again.
It says `This quiz already has 100 questions` so I cannot generate more.
Each quiz is capped at 100 questions. The fix: delete the questions you do not use, or split it into two quizzes by topic and attach both to the course.
I cannot add another course item, or cannot create another group.
The system has hard caps: 200 items per course, and 200 learner groups per workspace. The fix: merge small items together, or clear out old groups you no longer use.
It says the course needs a document or at least one stage with content.
The course is empty, so there is nothing to build from and nothing to save. The fix: upload a source document, or paste content into the paste field, then click again. If you pressed the AI build button, you also need at least one component toggle on, for example stages or flashcards.
A learner submitted and has a score, but the item is still not marked complete.
Saving a score and counting completion are two different things. Usually the item has a Minimum time set and the learner did not stay long enough, or the score is below the threshold, or the paper is waiting on manual grading so nothing is released yet. The fix: open Item settings and review the toggles, and check the course's Passing score.
Opening a share link gives `This link isn't available` or `This course isn't assigned to you`.
The first message means the Share toggle is off or the code in the address is wrong. The second means the mode is set to assigned learners only and whoever opened it is not on the list. The fix: turn the toggle back on, change the Who can open the link field, or assign the course to that person.
I sent the course link but the recipient is still asked to sign in.
That is by design. A course always needs an account, because progress, scores and certificates have to be recorded somewhere. If you only want a quick look at the content, share a standalone lesson instead of the whole course; a standalone lesson opens straight away, but records no progress and issues no certificate.
I press an AI button and get an out-of-quota notice.
The workspace quota wallet is empty. The job does not run and nothing is deducted. The fix: top up quota for the workspace, or do that part by hand, for example type the questions yourself and upload a cover image you already have instead of asking AI to draw one.
I picked the wrong certificate format — how do I change it?
The format is locked in as the template is created and cannot be changed. The only fix is to create a new template with the right format and attach it to the course. Creating a template with AI costs another quota run.
/ Need help?
Can't find what you need? Open the Support section in your workspace, or send us a message.