
Orova Recruit handles the whole hiring round in one place. You open a job opening, collect CVs, let AI screen them, book interviews, score them and email your candidates.
This guide is written for someone who has never opened Orova. Every section starts by explaining the new words, then walks through the clicks.
One principle runs through the whole guide: AI scores and records the evidence, you make the call.
00 · Introduction
What Orova Recruit is
One hiring story from start to finish, all inside a single module.
Orova Recruit
This is the hiring part of Orova. Picture it as a filing cabinet that can read: you drop in the job description and the CVs, it reads them for you and ranks the candidates.
The module follows the exact order of a real hiring round. You don't need to know any of the jargon up front — just work your way down.
- Open a job opening — for example “Head barista”.
- Add the JD (job description) and let AI extract a set of scoring criteria.
- Upload candidate CVs and let AI score each one against those criteria.
- Prepare interview questions for each person.
- Book the interview room and time.
- Take notes during the session, score the interview, pick your person.
- Send the invitation, the offer or the rejection email, under your own company name.
Tip
How to read this guide
01 · Before you start
Three words you will meet all the way through
Learn these three words first and the rest of the guide reads very quickly.
Workspace
This is your “company” inside Orova. Every job opening, CV, email template and quota wallet belongs to the workspace, not to you personally. Colleagues you invite share the same storage.
Job opening
This is one role you are hiring for. Think of it as its own box holding the JD, the criteria, every CV, the interview questions and the bookings for that one role.
Quota
This is the workspace's spending unit for AI, like money in a shared wallet. Every time AI does work for you, quota is deducted based on how much AI was actually used.
Anything you do yourself — typing, editing criteria, booking a slot, picking a person — costs no quota. Only the actions with “AI” on them cost anything.
Note
The quota cost always shows before you click
How to get in: open your workspace and pick Recruit in the tab bar at the top. Orova takes you straight to the Job openings screen.
02 · Create an opening
Create your first job opening
The first job is always to create an opening. Everything else hangs off it.
JD status chip
This is the small label next to the opening name in the table. It tells you whether the opening already has a scoring criteria set: No JD yet, Analyzing, Ready or Analysis failed.
The Job openings screen lists every role your company is hiring for. When there is nothing yet, the screen only shows the line “No job openings yet.”
Create an opening
- 1
Click
New opening. The button sits in the top right of theJob openingsscreen. There is no name box and nothing to confirm: one click creates the opening straight away.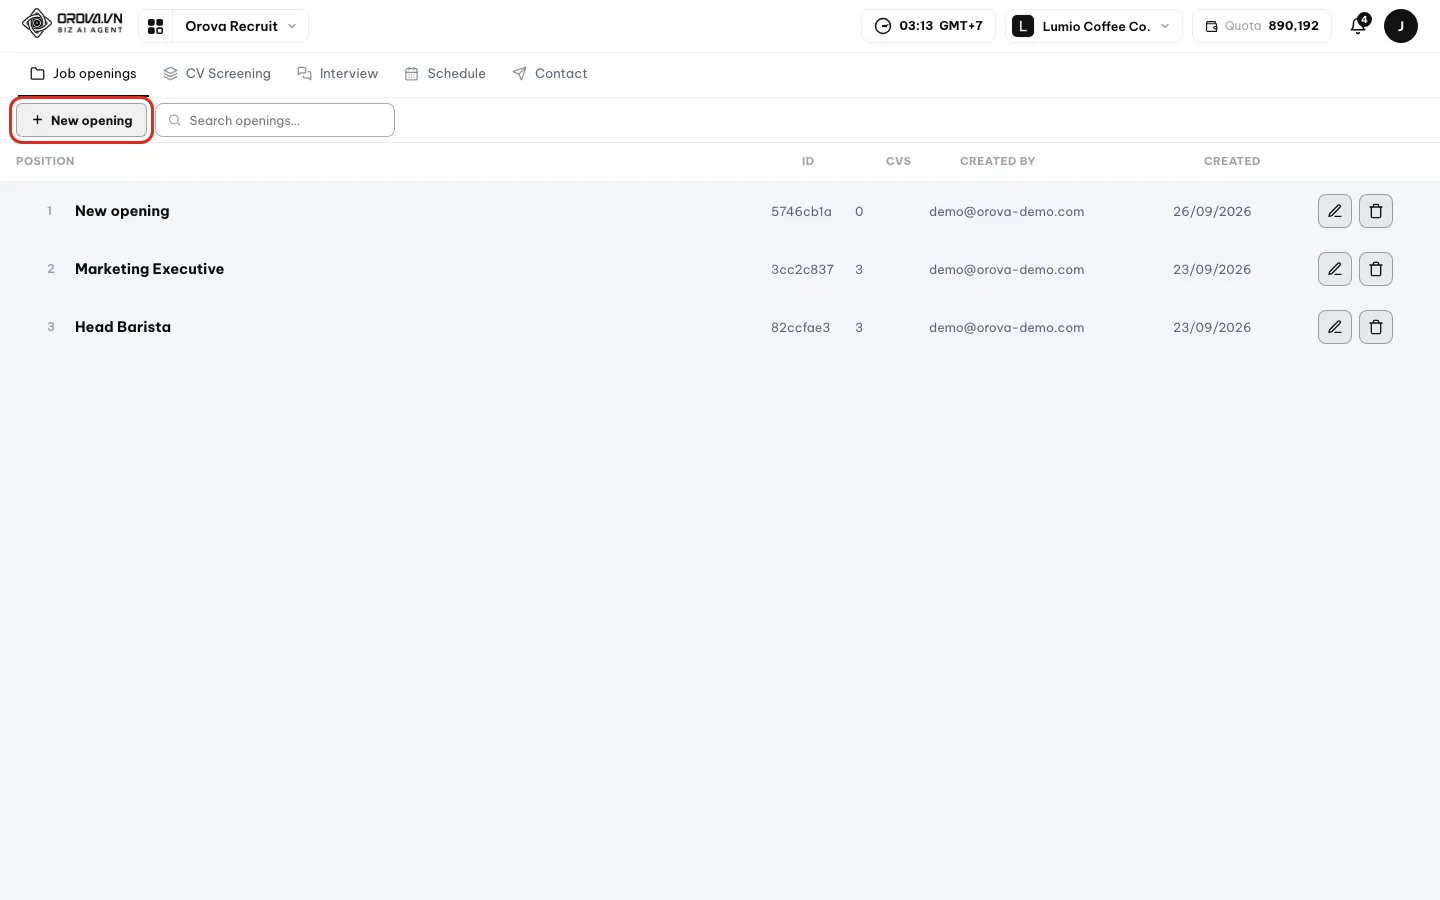
Click New opening at the top of the Job openings screen. - 2
The new opening opens. Orova jumps straight into the detail page of the new opening. You land on the
JD & Criteriatab with an empty JD — exactly where the next step happens.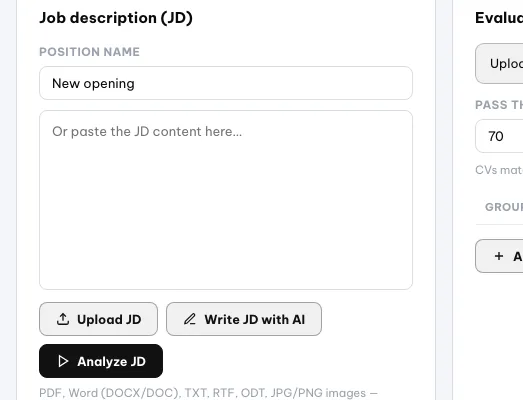
After creating, you land on the JD & Criteria tab with an empty JD. - 3
Rename it right on the page. The new opening is called “New opening” for now. Click the
Position namebox on the detail page and type the real name, for example “Head barista”.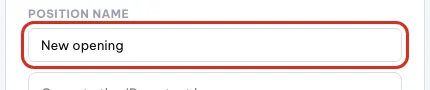
Type the real role name into Position name. - 4
Go back to the list. Each opening is one row in the table. The
CVscolumn shows how many applications came in, and the status chip tells you whether it is ready to score.
Each opening is one row: ID, CV count, creator and date.
| Button / field | What it does | Notes |
|---|---|---|
New opening | Creates a new opening at once and opens it | Costs no quota |
Position name | The display name of the opening | Starts as “New opening”; rename it on the detail page |
Search openings… | Filters the table you are looking at | Filters as you type |
Position column | The opening name plus its JD status chip | Click the row to open the detail page |
CVs column | How many CVs were uploaded to that opening | Goes up every time you upload more |
ID column | The opening reference Orova generates | Handy when you discuss it with a colleague |
Created by · Created columns | Who opened the role and when | Read-only |
Delete opening | Moves the opening to Trash | Can be restored |
Trash tab | Shows deleted openings | Has Restore and Delete forever |
Warning
Delete forever really means forever
Delete opening only moves the opening into Trash, and Restore brings it back. But Delete forever in Trash wipes the CVs and the scoring results permanently — there is no undo.03 · JD & criteria
Build the JD and the scoring criteria
This is the most important step. Good criteria are what make AI score CVs the way you would.
JD (job description)
This is the job description you normally post: what the job involves, what you need, what you prefer. Orova reads the JD to generate the criteria it scores CVs against.
Evaluation criterion
This is one requirement pulled out of the JD, for example “2+ years of barista experience”. AI checks every CV against every criterion instead of scoring on gut feel.
Weight
This is how important a criterion is, scored from 1 to 10. A criterion weighted 10 moves the total score far more than one weighted 1.
You are on the JD & Criteria tab of the opening detail page. The top half is the JD box, the bottom half is the Evaluation criteria table — empty for now.
Option 1 — bring in a JD you already have
- 1
Paste the content straight in. Click the large box that says “Or paste the JD content here…” and paste your job description. Orova saves it for you: you see “Saving…” and then “Saved automatically”.
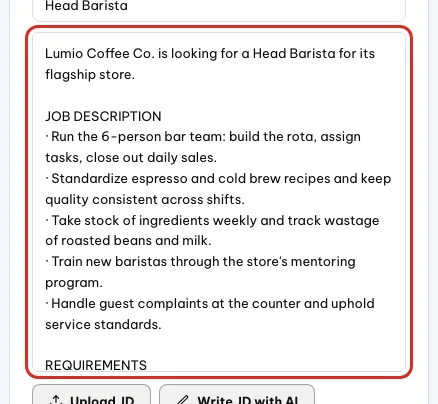
Paste the JD straight into the big box; it saves by itself. - 2
Or upload a JD file. Click
Upload JDand pick a file. Orova accepts PDF, Word (DOCX/DOC), TXT, RTF, ODT and JPG/PNG images, up to 10MB per file. Uploading a JD file uses AI to read it, so it spends quota.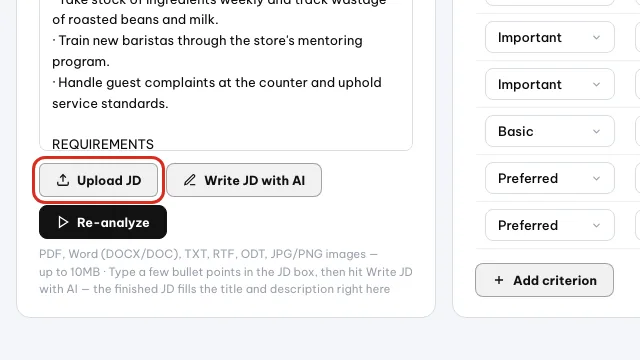
Upload JD takes a PDF, Word, TXT or image file up to 10MB.
Option 2 — let AI write the JD for you
- 1
Type a few bullet points. In the JD box, jot down only the essentials: the role, how many people it manages, the experience you want, what you prefer. Three to five lines is enough.
- 2
Click
Write JD with AI. The button sits right above the JD box. AI reads your bullets, writes a full JD and fills in both the title and the description box. This action spends quota.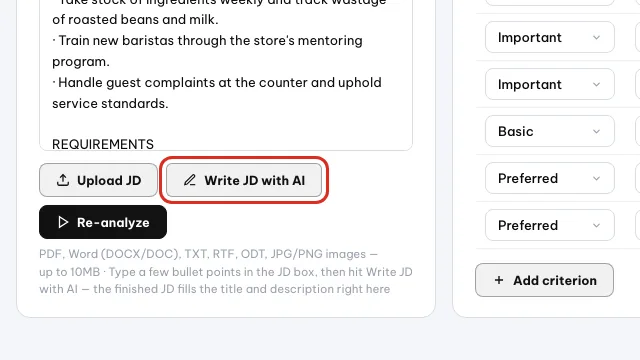
Write JD with AI turns your bullet points into a full JD (spends quota). - 3
Read it back and edit. AI writes what you asked for, but it doesn't know your internal context. Edit directly in the box — Orova still saves automatically.
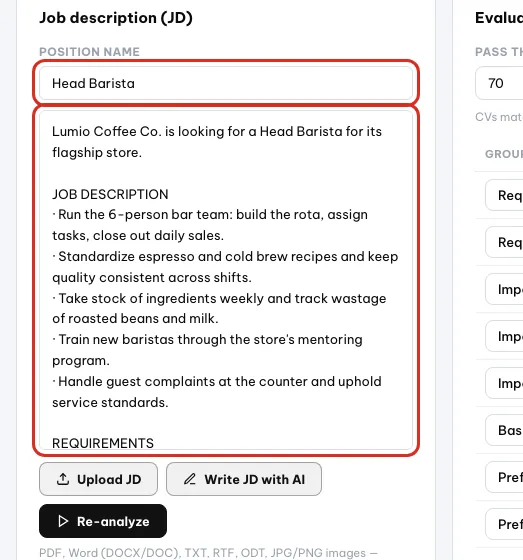
Read the title and the JD back and edit them in place.
Analyze the JD to get the criteria
- 1
Click
Analyze JD. The button sits under the JD box. The screen shows “AI is analyzing the JD…” for a few seconds. This action spends quota.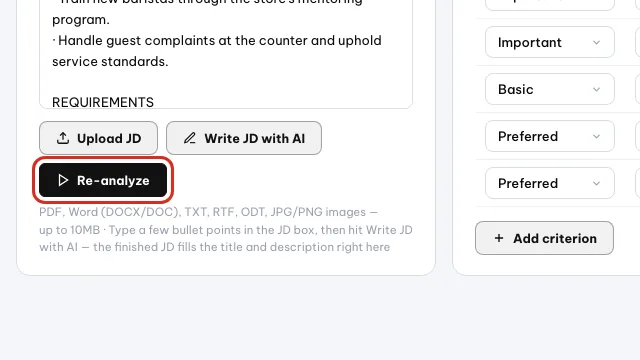
Analyze JD (Re-analyze once done) builds the criteria table. - 2
Watch the criteria table fill in. The
Evaluation criteriatable fills with rows, each with three columns:Group,Criterion,Weight. This is the yardstick AI will use on every CV for this opening.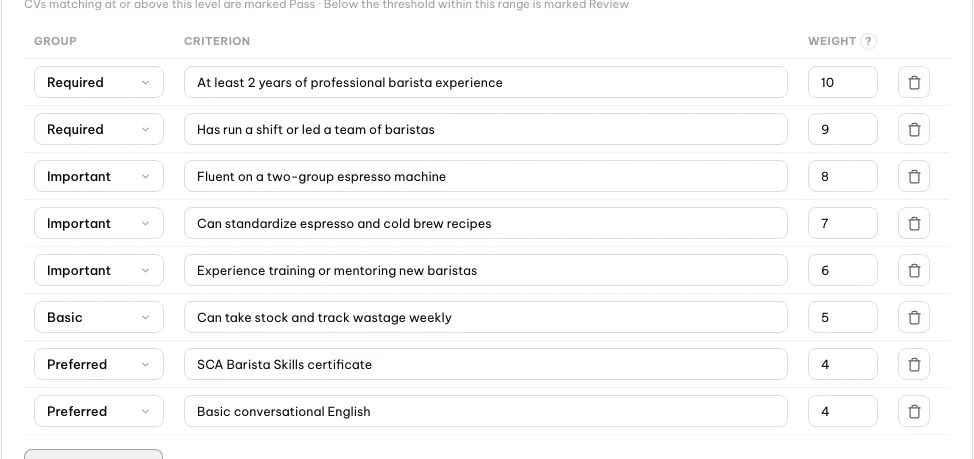
The criteria table: group, criterion text and a weight for each row. - 3
Adjust it to match what you want. Change the
Group, rewrite the text in theCriterioncolumn, adjust theWeight. ClickAdd criterionfor a blank row. Every time the table changes, Orova saves it and calls AI to split the criteria into smaller points, so it spends quota.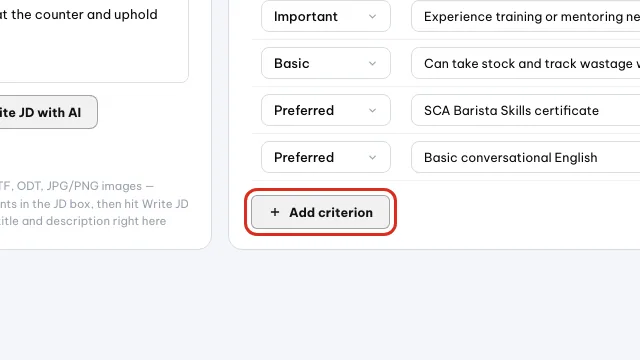
Change a weight or click Add criterion for a new row. - 4
If you want to start over. Edit the JD content, then click
Re-analyze. The criteria table is rebuilt from the new JD.
| Group | What it means | Notes |
|---|---|---|
Required | Missing it means rejection | A CV matching less than half of the required criteria lands on Fail, even with a high total score |
Important | Strongly needed, moves the score a lot | Give these a high weight |
Preferred | Nice to have, still considered without it | Use it for certificates and bonus skills |
Basic | Baseline requirements everyone should meet | Usually a low weight |
Flexible | Negotiable | Barely moves the total score |
Set the pass threshold and the review band
- 1
Fill in
Pass threshold. This is the percentage a CV needs to be markedPass. The field sits right under the criteria table. A CV scoring at or above this level passes.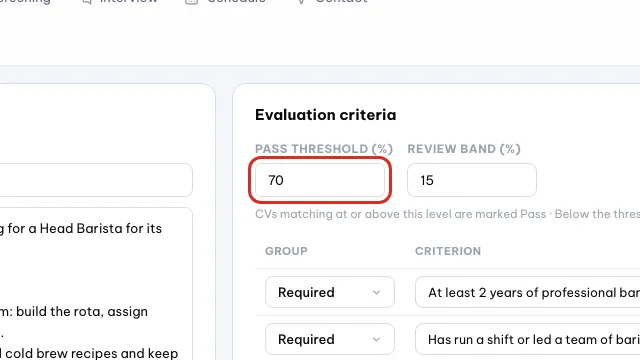
Pass threshold: a CV at or above this percentage is marked Pass. - 2
Fill in
Review band. This is the percentage window just below the pass threshold. A CV landing in that window is markedReviewso you can look at it yourself instead of rejecting it outright. These two numbers decide which group every CV goes into.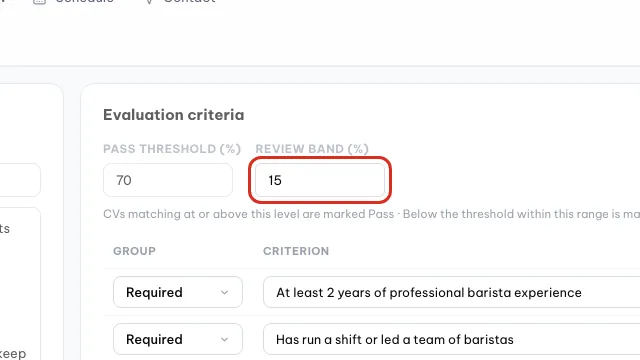
Review band: the window below the threshold marked Review.
Hand the opening to the right people
- 1
Click
Recruiters. The button sits at the top of the opening detail page. A dialog opens listing the members of your workspace.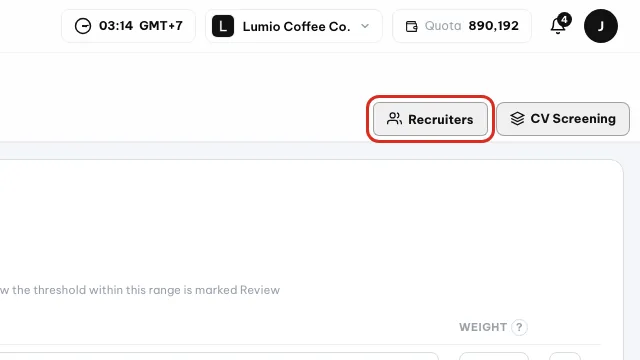
Click Recruiters to choose who can work on this opening. - 2
Pick an access level per person. There are four levels:
Use default,Can edit,View only,No access. Anyone set toNo accesswill not see the CVs of this opening.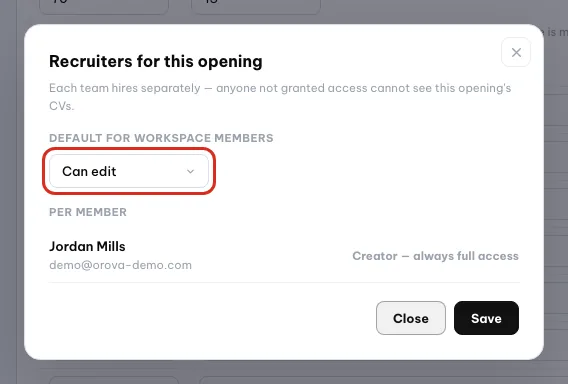
Pick an access level: Can edit, View only or No access.
Warning
The order is not optional
Tip
Don't let AI decide the weights for you
Group and Weight completely changes the quality of the ranking.04 · Upload CVs
Upload candidate CVs
You can drop in a whole folder of CVs. Orova reads every file for you.
CV Screening
This is the screen that holds every CV of one opening and their scoring results. On the opening detail page, the CVs & Results tab is only the doorway — clicking it opens the real CV Screening screen.
Machine-readable CV
This is a file a machine can pull text out of, for example a PDF exported straight from Word. Screenshots and blurry scans are a struggle to read and often end up as Unreadable.
Get CVs into the opening
- 1
Open the CV Screening screen. On the opening detail page, click the
CVs & Resultstab. With no applications yet, the screen shows “No CVs yet. Upload CVs to start scoring.” along with the two upload buttons.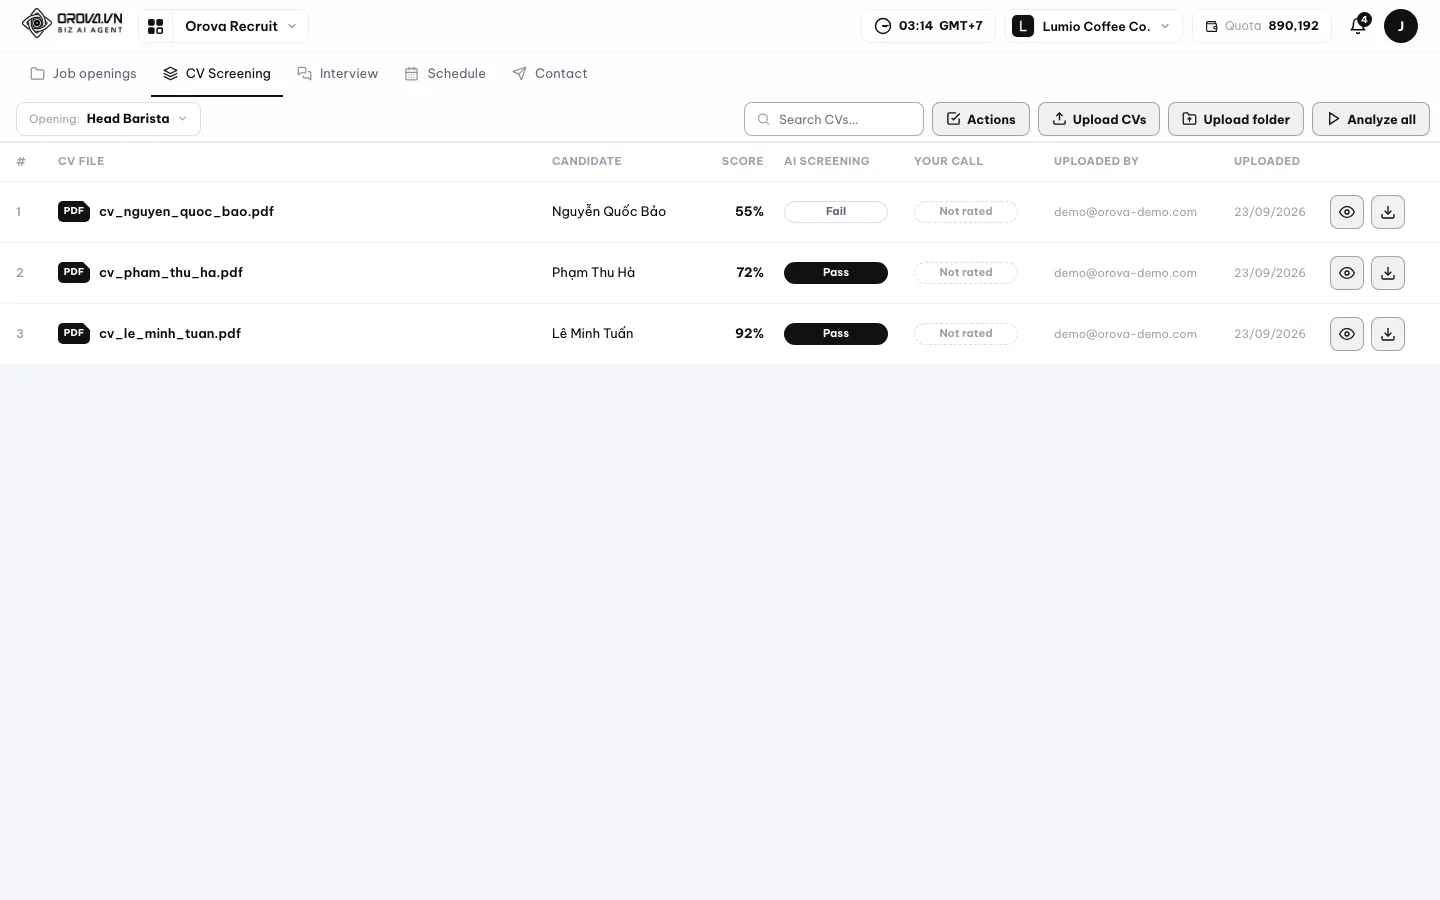
The CV Screening screen of an opening, with the upload buttons on top. - 2
Click
Upload CVsto pick individual files. Your computer's file picker opens. Hold Ctrl (or Command on a Mac) to select several files at once.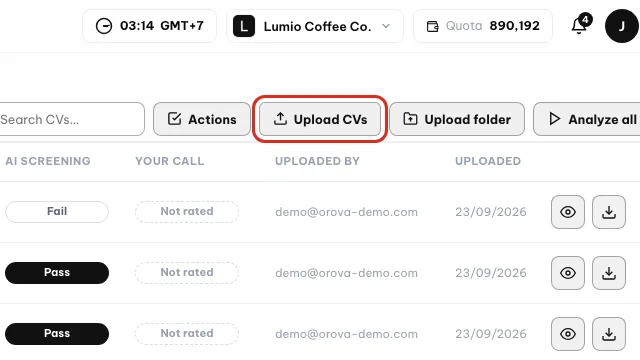
Upload CVs opens your file picker for one or many files. - 3
Or click
Upload folder. Use this when you have already gathered the CVs into one folder on your computer. Orova takes every valid file in it and skips the rest.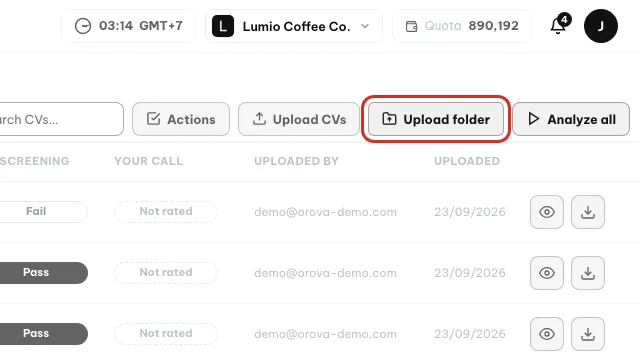
Upload folder takes every valid CV inside one folder. - 4
Wait for the upload bar to finish. An “Uploading CVs” card appears with the line “Uploading {done}/{total}…”. Once it finishes, Orova reports “{n} CVs received.” and the new rows show up in the CV table.
- 5
Check the skipped-files line. If a file has the wrong format or is too heavy, Orova rolls them into one line: “{n} files skipped (format or over 10MB).” Review those files and upload them again.
| Item | Limit | Notes |
|---|---|---|
| Accepted formats | PDF, DOCX, DOC, TXT, MD, RTF, ODT, JPG, JPEG, PNG, WEBP | Anything else is skipped |
| Size per file | 10MB maximum | Oversized files are skipped with a single combined notice |
| CVs per opening | 500 maximum | Counted across the whole opening |
| Files per upload batch | 100 maximum | Pick more and Orova splits them into batches |
| Quota | Nothing on upload | Only spent when you click score in the next section |
After uploading, every CV row carries the Not analyzed chip. The Candidate column is still empty because the name only appears once AI has read the file.
Tip
Prefer PDFs with real text
Unreadable, and then you have to open the file and read it yourself.05 · AI screening
Let AI score the CVs
One click, and AI works through the applications one by one against the criteria you just built.
Background run
This is work that runs on Orova's servers, not in your browser. Close the page, shut down your computer, come back later — the job keeps going and the results are still there.
Point-by-point scoring
AI breaks each criterion into several “points”. A result written as “4/6 points” means the CV matches four of the six points of that criterion, with a quote from the CV as evidence.
Your call
This is the column for a human opinion, kept separate from the AI screening column. AI ranks candidates so you don't have to read everything, but the final verdict is still yours to write.
Run a scoring pass
- 1
Click
Analyze all. The button sits above the table on theCV Screeningscreen. A confirmation box appears, telling you how many CVs will be scored and that each CV spends quota based on actual AI usage.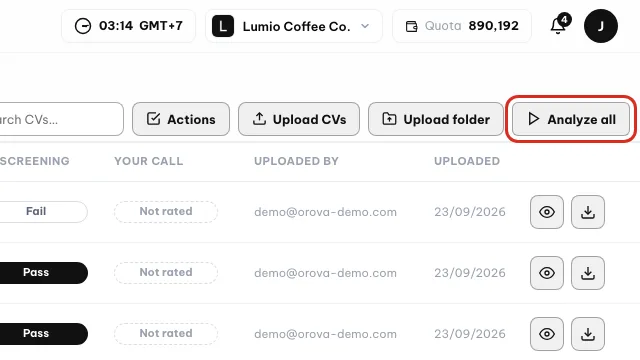
Analyze all scores every CV against the criteria (spends quota). - 2
Or score just a few applications. Tick the checkboxes on the rows you want. A toolbar appears at the bottom with
Analyze,Delete,Clear. This suits the case where you have just added a handful of CVs.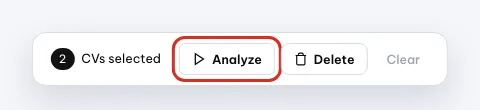
Tick a few rows, then use Analyze in the bottom bar. - 3
Confirm and leave it running. The
Scoring CVscard appears, counting “{done}/{total} CVs done” and showing “Scoring: {file name}”. Each CV takes a few dozen seconds, so six CVs land somewhere around three to six minutes. - 4
Leave the page if you want. Right under the progress card is the line “You can leave this page — scoring runs in the background.” Go do something else and come back to the results.
Read the results
- 1
Look at the
ScoreandResultcolumns. The score is the weighted average across every criterion. TheResultcolumn turns that score into one of three easy-to-read chips, based on the thresholds you set.
Score and the Pass/Fail chip sit side by side for each CV. - 2
Click a row. A result popup opens, headed by the CV file name. It holds the candidate details (full name, email, phone, years of experience, most recent position), the overall comments and the per-criterion scoring table.
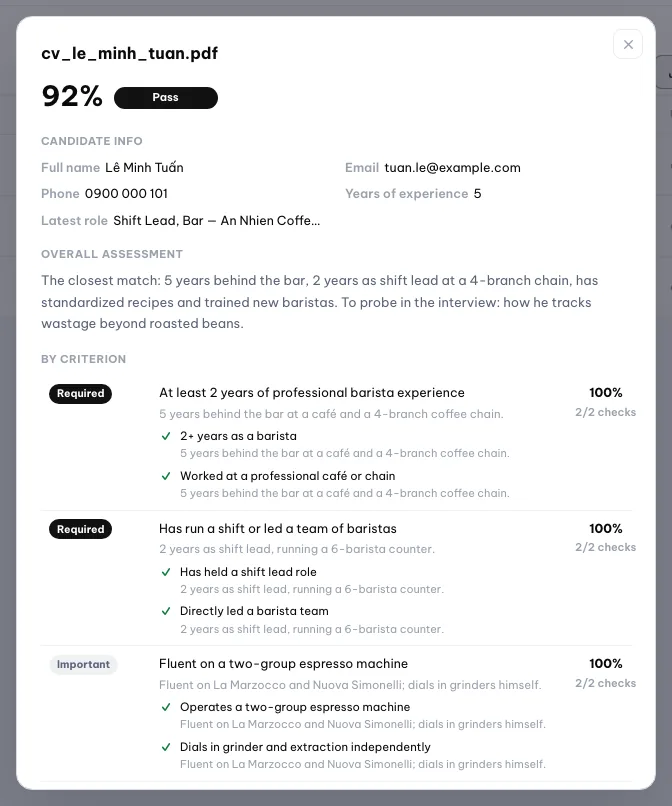
The result popup: candidate info, overall comments, per-criterion scores. - 3
View the original CV right there. Click
View CVto open the original file inside Orova instead of downloading it. PDFs and images display directly, Word files are rebuilt as a text page. There is a button to open it in a new tab and one to download it.
Click the file name to open the original CV inside Orova. - 4
Write down your own opinion. Use the
Your callcolumn to record the human verdict. It never overwrites the AI score — the two columns sit side by side so you can compare.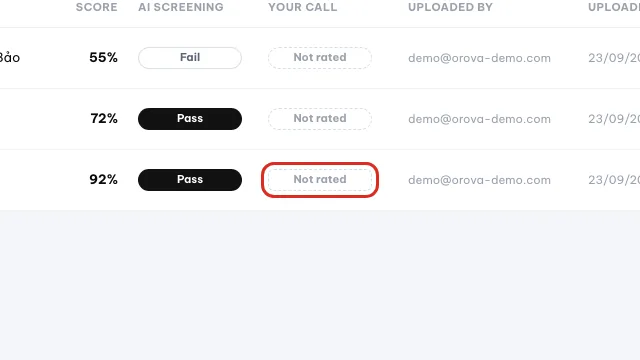
Record your own verdict in Your call; the AI score stays as is.
| Chip | What it means | Notes |
|---|---|---|
Not analyzed | The CV is uploaded but not scored yet | Click Analyze all to score it |
Analyzing | This CV's turn is happening now | Give it a few dozen seconds |
Pass | Score at or above the pass threshold | The group to invite to interview first |
Review | Score falls inside the review band | Worth opening yourself before rejecting |
Fail | Below the review band, or missing Required criteria | A high total score can still land here |
Unreadable | The machine could not pull text out of the file | A broken file, a password-protected one, or a blurry photo |
Warning
Running out of quota mid-run
Note
When the progress card sits still
06 · Interview questions
Prepare the interview questions
One shared set for the whole opening, plus tailored questions for each candidate.
Shared set (from JD)
This is the question list used for every candidate of one opening. AI builds it from the JD and the criteria, so the questions land on exactly what you need to check.
CV-tailored set
This is one candidate's own question set. AI reads their CV and rewrites the shared set to ask directly about the details in their application.
The screen lives under Interview ▸ Questions. Two dropdowns sit at the top: Opening and Candidate. Pick the opening first, and leave the candidate box empty while you work on the shared set.
Build the shared question set
- 1
Pick the opening. Click the
Openingdropdown at the top and choose the role you are preparing for. With no questions yet, the screen shows “No questions yet — click “AI from JD” or “Edit manually” to type your own.”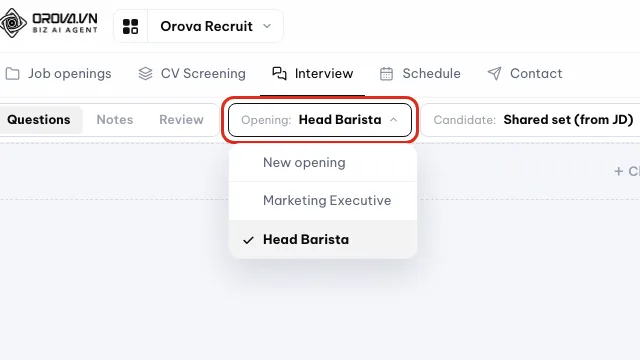
Pick the opening you are preparing questions for. - 2
Click
Generate. AI reads the JD and the criteria and writes out the question list. A few seconds later the questions fill the screen. This action spends quota.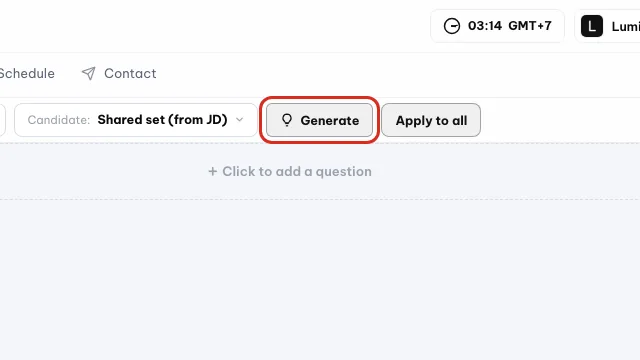
Generate writes the shared question set from the JD (spends quota). - 3
Edit and add. Click
Edit manuallyto change the wording of any question. ClickAdd questionto add one of your own. Neither costs quota.
Add your own question by hand at no quota cost.
Make a personal set for one candidate
- 1
Pick the candidate. Click the
Candidatedropdown at the top and choose a person. The list comes from the CVs uploaded to that opening.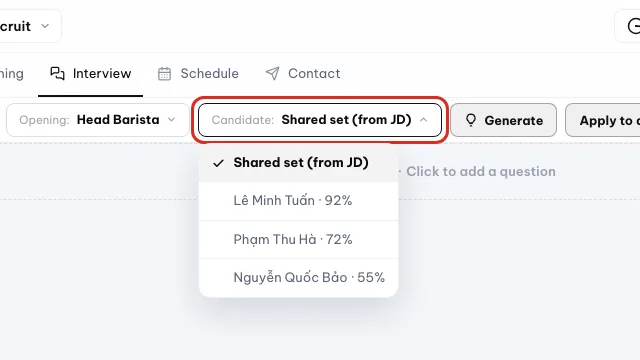
Pick a candidate to build a personal set. - 2
Click
Generate. With a candidate picked,Generatereads that person's CV and rewrites the question set to ask directly about the experience and projects in their application. This action spends quota.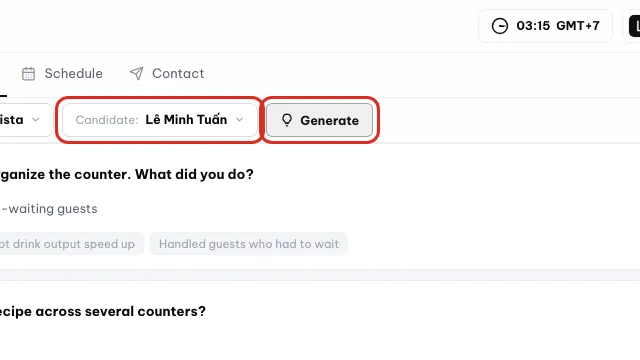
With a candidate picked, the AI button tailors the set to that CV. - 3
Reuse it for the whole group if you like. Click
Apply to allto push the set you are looking at to every candidate of the opening. Orova reports “Applied to {n} candidates.” This action costs no quota.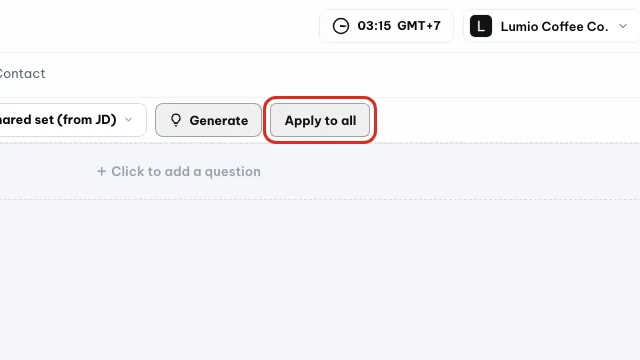
Apply to all pushes this set to every candidate of the opening.
Tip
Do the shared set first
07 · Interview schedule
Schedule interviews and book rooms
Once you have a few candidates worth meeting, you invite them in. Orova keeps your company's room list and every booked interview on the same calendar.
Room
Where the interview takes place. You set it up once and reuse it forever. Each room has booking hours and a default length for one interview.
Booking hours
The hours of the day when that room accepts bookings. For example 09:00–17:00. Anything outside this window is blocked and not saved.
Interview
A slot on the calendar. It ties four things together: the job opening, the candidate, the date and time, and the room. The invite email goes out through the Interview just scheduled rule in Candidate emails.
Open the Schedule area in Orova Recruit. This screen answers two questions: who is coming this week, and which room is still free.
| Button / field | What it does | Notes |
|---|---|---|
Rooms | Opens the company room list | Set rooms up before you book. With no room yet you see “No rooms yet — click Add room.” |
Book interview | Creates a new interview on the calendar | Pick the opening, candidate, date, time and room |
Same hours daily | Uses one time window for the whole week | Clear it if each day has different hours |
Do it in this order
- 1
Set up the rooms first. In the
Schedulearea, clickRooms. A dialog called “Interview rooms” opens. Fill in the room name, its booking hours and the default length of one interview. Turn onSame hours dailyif every day is the same. Save, and the room appears in the list right away.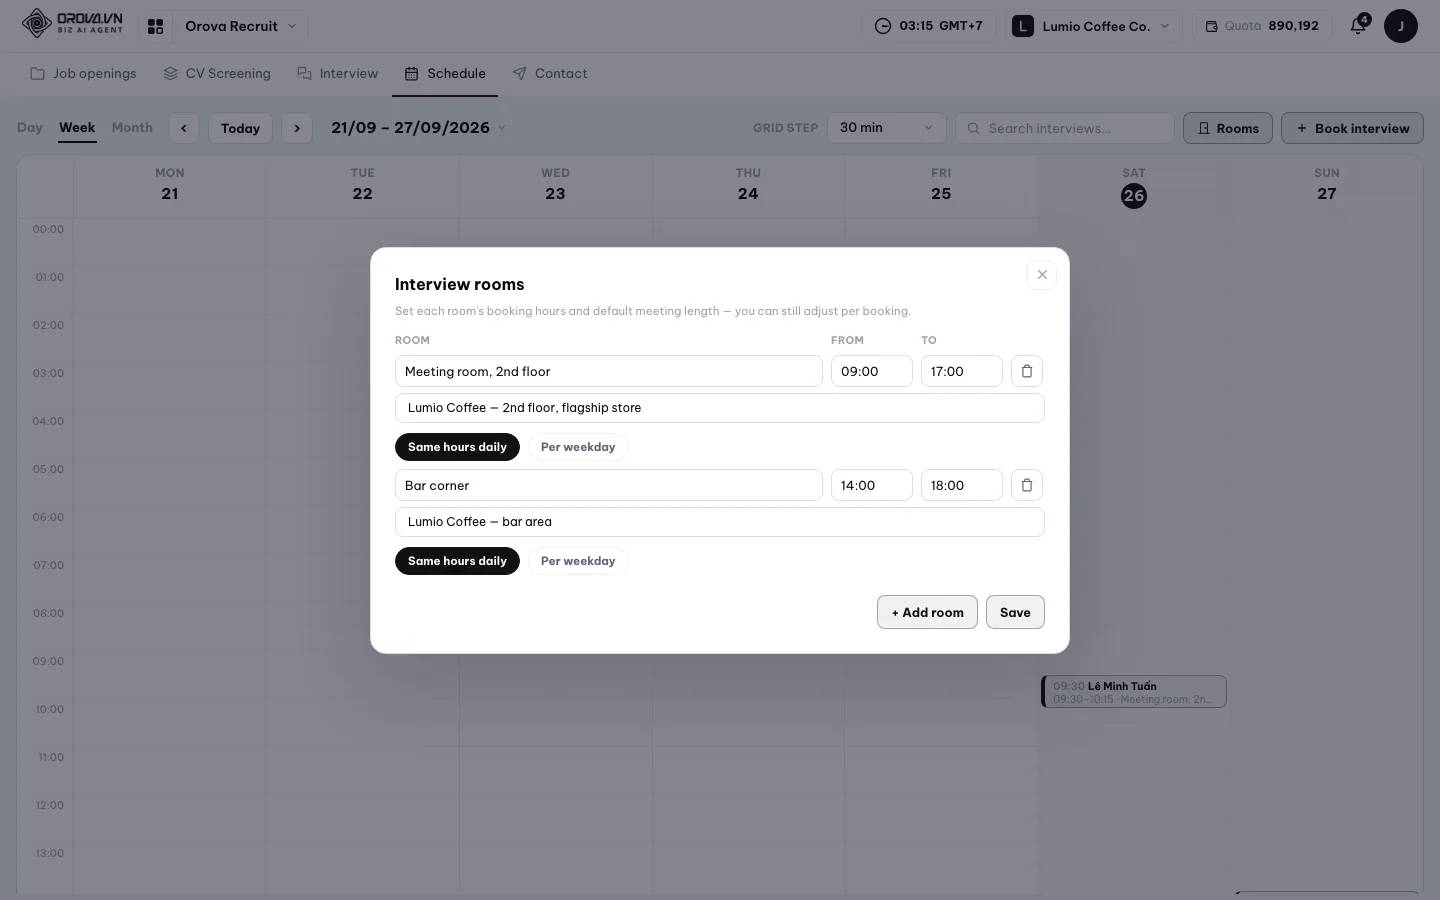
Set up rooms with booking hours and a default length. - 2
Book one interview. Click
Book interview. Pick theJob opening, then pick theCandidatefrom the CVs of that same opening. Choose the date, the start time and the room. Save, and the interview appears as a block on the calendar.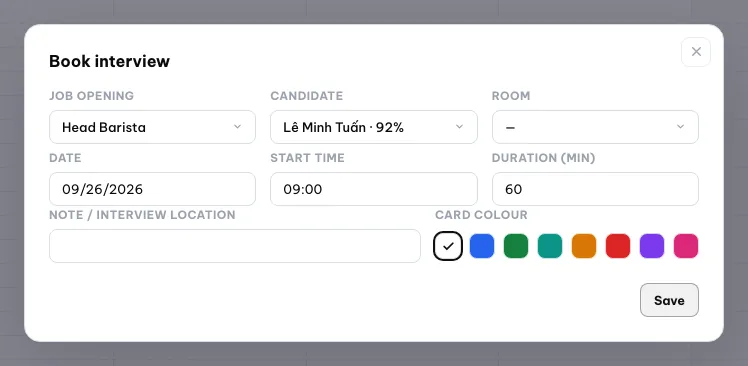
Book interview: pick opening, candidate, date, time and room. - 3
Look at the whole week. The calendar has a day view and a week view. Each interview is a block carrying the candidate's name. You can check at a glance whether anyone is booked back to back, or which room is full.
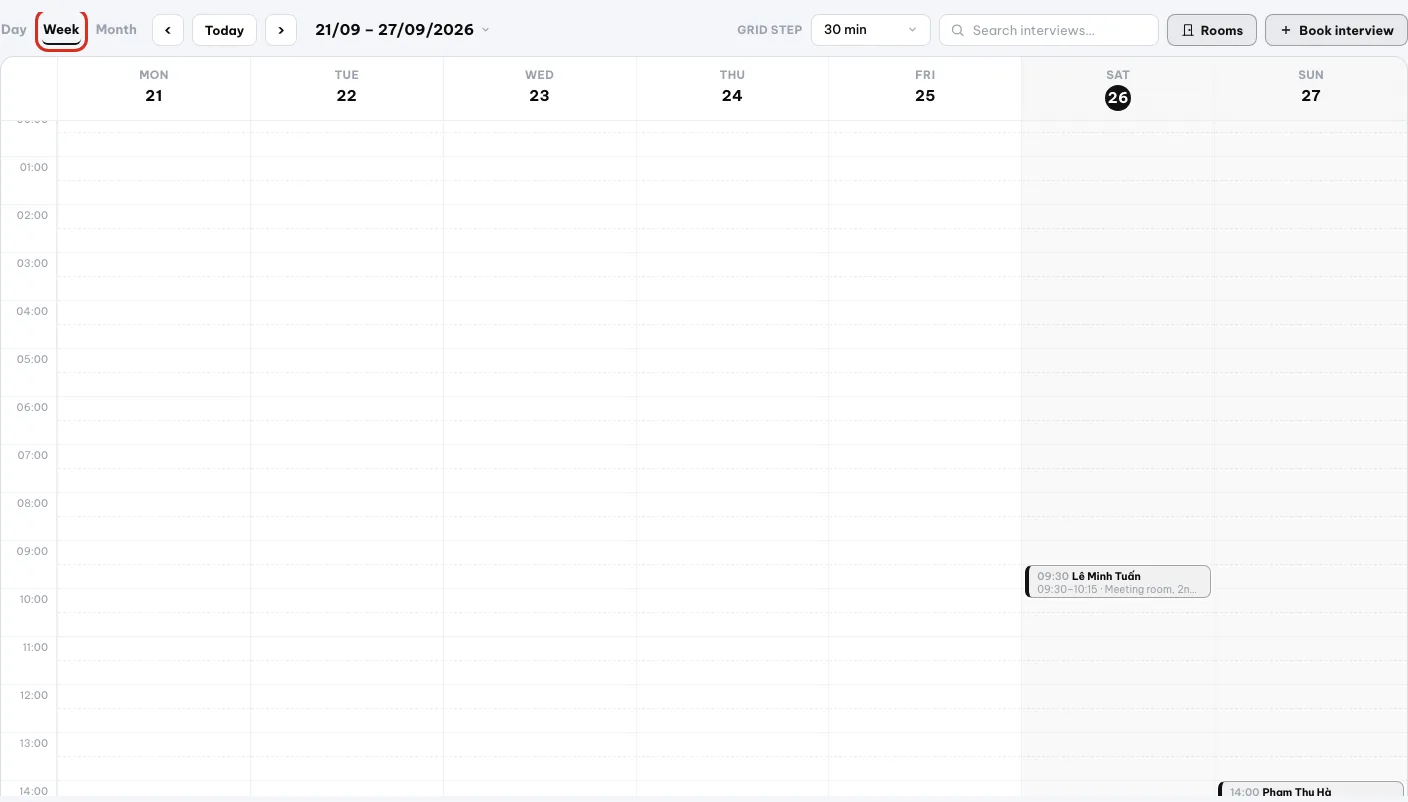
The week view shows every interview as a named block.
Note
Two blocking messages you will meet when booking
Tip
Set wide booking hours to save trouble
08 · Interview notes
Take notes while the interview runs
During the interview you write down what the candidate says. These notes are exactly what the AI reads at the review step, so the more concrete they are, the more accurate the scoring.
Interview notes
The lines you type while talking to the candidate. Each candidate has their own notes box, like a chat thread.
Transcription
Turning the speech in a recording into text. You speak, the machine types. The AI does this work, so it spends quota.
Interview session
One interview round you have closed. Once you save the session, the notes of that round are stored. The next round starts on a fresh box while you can still read the old one.
Open Interview and pick the Notes tab. Choose the Opening and the Candidate in the two fields at the top of the page. The notes box of that person appears.
| Button / field | What it does | Notes |
|---|---|---|
| Notes box | Type each line by hand | No quota |
Record | Starts listening to and recording the interview | The browser must be given microphone permission |
Stop & transcribe | Stops recording and turns the speech into text | Spends quota. Audio file up to 300 MB |
Listening language | Pick the language the candidate is speaking | The wrong language gives a badly wrong transcript |
| Save session | Closes the current interview round | Asks “Save the current notes as an interview session?” before saving |
- 1
Open the notes box of the right candidate. Pick the
Openingfirst, then theCandidate. Before you write anything the box says “No notes yet…”. TheRecordbutton sits right there.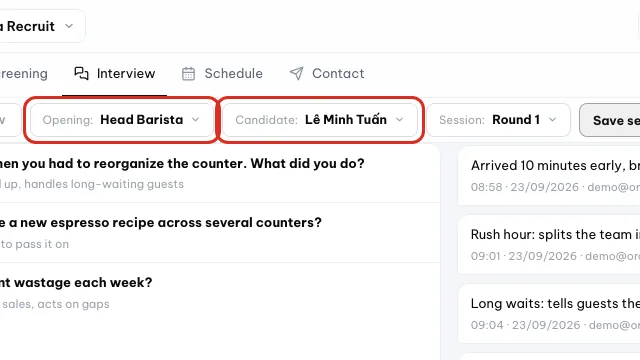
Pick the opening, then the candidate you are interviewing. - 2
Type while you listen. Type one short point per line. Each line saves itself and carries the time it was written. This costs no quota and always works, even in a noisy room or on a machine with no microphone.
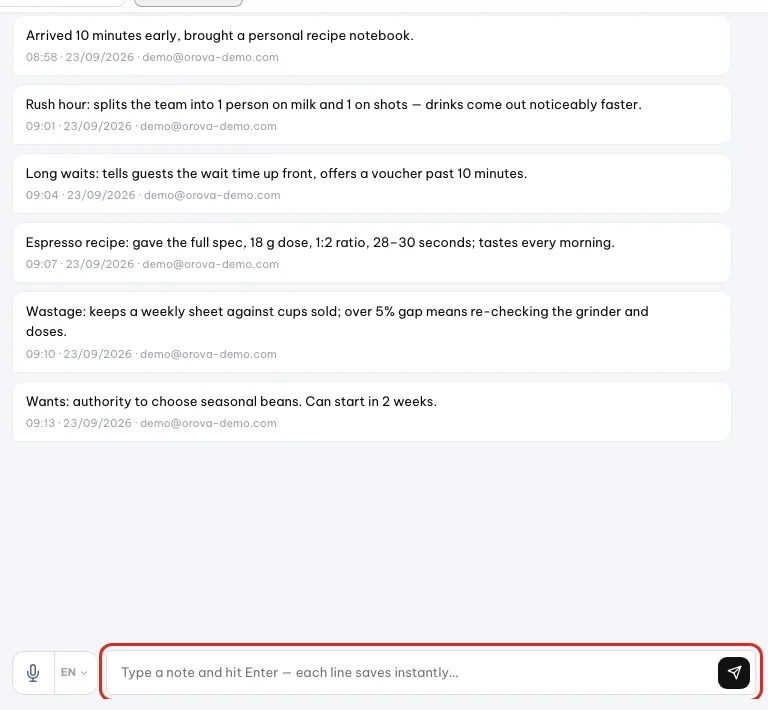
Type one point per line; each line saves with its time. - 3
Or let the machine listen for you. Click
Record, the browser asks for microphone permission, and you click Allow. On Chrome, Edge and Safari the machine listens and types as you speak. Other browsers only record, and the text is transcribed afterwards.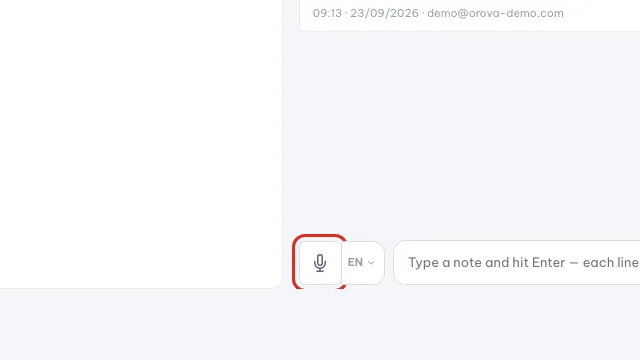
Record lets the browser listen and type for you. - 4
Stop and get the text. Click
Stop & transcribe. The AI listens back to the file and appends the text to your notes box. This step spends quota, and the number shows before you click. Audio files are accepted up to 300 MB. - 5
Close the interview round. When the interview is over, save the notes as a session. The screen asks “Save the current notes as an interview session?”. Agree and that round is stored, ready to read any time.
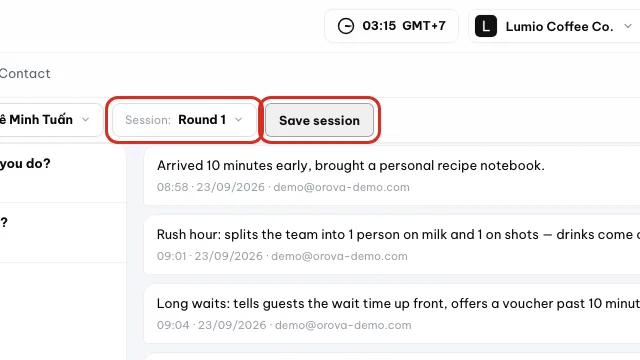
Save session stores this round of notes.
Tip
Write the criterion name into your notes
Note
Three common error messages
09 · Review and final call
Score the interview and pick your person
Notes are raw text. The Review tab turns that raw text into comparable scores, puts the candidates side by side, then records your final decision.
Question sheet
The set of questions you built in the previous section. The AI scores the interview by checking the notes against this exact sheet, not on gut feeling.
Final call
A real person's verdict: Hire, No hire or Not decided. The AI is not allowed to set this value. It only changes when you click.
Open Interview and pick the Review tab. Choose the opening you are hiring for. The table lists every candidate together with their CV score and interview score.
| Button / field | What it does | Notes |
|---|---|---|
Review all | The AI reads the notes and recordings, then scores against the question sheet | Spends quota. Any recording not transcribed yet costs the transcription on top |
AI recommendation | The AI compares the candidates and names who stands out | Needs at least 2 candidates with a scored CV. Spends quota |
Final call column | You settle on Hire, No hire or Not decided | This is what the automatic email rules in Candidate emails run on |
| Recording upload field | Attaches an existing recording to the candidate's row | Takes the common audio formats and MP4 video |
| Export PDF | Downloads the evaluation file to your machine | No quota |
- 1
Click Review all. The AI reads each candidate's notes and scores them against the question sheet. The screen runs progress lines such as “Candidate {i}/{n} · {name}” and “AI is scoring against the question sheet…”. Each candidate takes a few dozen seconds; wait until the table shows scores.
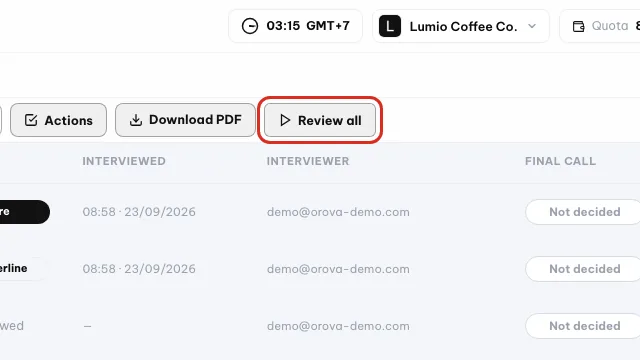
Review all scores each interview against the question sheet (spends quota). - 2
Read the evaluation table. The table puts the CV score next to the interview score of the same person. Whoever looks strong on paper but weak in person, or the other way round, stands out here immediately.

CV score and interview score sit side by side for each person. - 3
Ask the AI to compare the candidates. Click
AI recommendation. The AI ranks on both the CV score and the interview score and gives a reason for each person. It needs at least 2 candidates with a scored CV, otherwise the screen says “Need at least 2 screened candidates to compare.”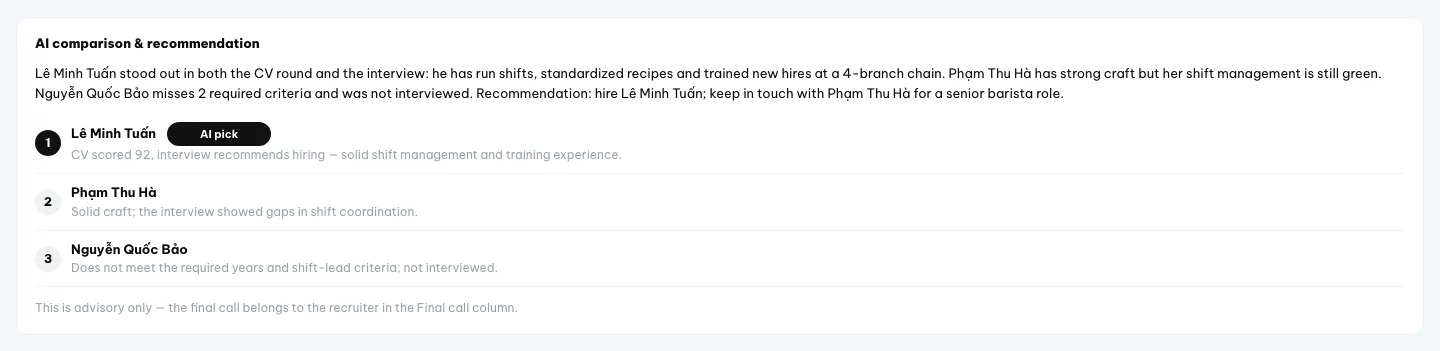
The AI ranks candidates with a reason each; it is advisory only. - 4
Make the final call. In the
Final callcolumn, pickHirefor the person you take andNo hirefor the one you do not. Leave it onNot decidedwhile you are still thinking. The automatic email rules in Candidate emails use this value.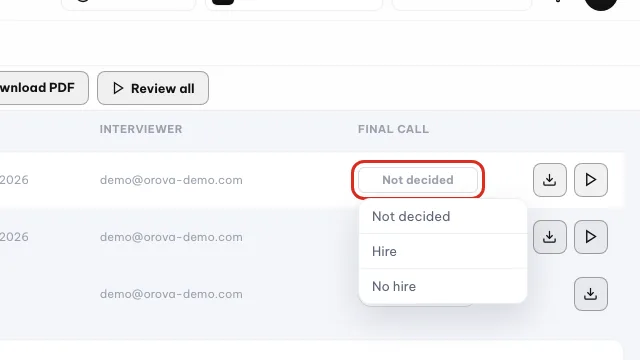
Set the Final call: Hire, No hire or Not decided. - 5
Export the evaluation file as PDF. Download a PDF that holds both the CV screening part and the interview part. Handy when you have to present to your manager or archive the hiring file.
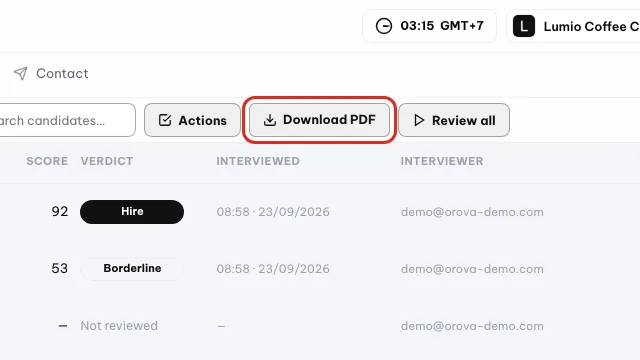
Download PDF exports the CV and interview evaluation.
Warning
You decide, not the AI
10 · Candidate emails
Email candidates from your company mailbox
Candidates deserve an answer, including the ones you reject. Orova sends through your company mailbox, so the letter reaches the candidate in your company's name, not Orova's.
App password
A separate password Gmail issues to each outside application. It is not the password you use to sign in to Gmail every day.
Email template
A ready-made letter frame for one purpose, for example the interview invite. Templates have no type, so give each one a name that says what it is for. Every time you send, your content is wrapped in this frame.
MailFlow rule
An automation: when a candidate enters a given status, the system sends a given template. Set it once, it applies to the whole workspace.
Open the Contact area. It holds three tabs: Email account, Templates and Send email. Work through them from left to right.
| Button / field | What it does | Notes |
|---|---|---|
Email account tab | Declares the mailbox used to send letters | Only the workspace owner and admins can edit it |
Templates tab | Writes letter frames shared by every message to candidates | No template type to pick; name each template by its purpose, for example “Interview invite, round 1”, “Rejection letter” |
AI generate | The AI drafts a template for you to edit | Spends quota |
Preview | Shows what the letter looks like before you send | No quota |
Send email tab | Holds the automatic sending rules; no compose box | Rules send real emails once switched On; drafting a template with AI spends quota |
Connect the mailbox first
- 1
Open the Email account tab. In the
Contactarea, pick theEmail accounttab. You see aSending accountfield, an app password field, anSMTP hostfield and a port field. On Gmail, enter the Gmail address and an app password; on company email, ask your IT team for the host and the port.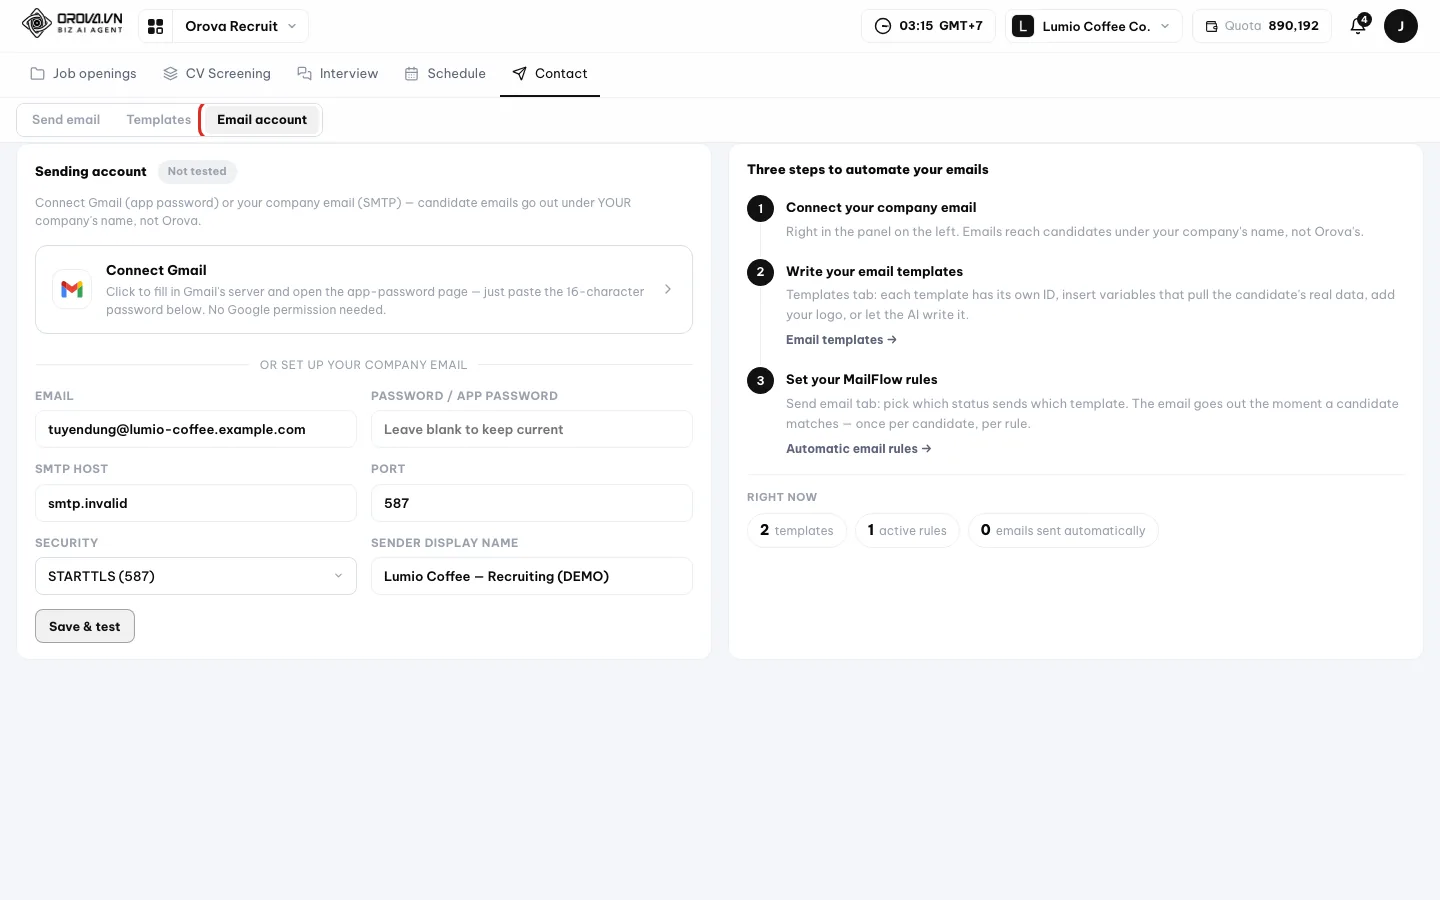
Open the Email account tab to connect Gmail or company SMTP. - 2
Save and wait for Connected. Click save. The screen shows “Testing login…” for a few seconds, then turns into
Connected. That word means the mailbox works. If it errors, see the FAQ at the end of this page.
Click Save & test and wait for the status to read Connected.
Write the templates and send
- 1
Create a template and name it by purpose. Go to the
Templatestab. Give the template a name that says its purpose, for example “Interview invite, round 1”, “Offer letter” or “Rejection letter”, so it is easy to pick the right one in a rule. Write the content into the template HTML field, or put a few requirements into the notes field for the AI and clickAI generate. Asking the AI spends quota.
Create a template and name it by what it is for. - 2
Preview before you use it. Click
Previewto see the letter exactly as the candidate will. To insert an image, for example your company logo, upload it right inside the editor. Images are accepted up to 3 MB.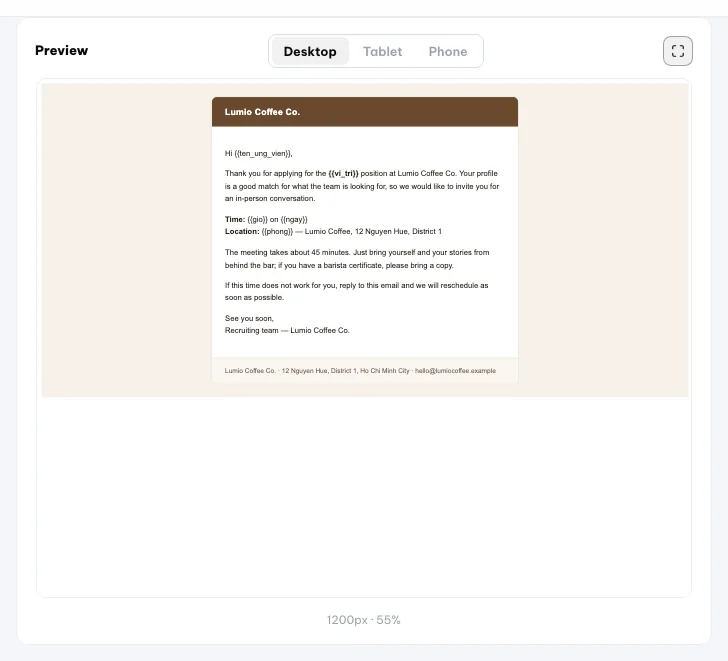
Preview shows the letter exactly as the candidate will see it. - 3
Open the
Send emailtab. This tab holds only the automatic sending rules — there is noTobox and no editor for writing a one-off letter. Letters go out through the rules, each wrapped in one of the templates you just made. With no mailbox connected, nothing is sent. - 4
Turn the automatic rules on. In the
Send emailtab, each rule pairs one condition with one template. The conditions you can pick are:AI screening result,Your call on the CV,AI interview verdict,Final call,Interview just scheduled. Switch theOncolumn and the rule runs.
Each rule pairs a condition with a template; the switch turns it on.
Warning
A rule that is on sends by itself
Preview the template and check the spelling before you switch it on. Each rule sends only once per candidate.Note
Nothing sends until the mailbox is connected
11 · Quota
What spends quota and what does not
Orova does not lock features by plan. Every account can use everything in Orova Recruit. Quota is only spent exactly where the AI actually does the work.
Quota
The AI spending unit of a workspace. Like money in the team's shared wallet. Whoever uses AI draws the shared wallet down.
Before each AI action, the screen tells you that it spends quota and the number shows before you click. You are always asked first; nothing is deducted silently.
| What you do | Spends quota? | Notes |
|---|---|---|
| Creating an opening, editing criteria by hand | No | Only a data save |
| Uploading the JD file and uploading CVs | No | Uploading and scoring are two separate steps |
Write JD with AI | Yes | The AI writes a full JD from your bullet points |
Analyze JD | Yes | The AI splits the JD into criteria |
| Saving the criteria after editing | Yes | The AI splits each criterion into smaller points |
Analyze all to score CVs | Yes | Counted per CV |
Generate or tailoring questions | Yes | Editing questions by hand is free |
Editing questions by hand, Apply to all | No | A human action |
Stop & transcribe on a recording | Yes | Typing notes by hand is free |
Review all on the Review tab | Yes | Counted per candidate |
AI recommendation | Yes | Needs at least 2 candidates with a scored CV |
AI generate and asking the AI to draft a letter | Yes | Writing the template yourself is free |
| Scheduling, sending letters, exporting PDF | No | No AI involved |
Note
What happens if quota runs out mid-run
Tip
How to spend less
Analyze JD. Delete the junk CVs before you click Analyze all. Type interview notes by hand instead of transcribing. These three habits cut most of the AI cost.12 · FAQ
Common questions and how to fix errors
Below are the messages you meet most often in Orova Recruit, with the cause and the fix. Read this before you decide the system is broken.
Most errors here come from the order of work: JD first, analyze the JD, then the CVs. Do it in that order and most of these messages never appear.
The screen says “No criteria yet — analyze the JD first.”
You have not clicked Analyze JD, so the opening has no criteria to check against. Open the opening, go to the JD tab, check that the description field has text, then click Analyze JD. Once the criteria table appears you can score CVs.
I uploaded a batch of files but some were reported as skipped
Files in the wrong format or heavier than 10 MB are dropped, and the system only reports the total count. Check the file extensions and the sizes. Each opening takes up to 500 CVs, each file up to 10 MB.
One CV comes back as “Unreadable”
The file is corrupt, password-protected, or a blurry scan the machine cannot pull text from. Ask the candidate to resend a PDF with real text, not a screenshot. In this case the AI is never called, so no quota is spent.
The CV scoring progress card is frozen and clicking again shows nothing new
Scoring runs in the background and only counts as stalled after about 10 minutes without a heartbeat. While the run is still alive, clicking again returns the same run instead of starting a new one. Wait past that mark, then click Analyze all once more.
Scoring stopped with “Out of quota — stopped.”
The workspace quota wallet ran dry mid-run. The CVs that were not scored stay Not analyzed, so nothing is lost. Top up on the quota wallet page and carry on scoring.
Booking an interview is blocked and will not save
There are two causes. Either the time you picked falls outside the room hours, and the message names the room and its hours; or that room already has another interview at exactly that time. Change the time or the room, or widen the room hours in the Rooms dialog.
Interview invites are not going out
Check two things. First, the Email account tab in Contact must have your company mailbox connected and show Connected. Second, in the Send email tab the Interview just scheduled rule must be switched On.
Saving the email connection reports “Email login rejected”
With Gmail you have to use an app password issued by Google, not your normal sign-in password. Create an app password in the security section of your Google account and paste it in. If it says “Could not reach the mail server”, the host or the port is wrong — ask your IT team.
The Email account fields are locked and I cannot edit them
Only the workspace owner and admins can edit the email connection. Ask someone with the right to set it up once; after that the whole team uses that mailbox.
I cannot see an opening a colleague just created
Each opening has its own recruiter list. Anyone set to No access loses that opening from all of their lists, including its CVs and its schedule. Ask whoever created the opening to open the Recruiters dialog and grant you access.
`AI recommendation` says it needs at least 2 candidates
The AI compares, so it needs two or more people with a scored CV in the same opening. Go back to the CV screening screen, score at least one more candidate, then try again.
`Record` does not record anything
“Microphone permission was denied.” means the browser is not allowed to listen; open the site permissions and enable the microphone. “This recording is empty — no audio came through.” means the wrong device is selected or the microphone is muted. If it still fails, type the notes by hand; the scoring works just as well.
Note
Deleting an opening is not immediate
Trash, and you can restore it. Only Delete forever wipes the data for good, with no way back./ Need help?
Can't find what you need? Open the Support section in your workspace, or send us a message.